Featured News
GeForce Experience: Broadcasting Tutorial

GeForce Experience makes it easy to broadcast gameplay from your entire PC library using the live streaming service of your choice, whether that’s Facebook Live, YouTube Live, or Twitch. And while each of these live streaming services are unique with respect to account setup, user interface, and intended audience, GeForce Experience conveniently brings all three services under one user-friendly interface.
The following guide will walk you through the setup and use of these features, helping you stream to friends and fans.
Account Prerequisites
In addition to requiring a GeForce Experience user account, this guide assumes that you have already created an account for Facebook, Twitch, or YouTube. If you have not already created an account for the service(s) you wish to use, please refer to http://www.facebook.com, http:/www.twitch.tv or http://www.youtube.com for further instructions. Creating a user account for GeForce Experience is a one-time process which you should complete after initial installation of GeForce Experience by following the on-screen instructions.
 |
 |
 |
One-time Setup
To set up broadcasting with GeForce Experience,
- 1. Press Alt+Z to bring up the Share overlay and go to Settings:
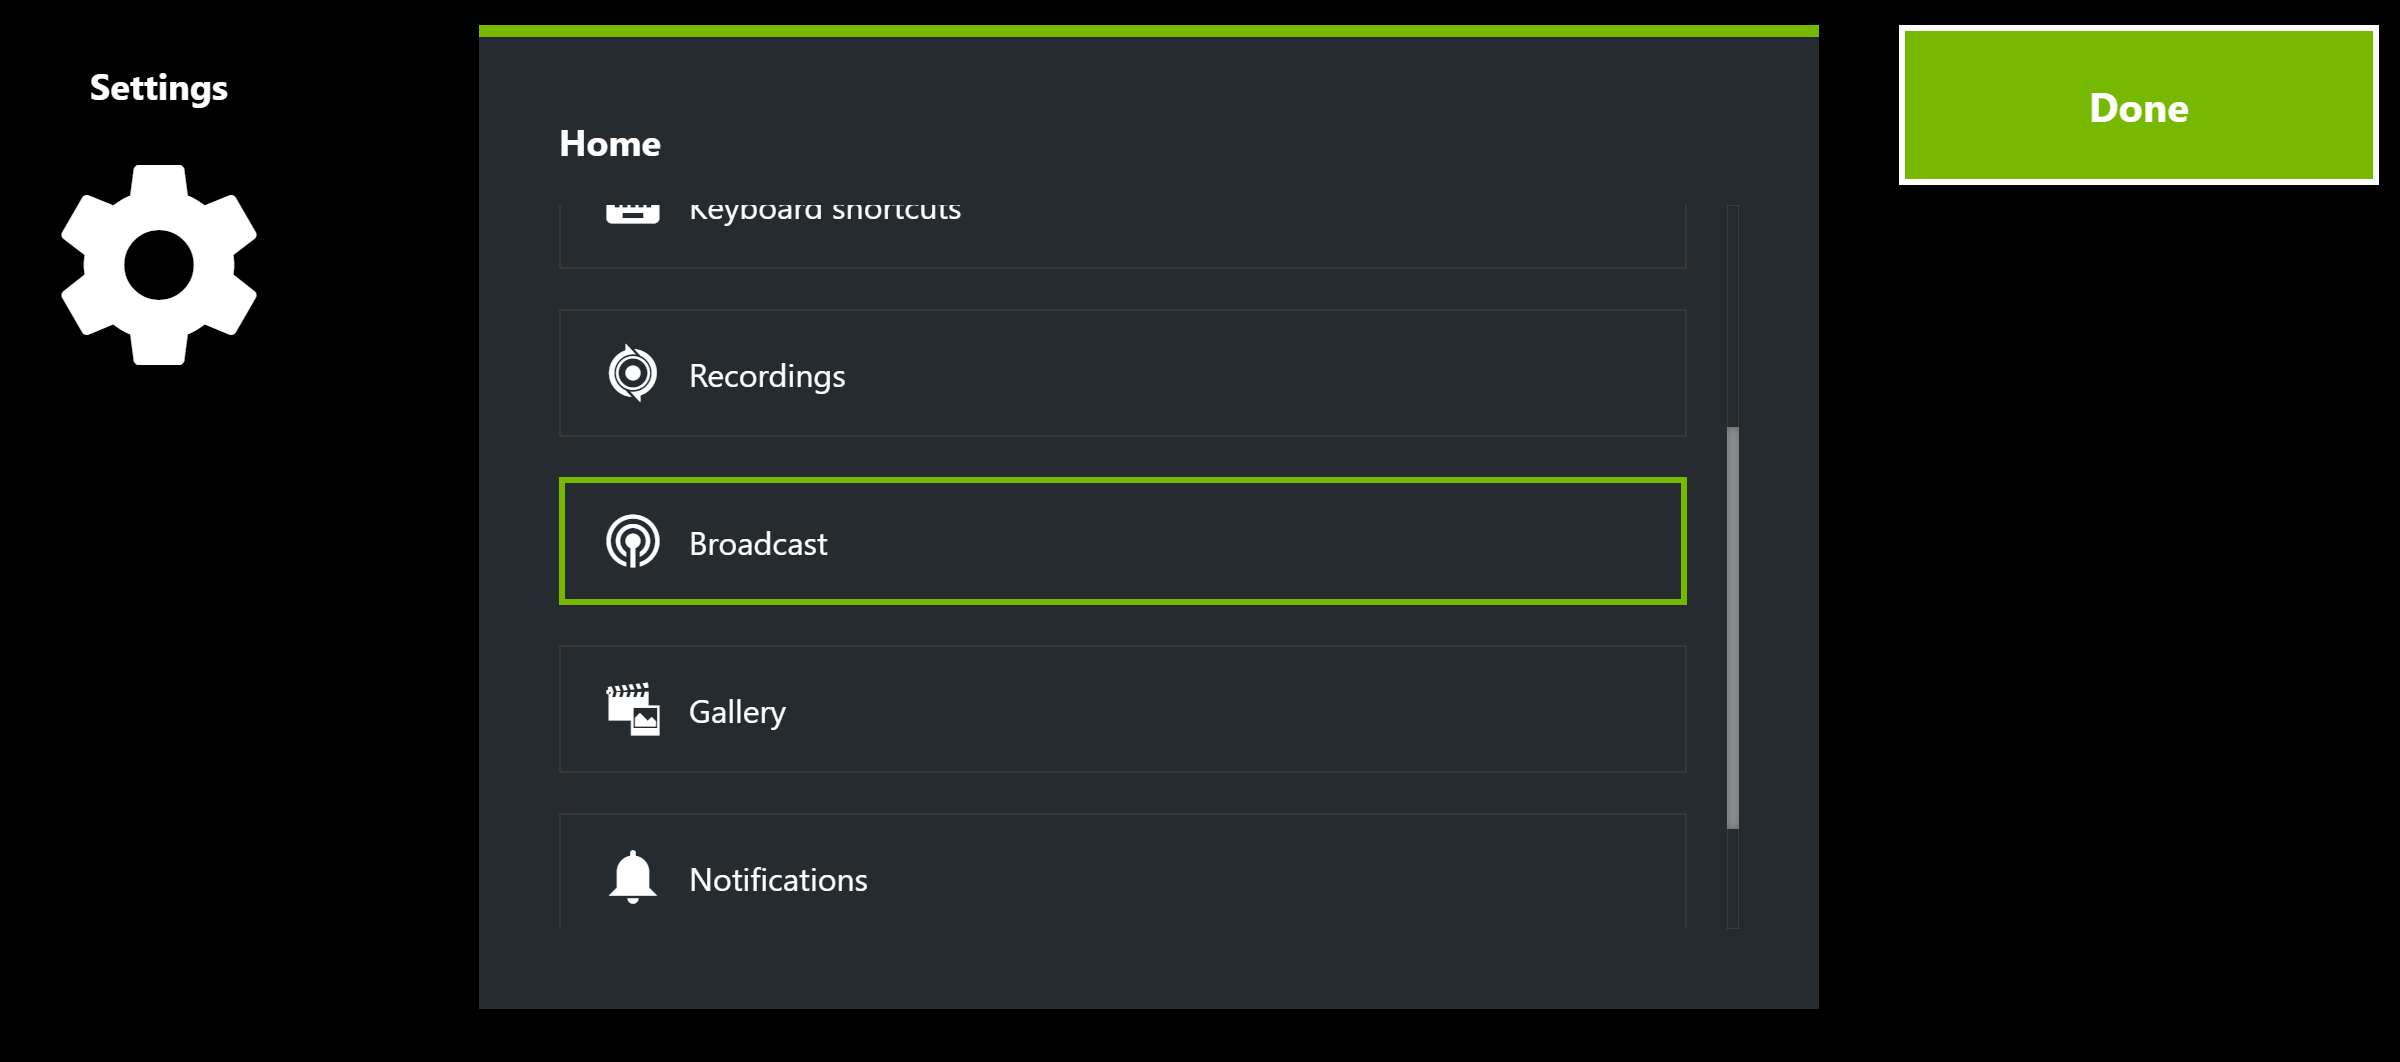
- 2. In Settings, click on Broadcast:
- 3. On the Broadcast page, select Yes to enable broadcasting from your PC. You can also set up custom overlays or change the ingest server for broadcasting to Twitch. Click the Back button when you’ve finished.
- 4. At this point you will be back at the Settings menu. Go on to the next section in this guide, Connect to Broadcasting Services, if you have completed this section.
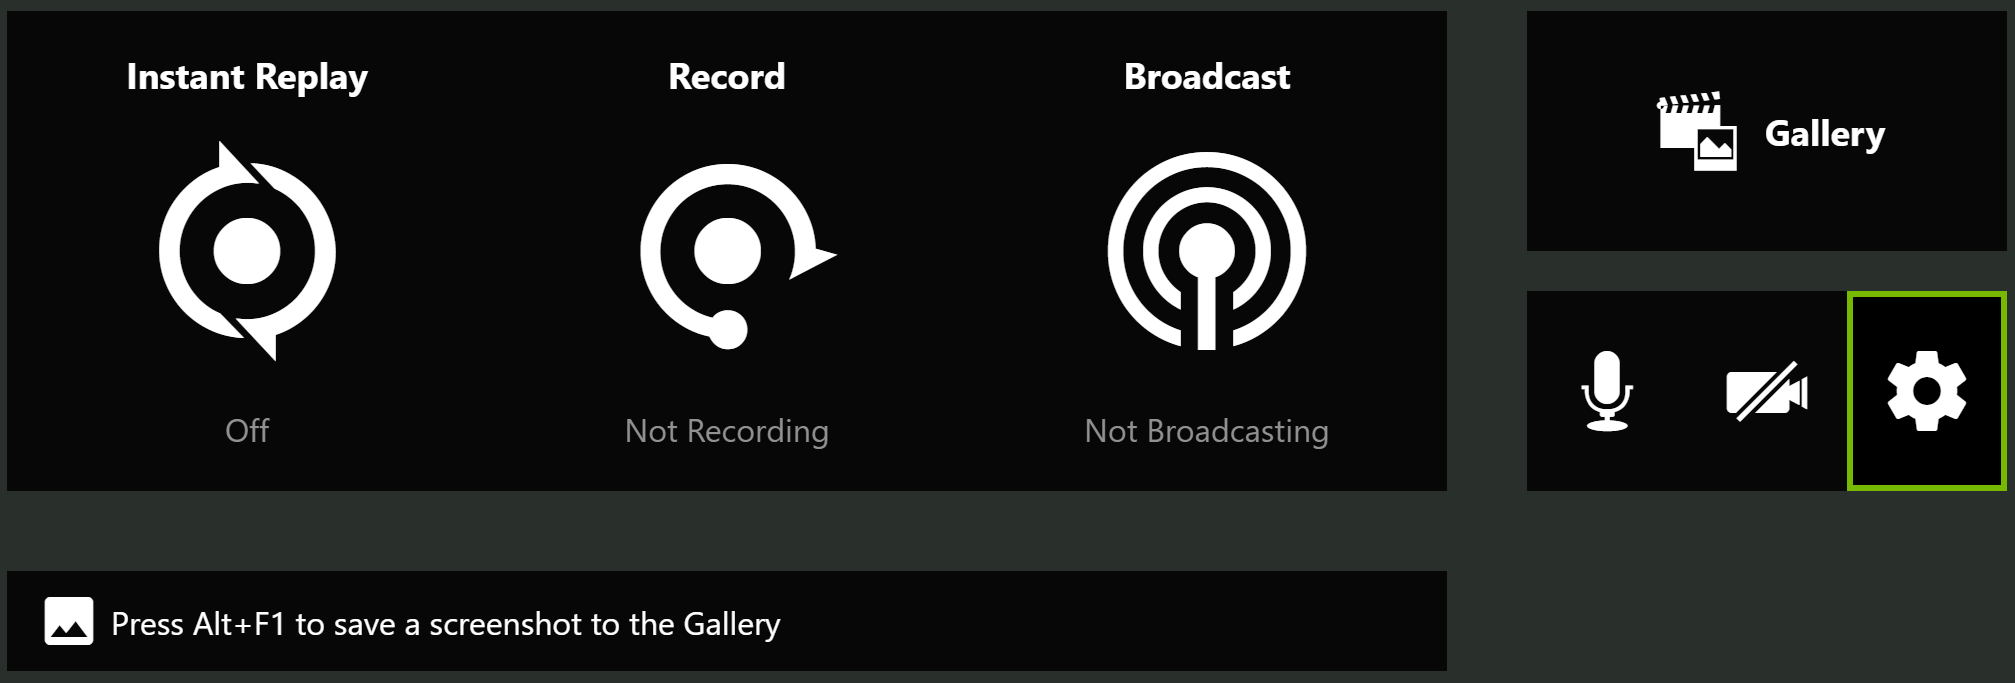
NOTE: If the Share overlay does not appear it may be turned off. You can turn it on inside GeForce Experience by going to Settings > GENERAL > SHARE and toggling the switch. It will light up green indicating the Share overlay has been turned on.
NOTE: You can change the keyboard shortcut for the Share overlay in Settings > Keyboard shortcuts if you don’t want to use Alt+Z.
Connect to Broadcasting Services
GeForce Experience supports broadcasting to Facebook Live, Twitch and YouTube Live. In this section, you will learn how to set up broadcasting for these services.
To connect to a broadcasting service,
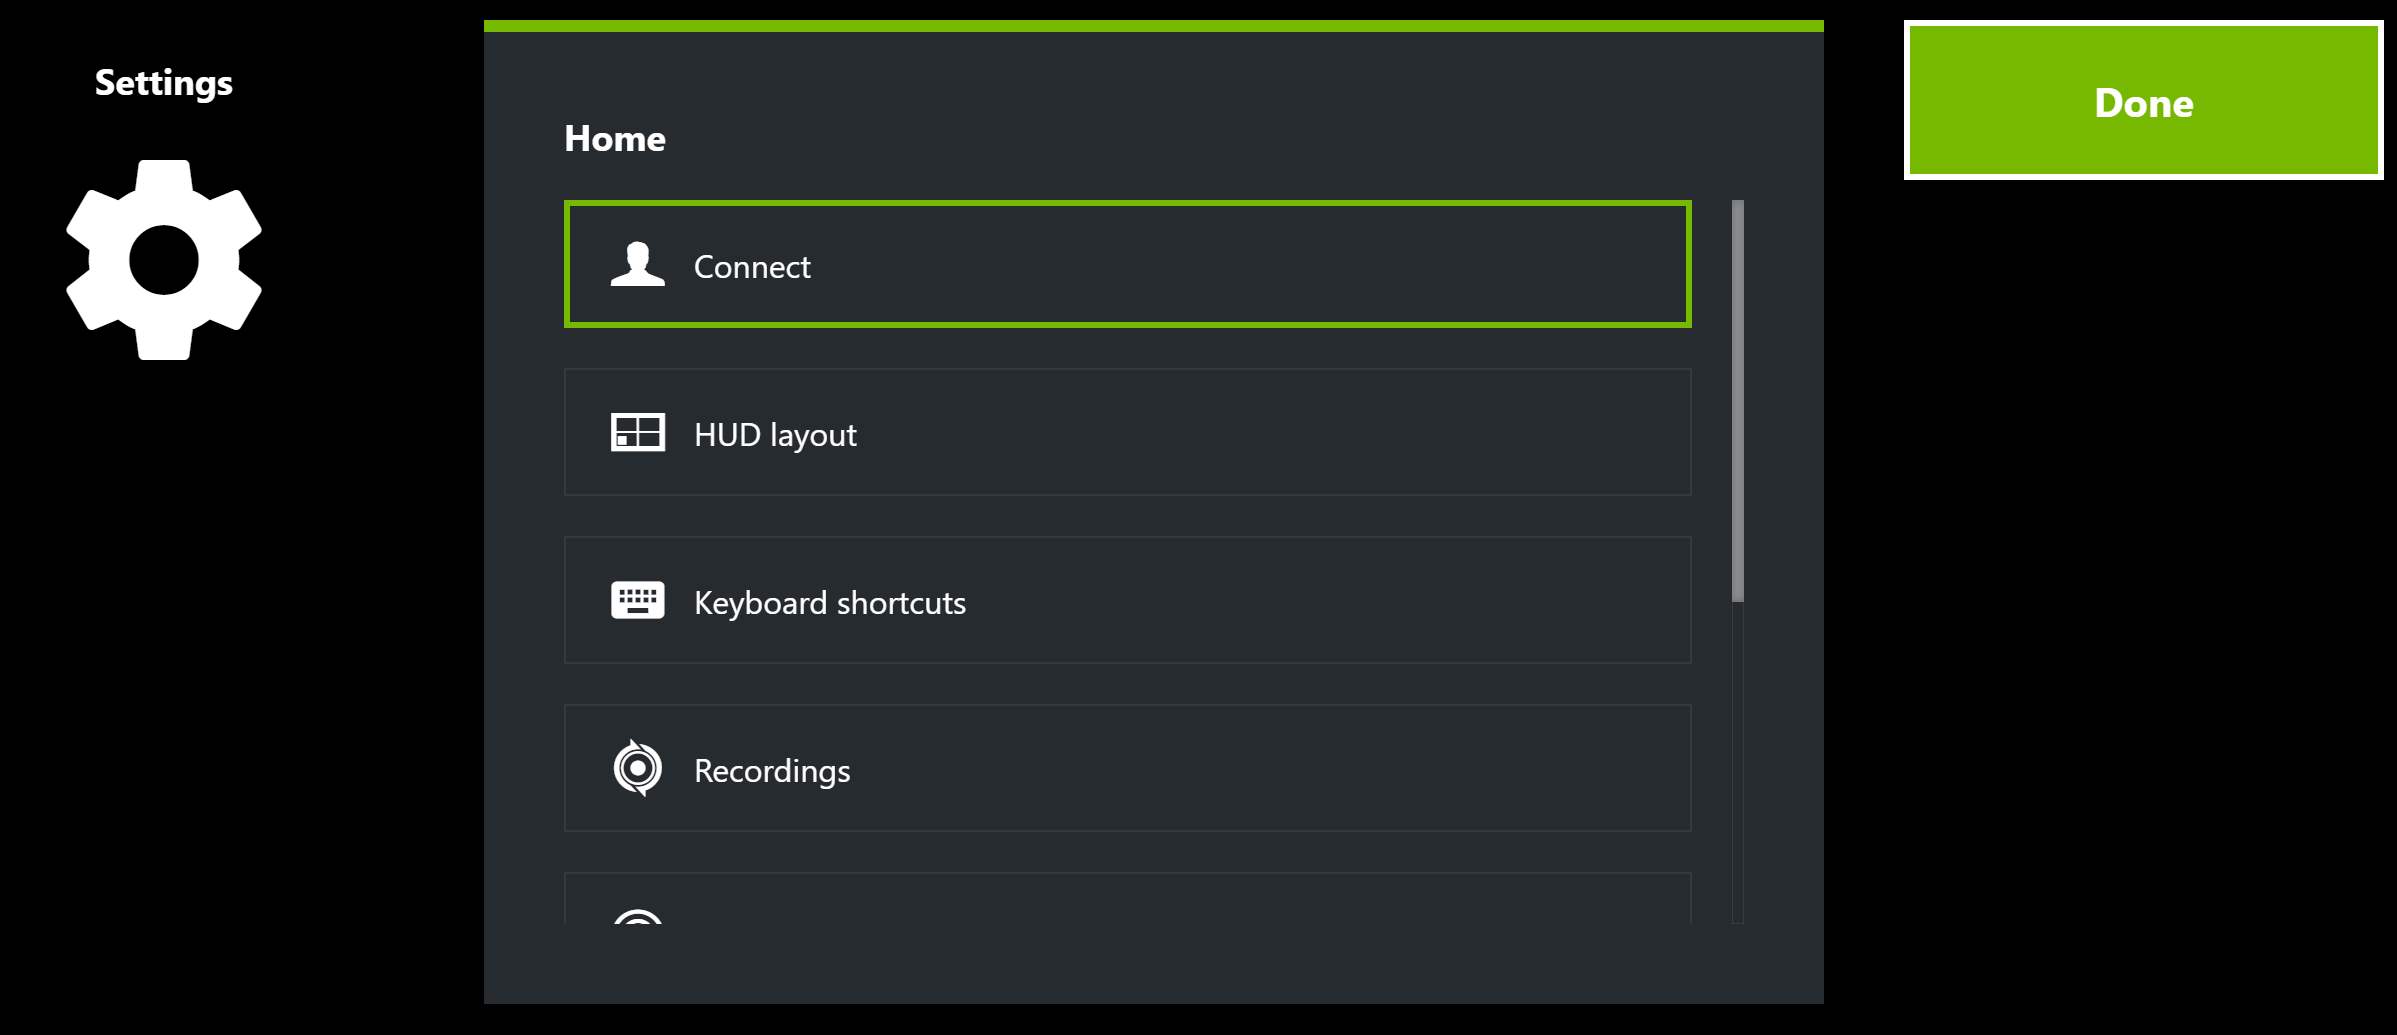
- 1. Ensure that you have completed the One-time Setup section of this guide. Then remain at (or return to) the Share overlay Settings menu and click on Connect:
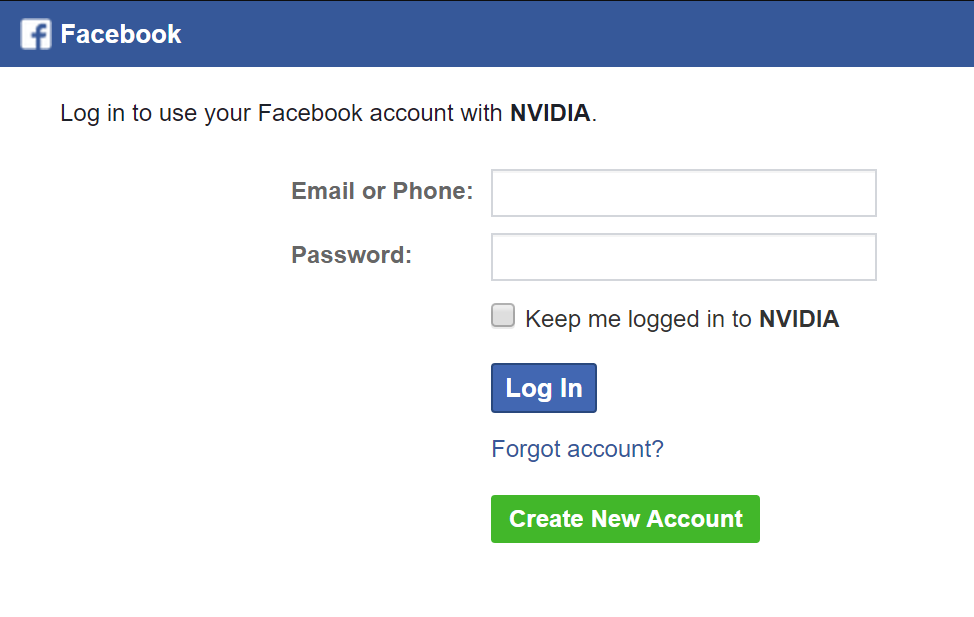
- 2. On the Connect page, click on the account type first, then click on the Log in button. For example, to connect your Facebook account for Facebook Live broadcasting, it looks like this:
- 3. Following the example from the previous step, you will then be prompted to enter your Facebook account details:
- 4. After logging into Facebook, you see your profile picture, username, and the connection status:
- 5. Your Facebook account will remain connected until you click it and then click the Log out button on the Connect page.
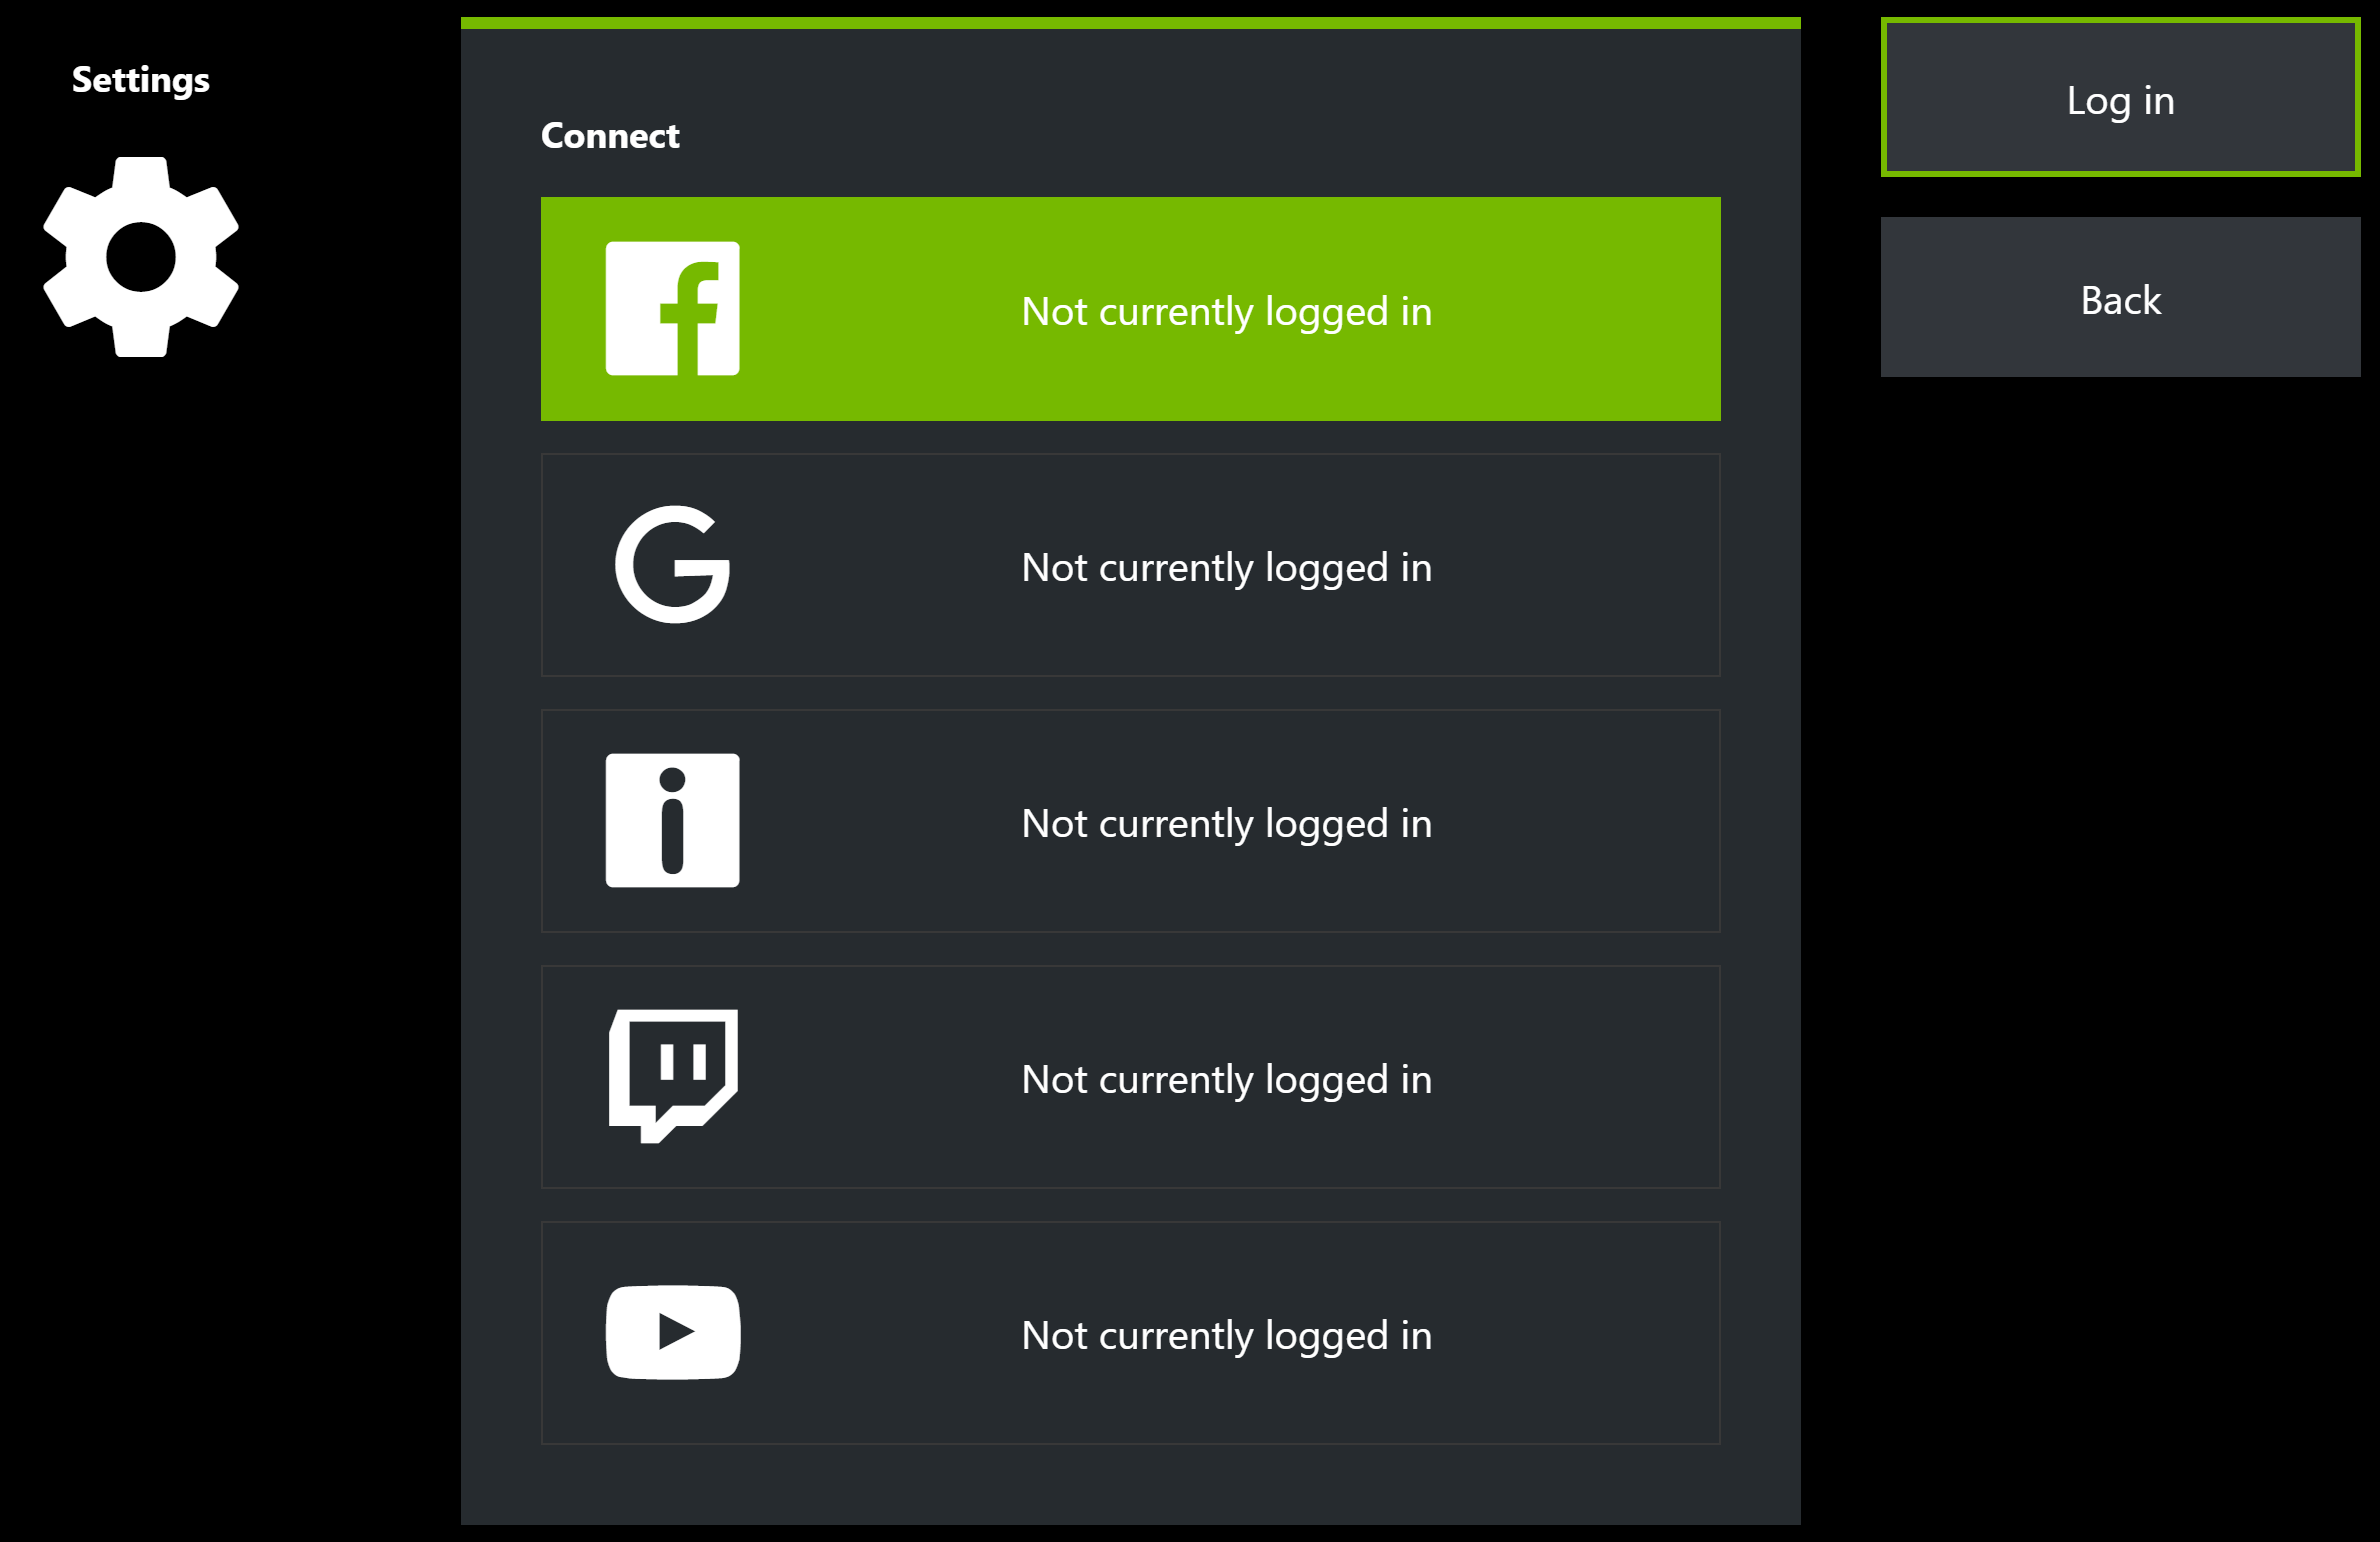
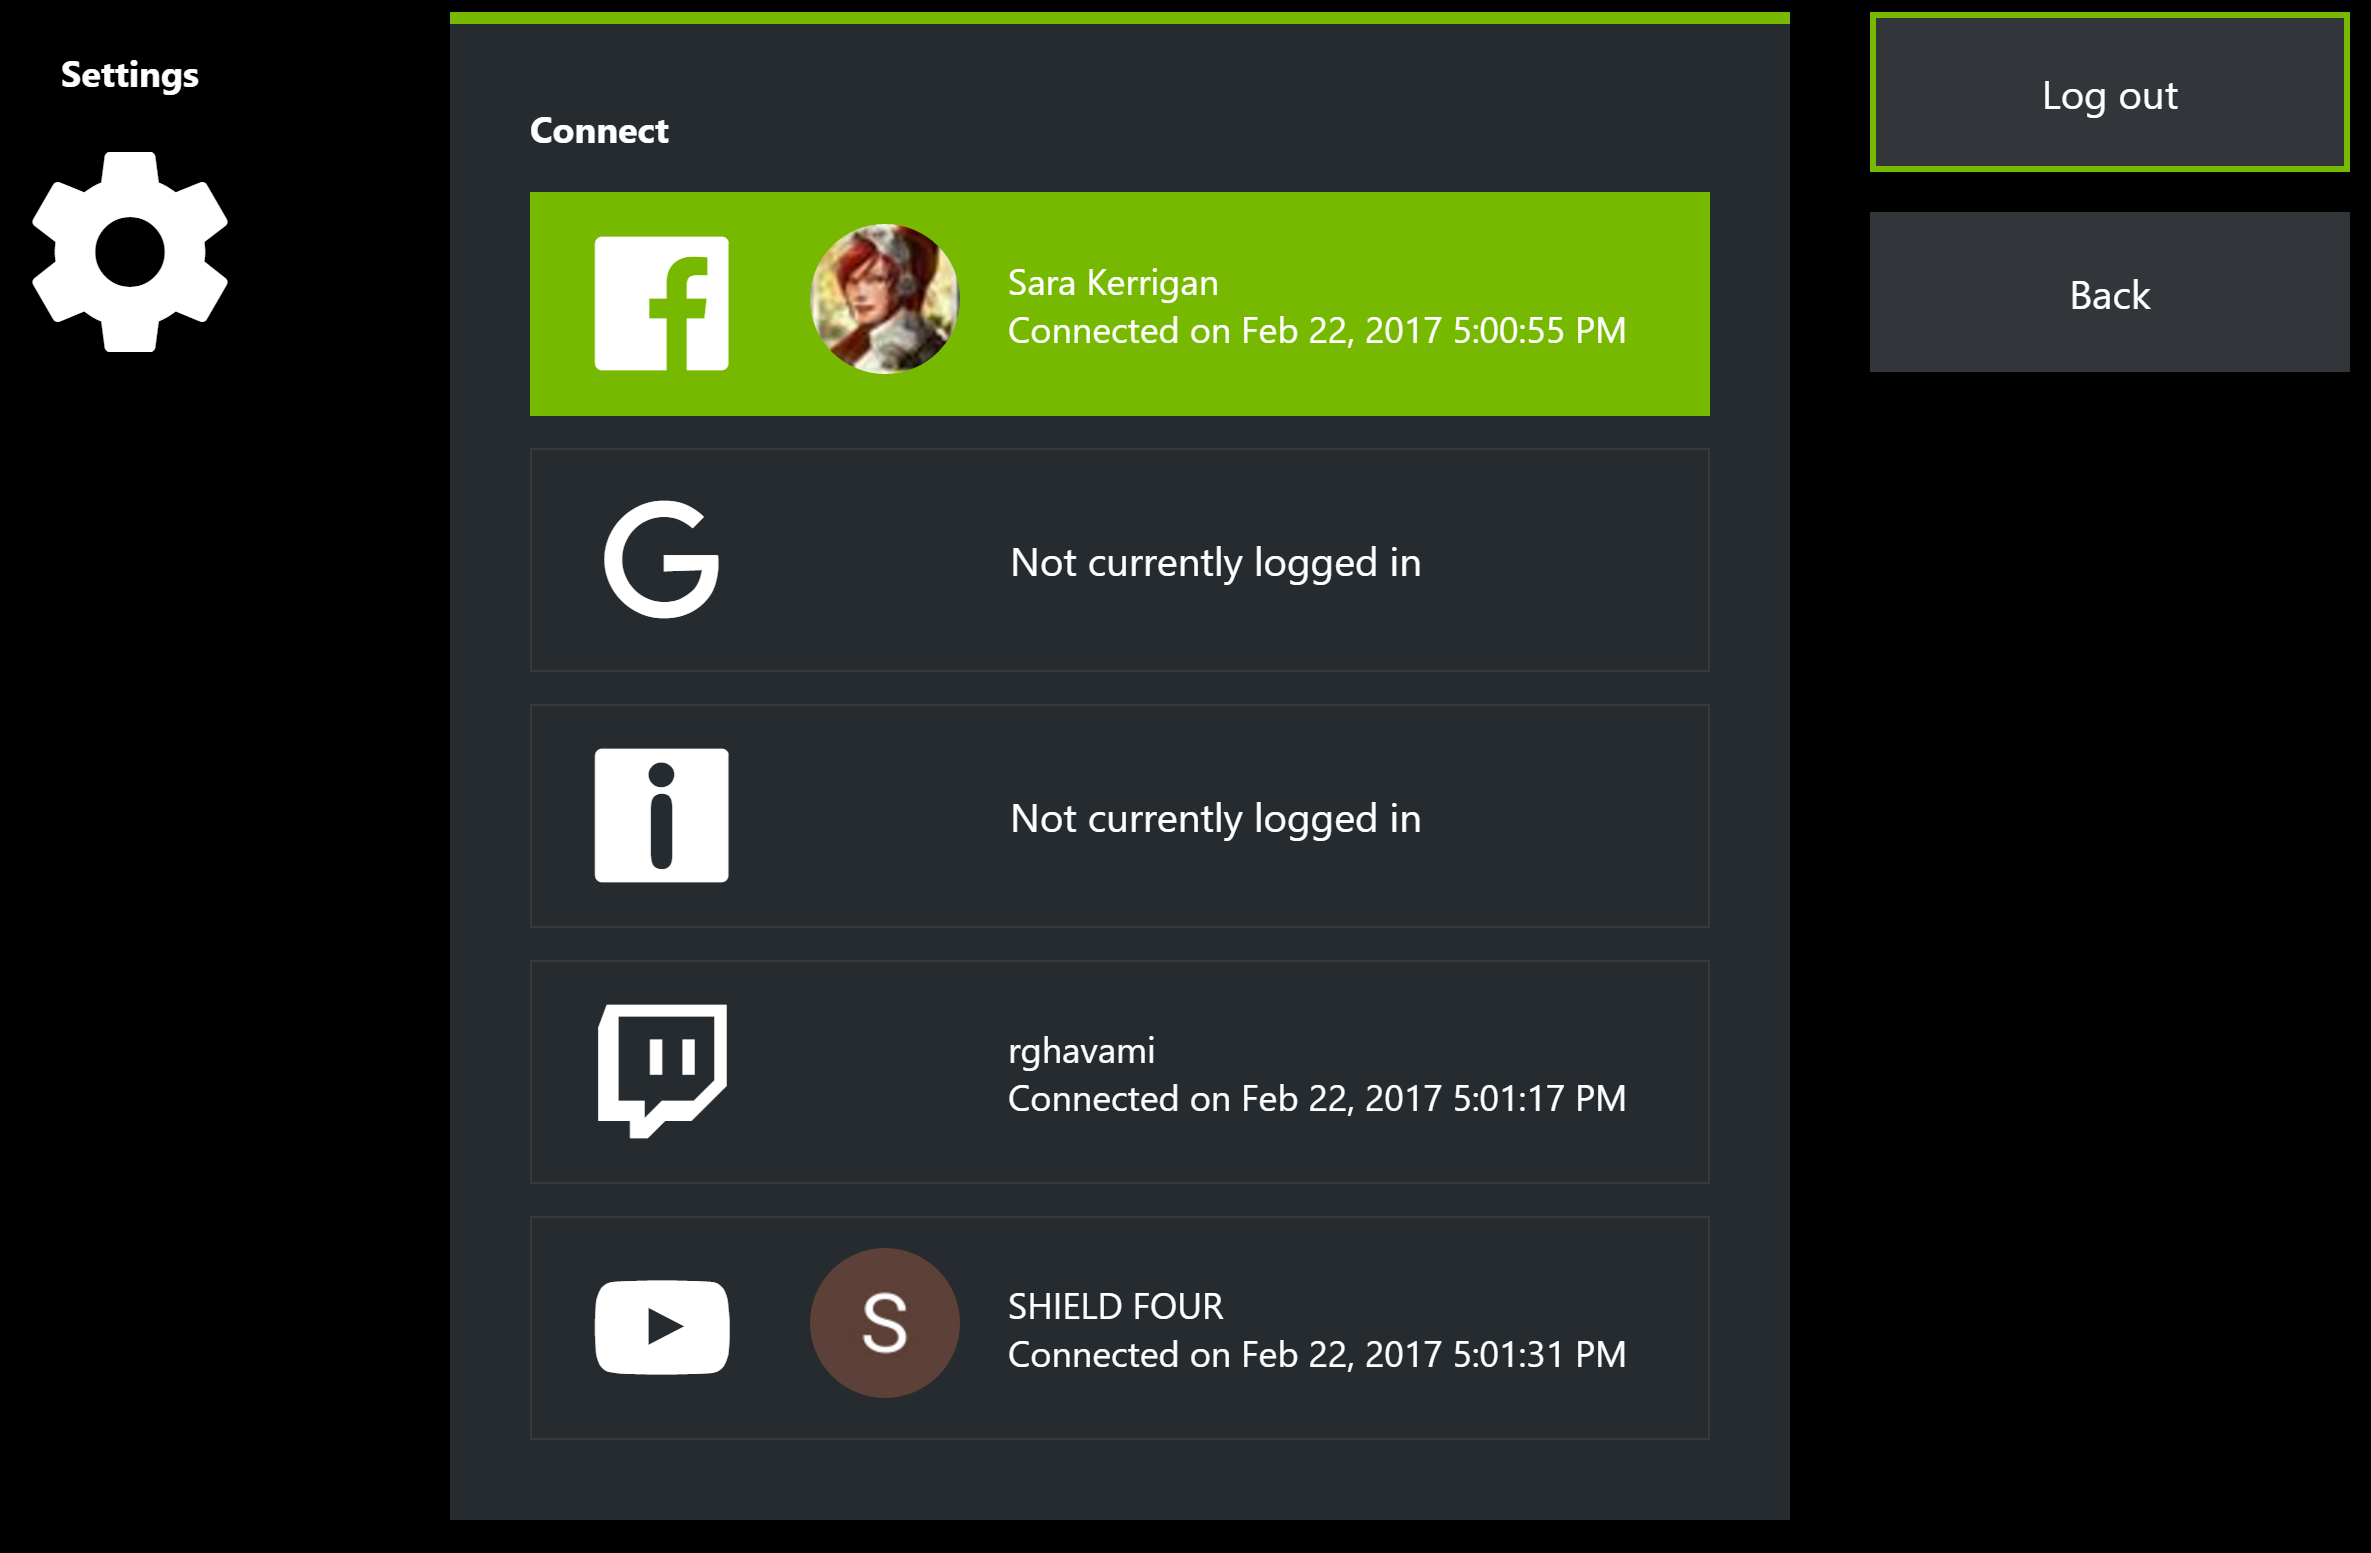
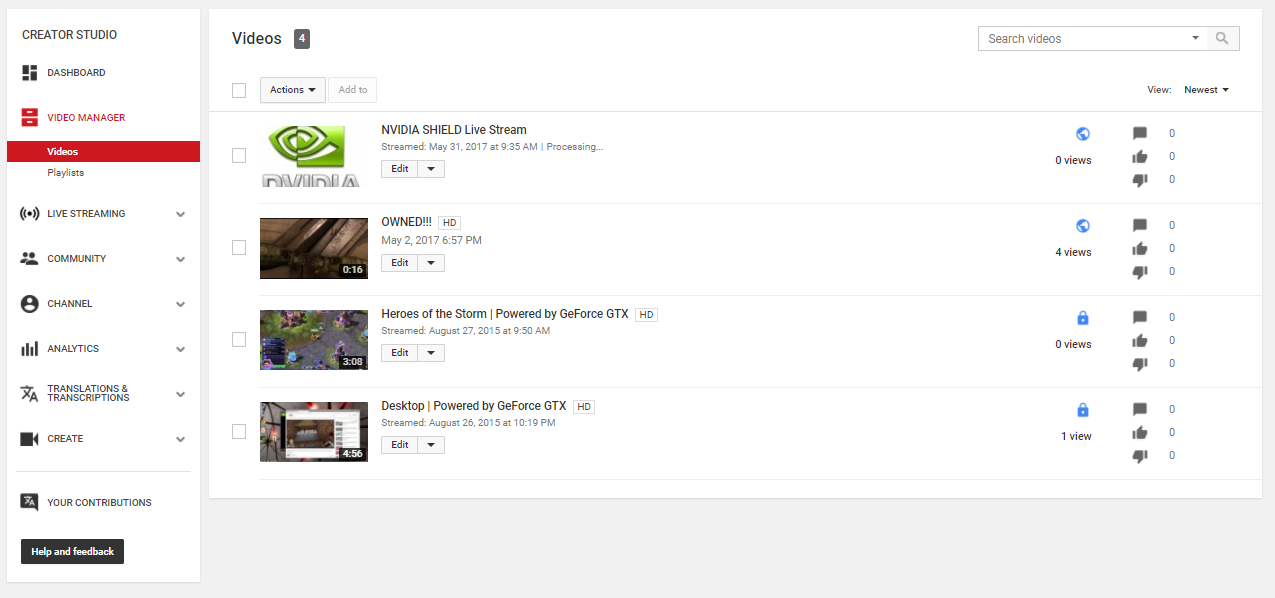
NOTE: For YouTube, you must log into a verified YouTube account. Past broadcasts may be viewed in the Video Manager tab within your Creator Studio.
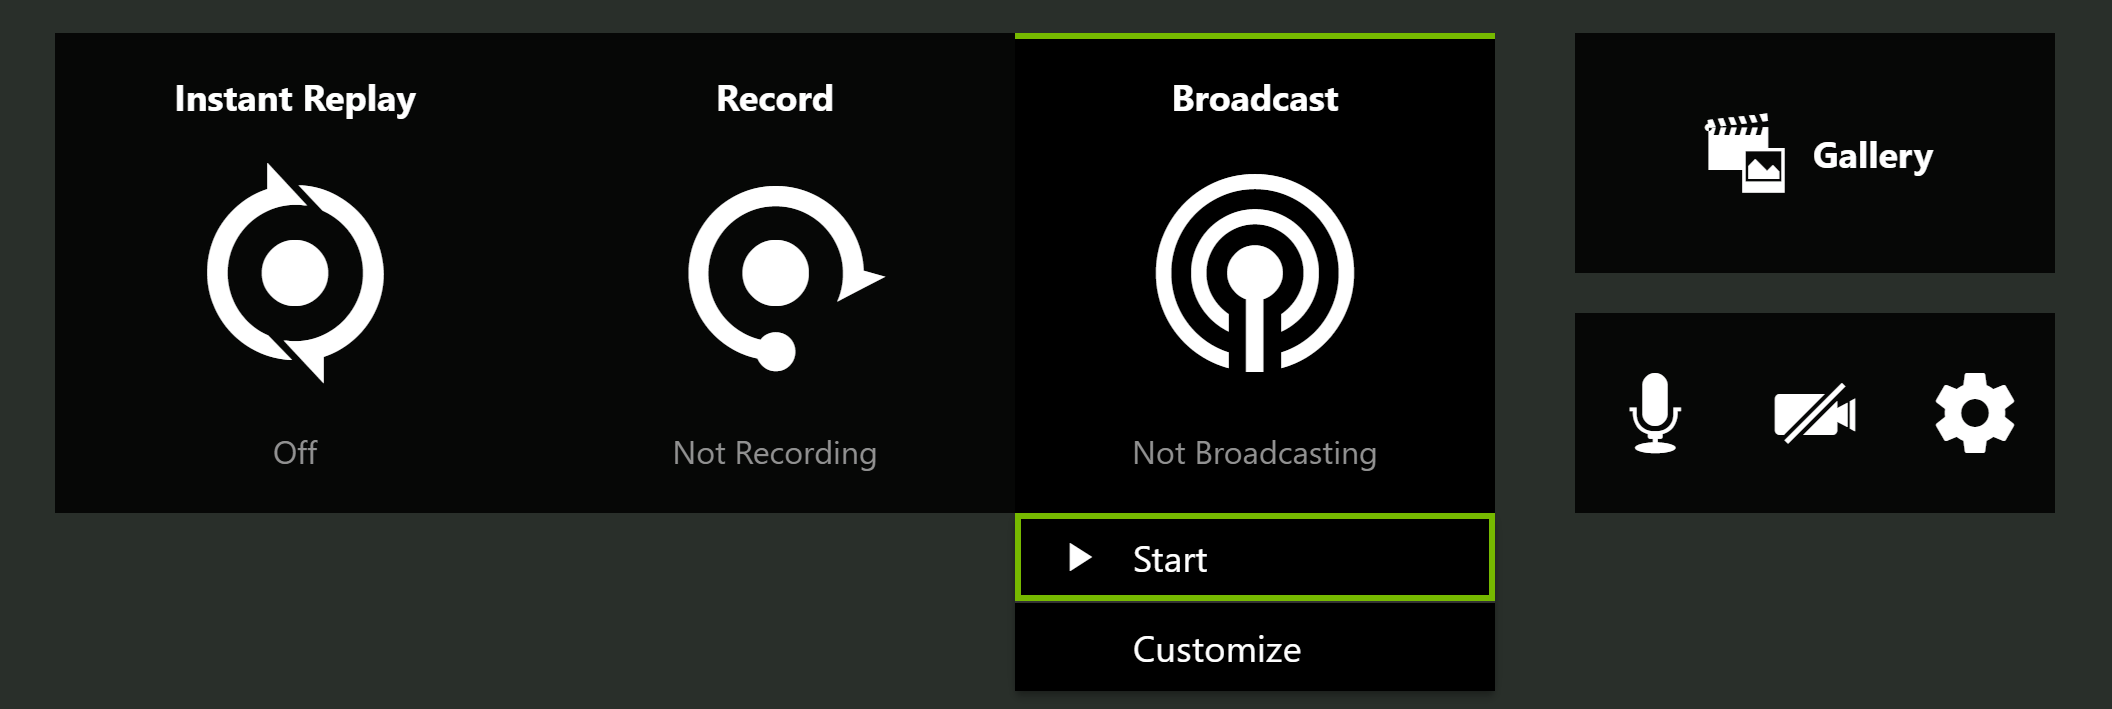
Quick Connect to Broadcasting
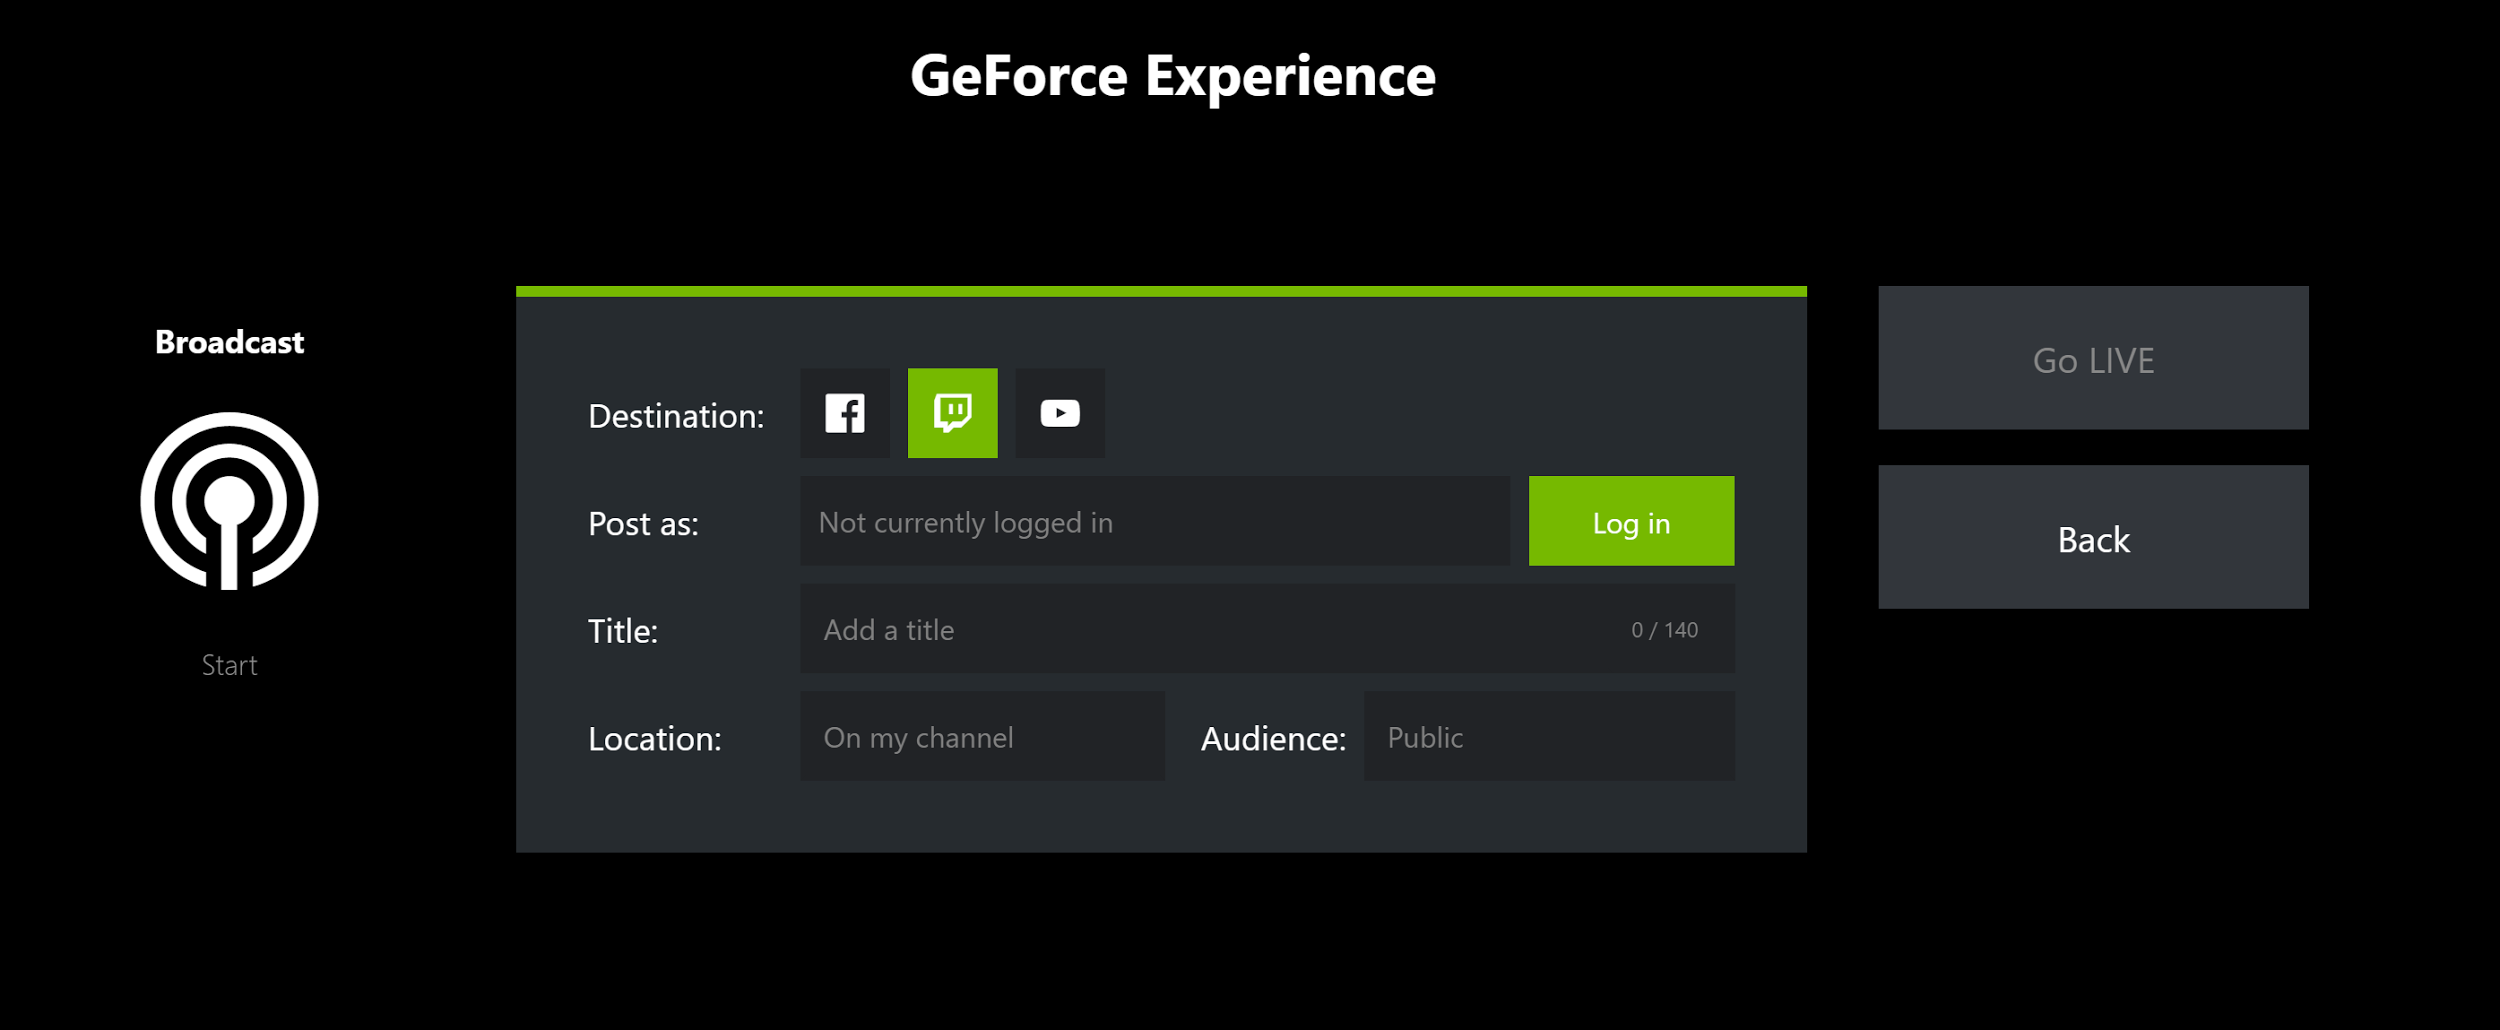
- 1. Press Alt+Z to bring up the Share overlay and click on Broadcast > Start.
- 2. Select the streaming service you would like to log into.
- 3. Log in with your information, add a title to your stream, and you’re all set! Go Live.
Customize Broadcast Settings
Depending on your bandwidth, you may want to increase or decrease certain characteristics of your broadcast, such as resolution, frame rate, or bit rate. To customize your broadcast settings,
- 1. Press Alt+Z to bring up the Share overlay and click on Broadcast > Customize:
- 2. Use the Customize page to set your preferred broadcast resolution, frame rate, and bit rate.
Quality pre-sets are also available for your convenience: - 3. Click the Save button when you’ve finished.
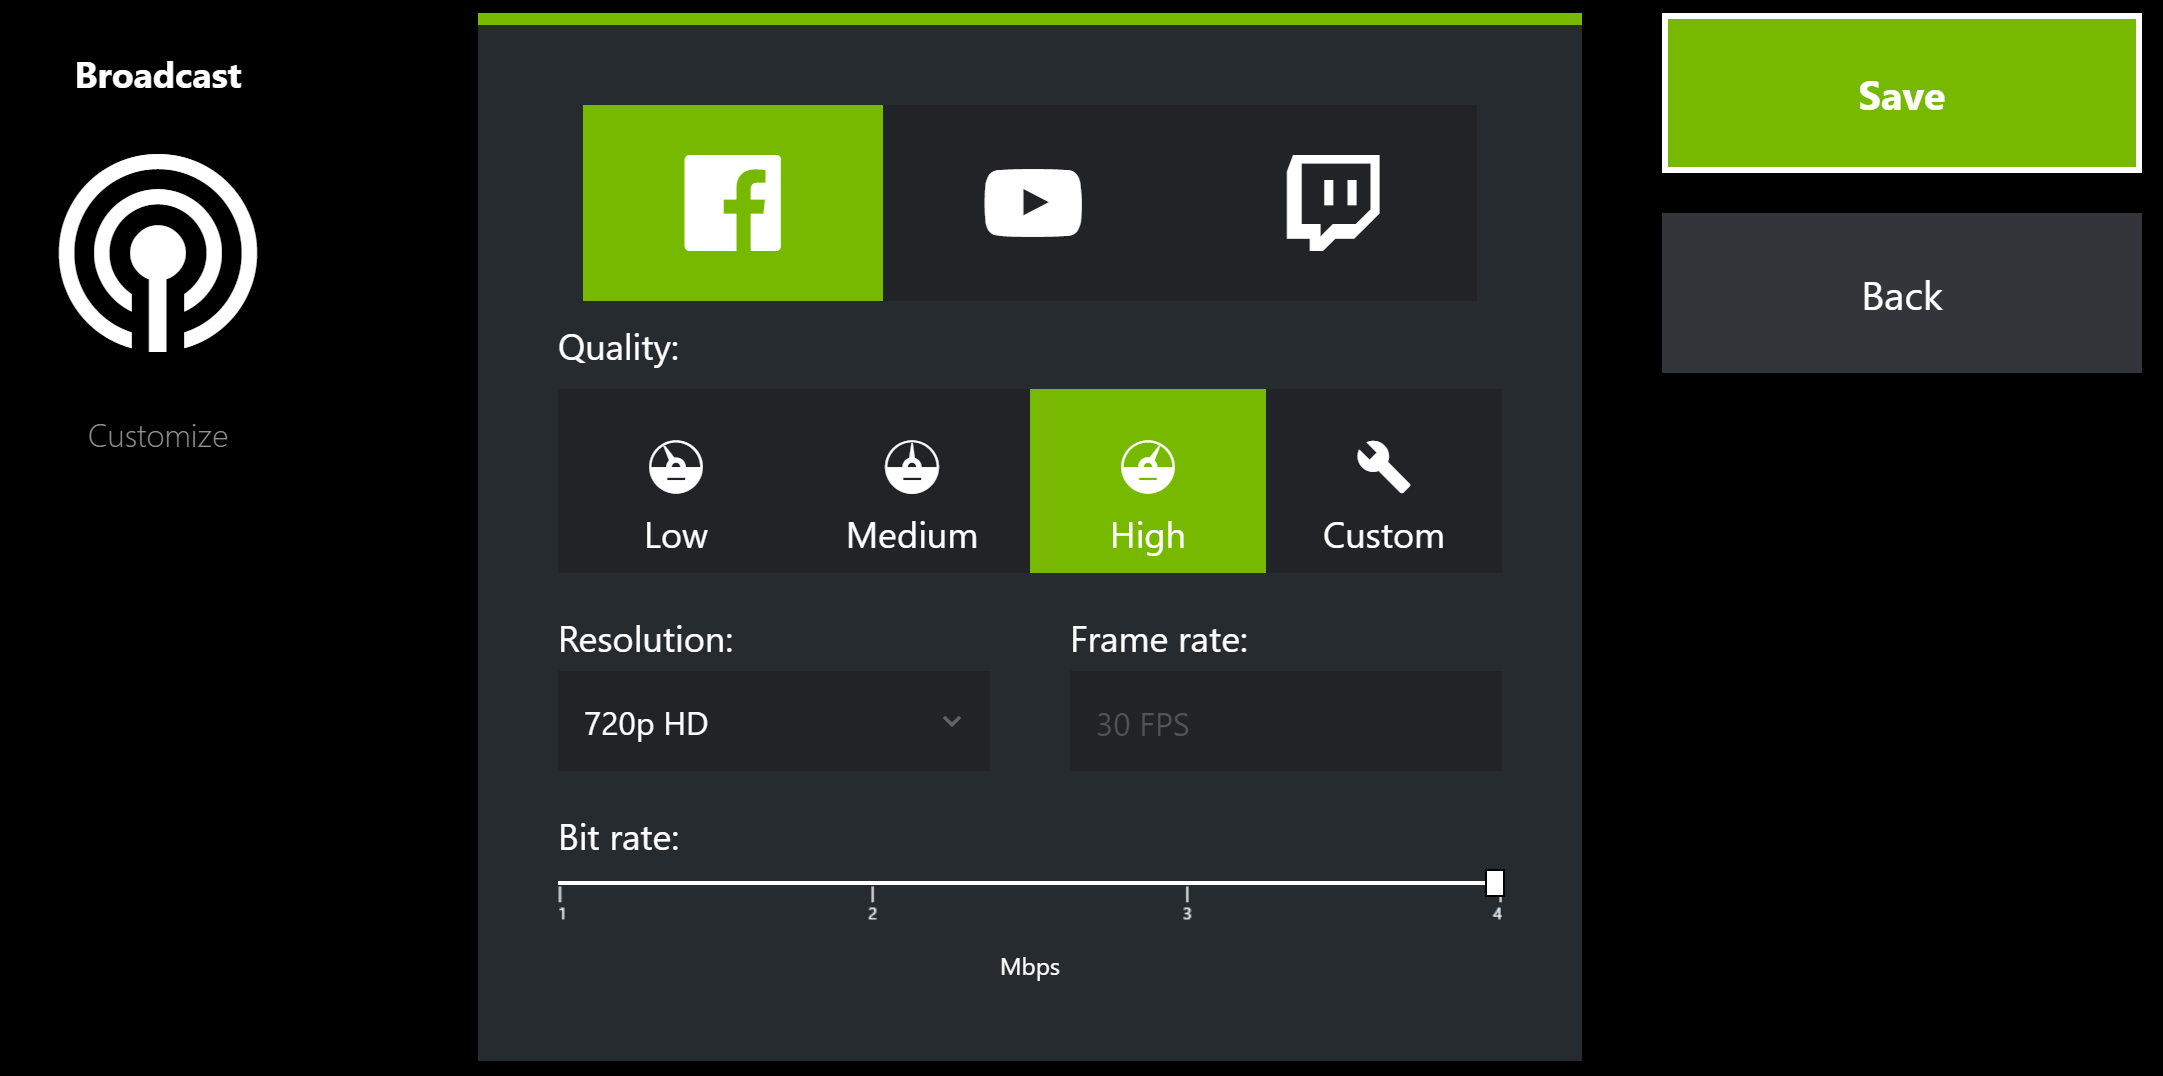
NOTE: You can adjust the quality settings for each broadcast service individually.
Webcam and Microphone Setup
If you have a webcam and microphone or webcam with integrated microphone plugged in and working with your PC, you can use it when broadcasting with GeForce Experience.
To set up your microphone,
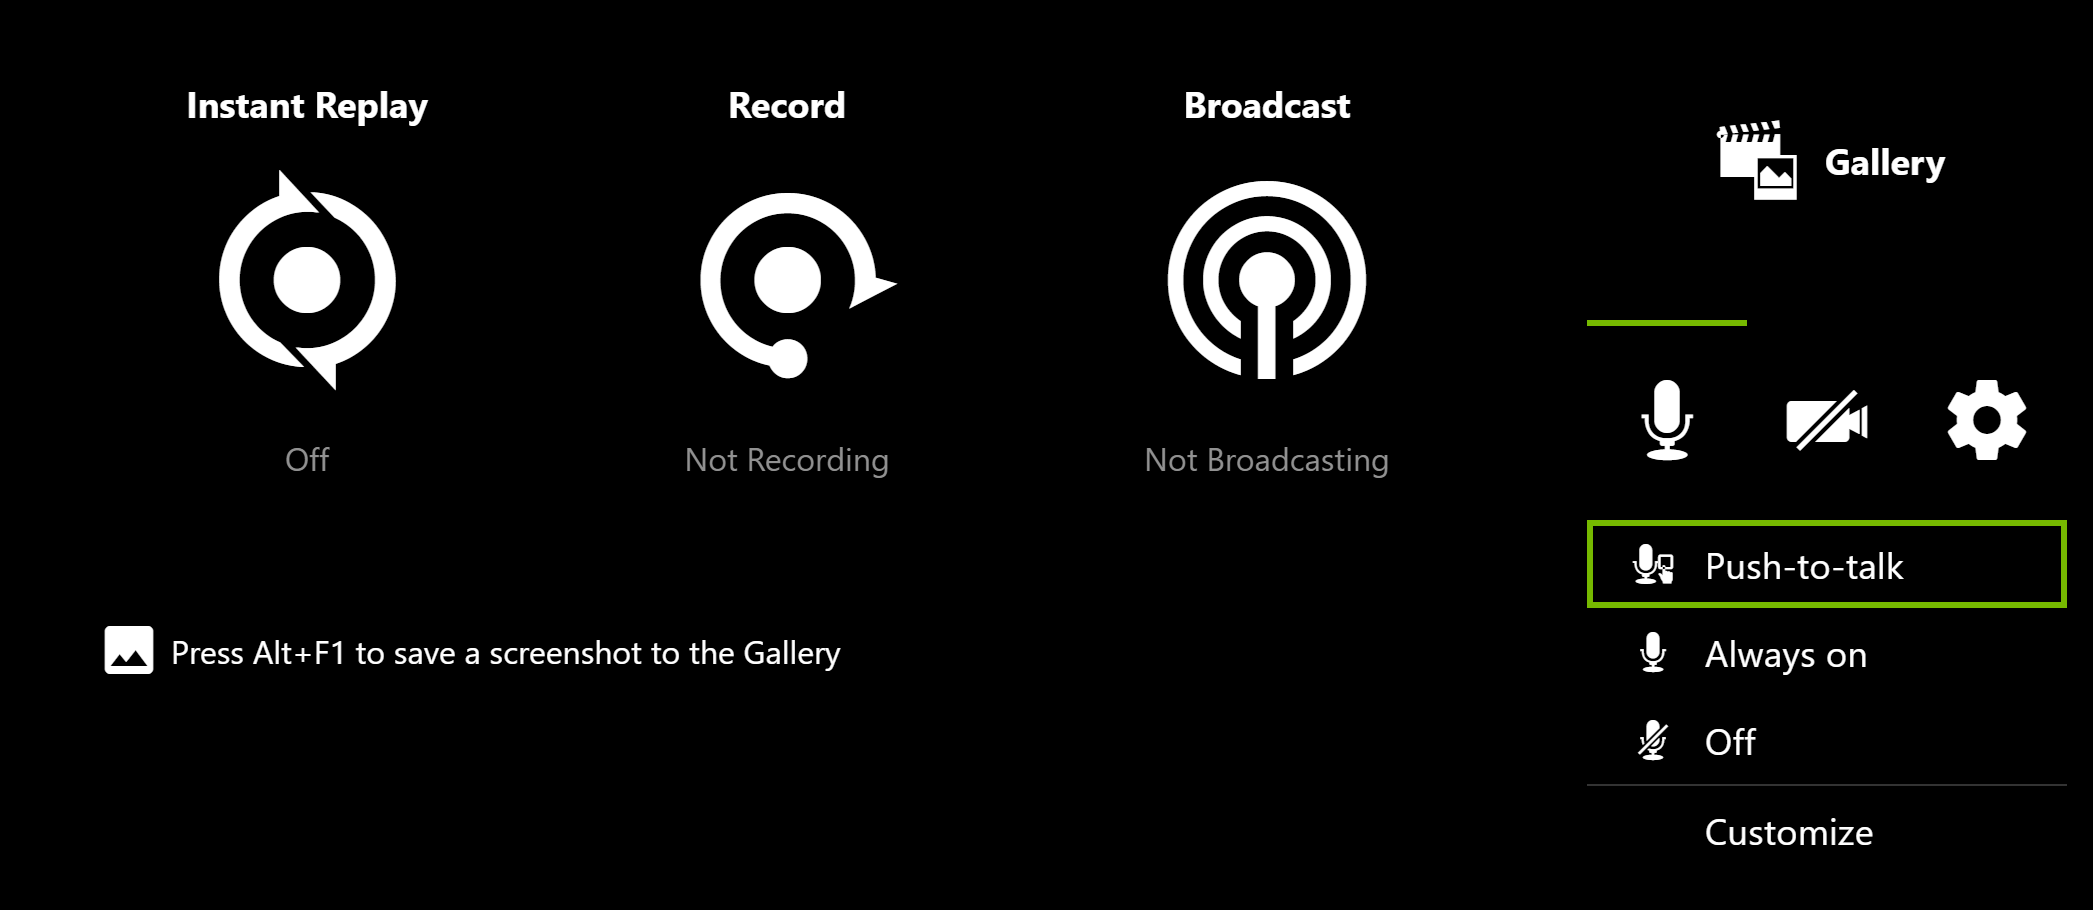
- 1. Press Alt+Z to bring up the Share overlay, then click on the microphone symbol:
- 2. A menu of options including Push-to-talk, Always on, Off, and Customize is shown. Use Customize to choose which microphone to use, to set the microphone volume, and optionally boost the microphone volume.
To set up your webcam,
- 1. Press Alt+Z to bring up the Share overlay, then click Settings.
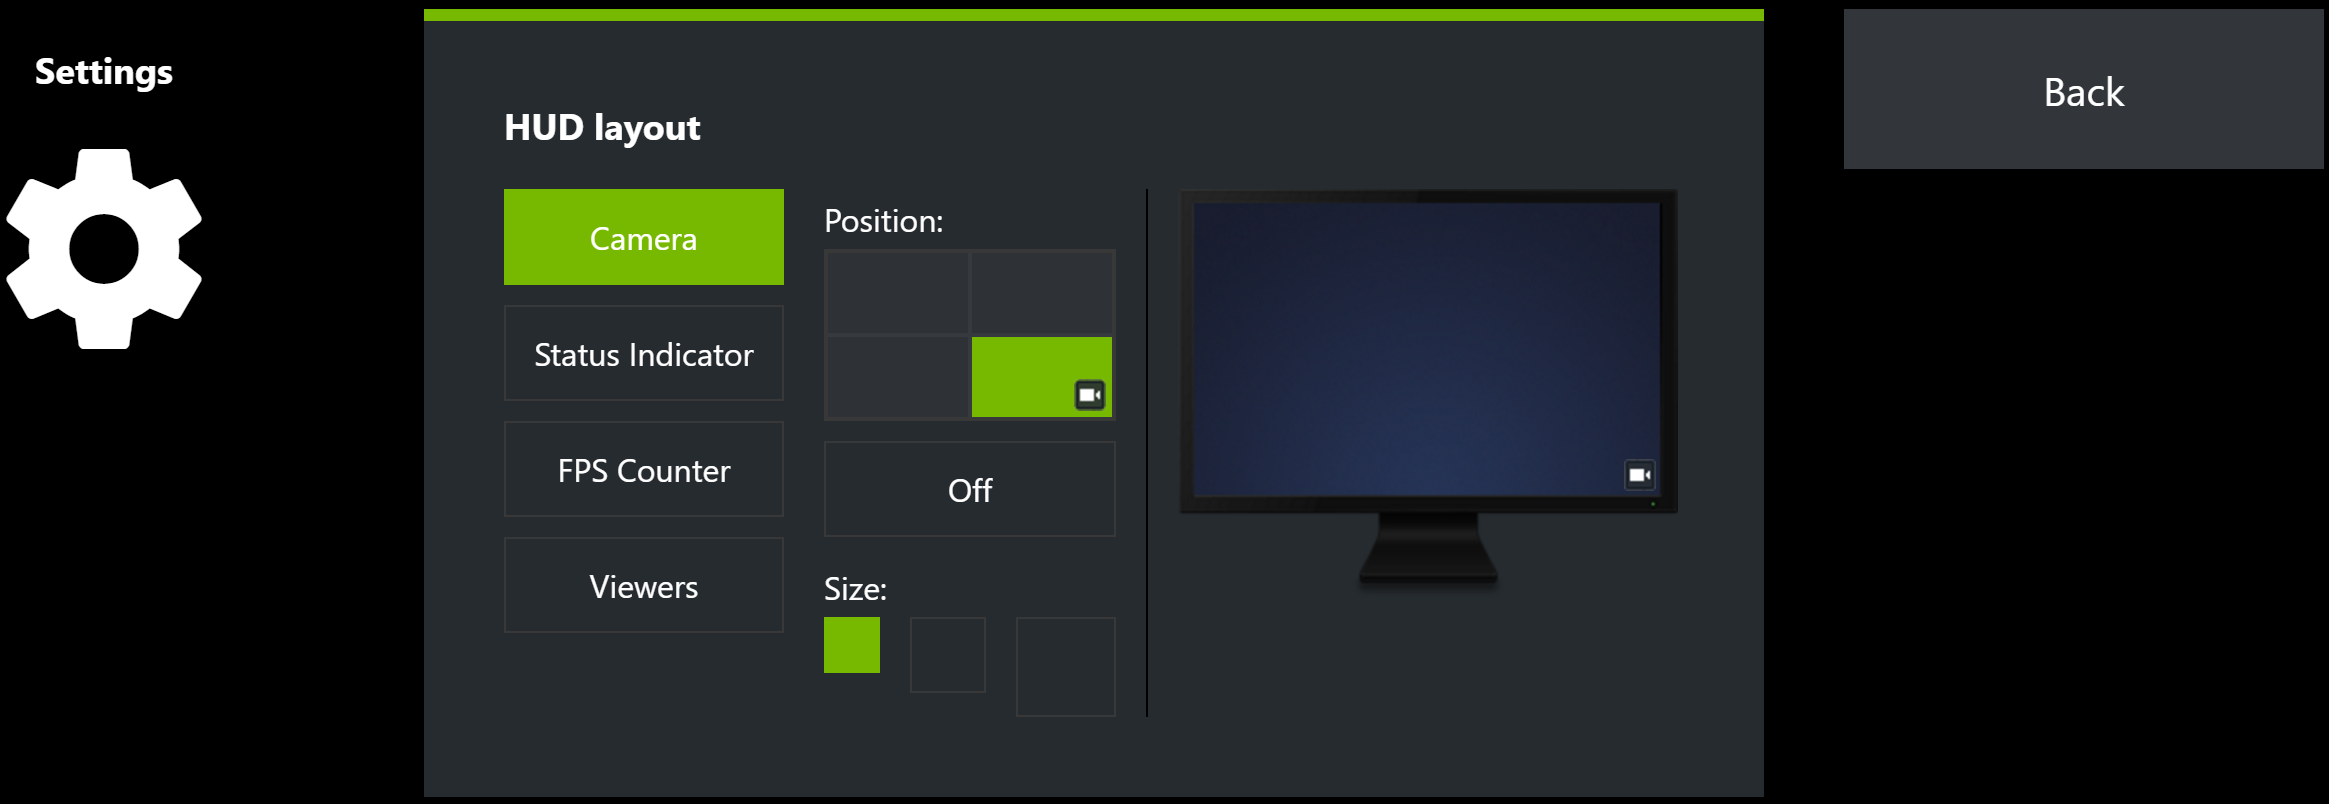
- 2. In Settings, select HUD layout.
- 3. On the HUD layout page, click on a quadrant in the 2x2 Position grid to move your webcam to any corner of the screen or to turn it off. You can also set the size of your webcam:
- 4. Click the Back button when you’ve finished. Your webcam is now enabled for broadcasting.
NOTE: You can toggle your microphone and webcam on and off at any time during a live broadcast by simply hitting Alt+Z to bring up the Share overlay and clicking on the mic or camera symbol.
Adding Custom Overlays
To add a custom overlay to your broadcast, navigate to the settings cogwheel in the GeForce Experience overlay and enter the Broadcast settings.
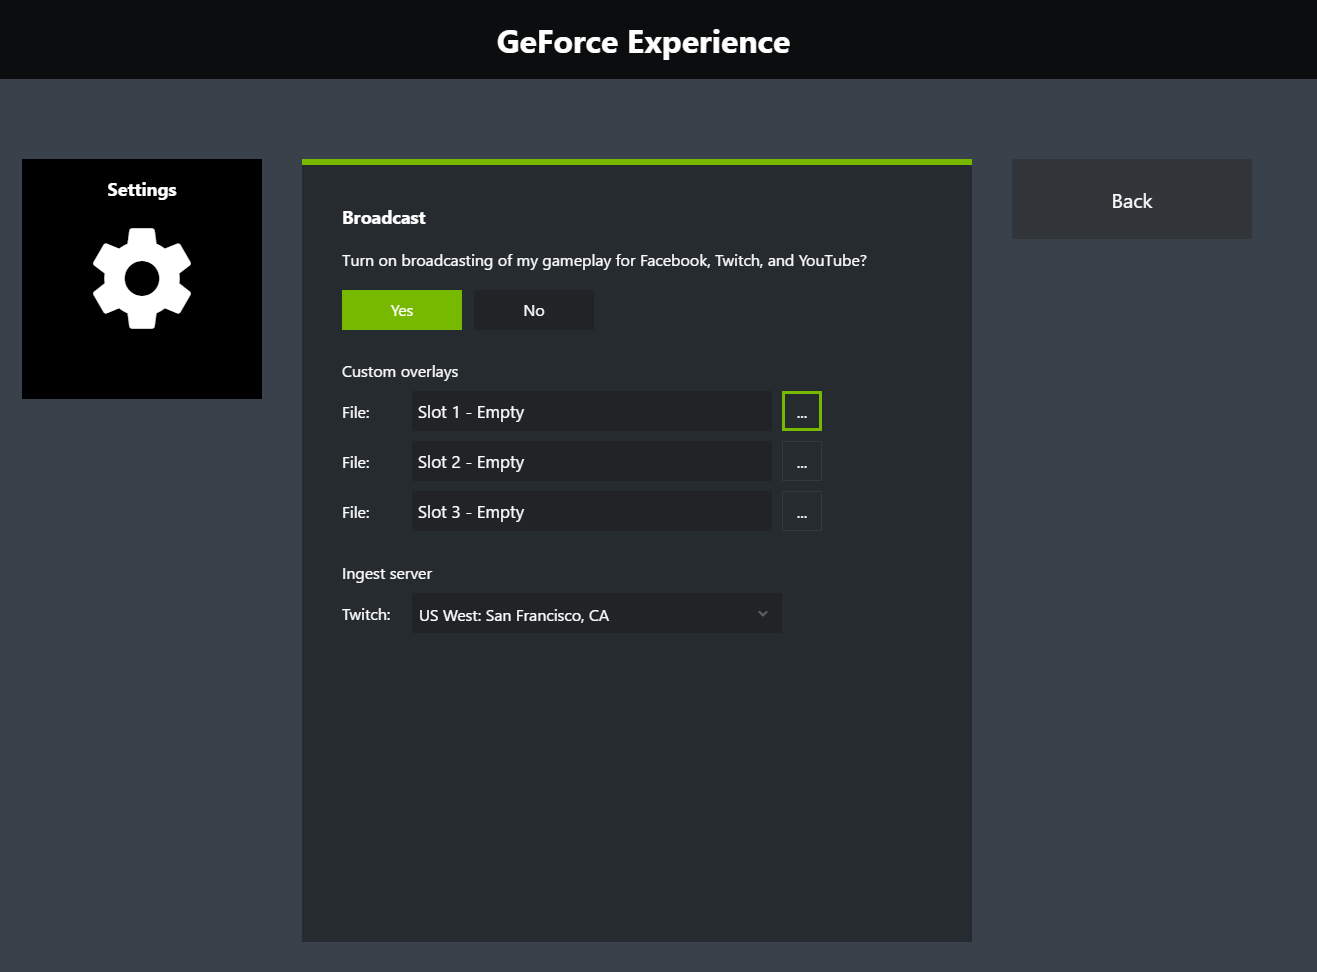
Select one of the empty slots, select the folder that contains your overlays, and select your custom overlay! You can add up to 3 custom overlays for your broadcast.
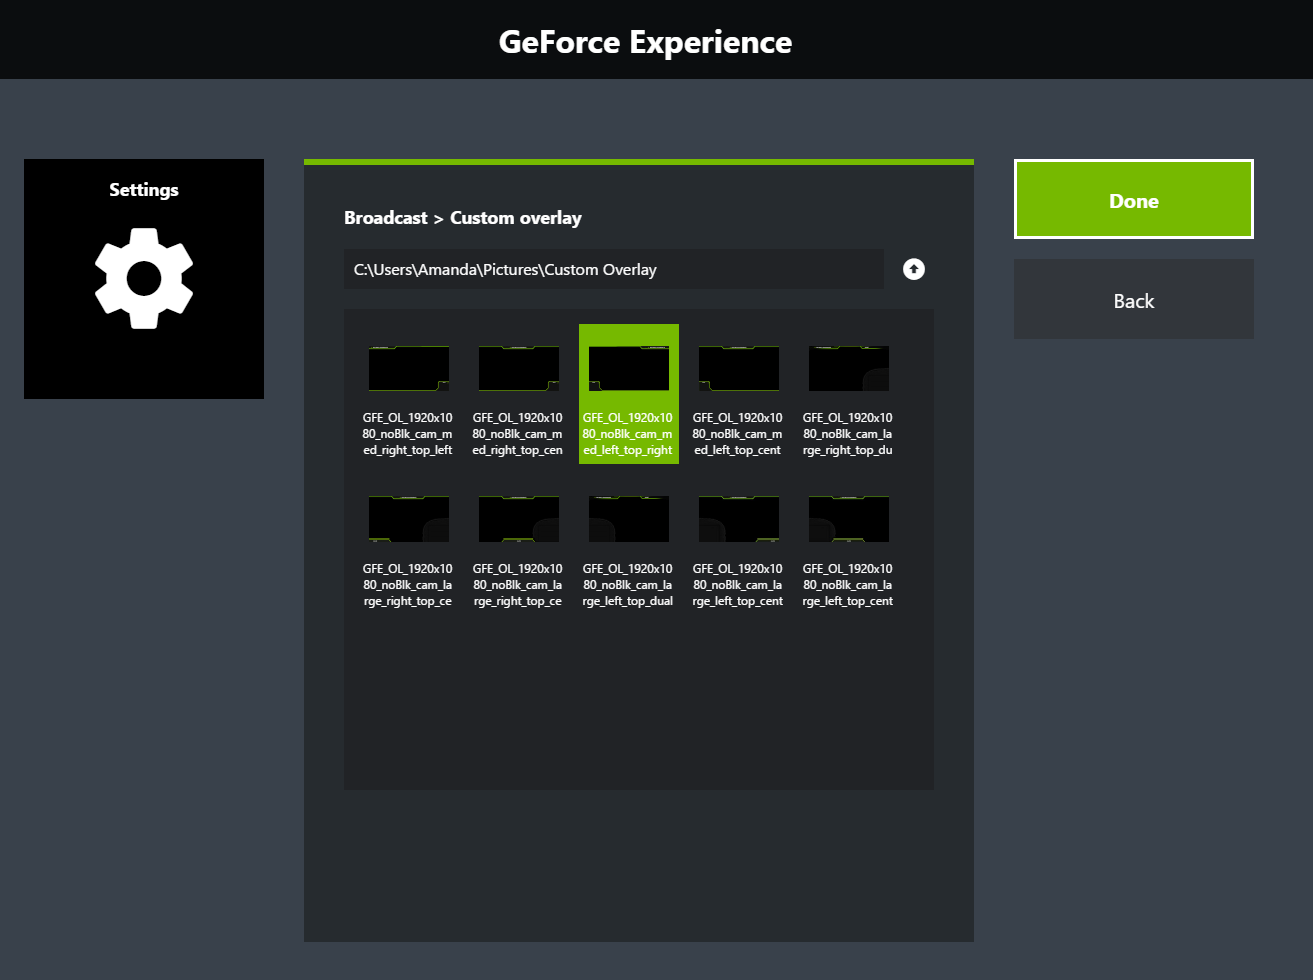
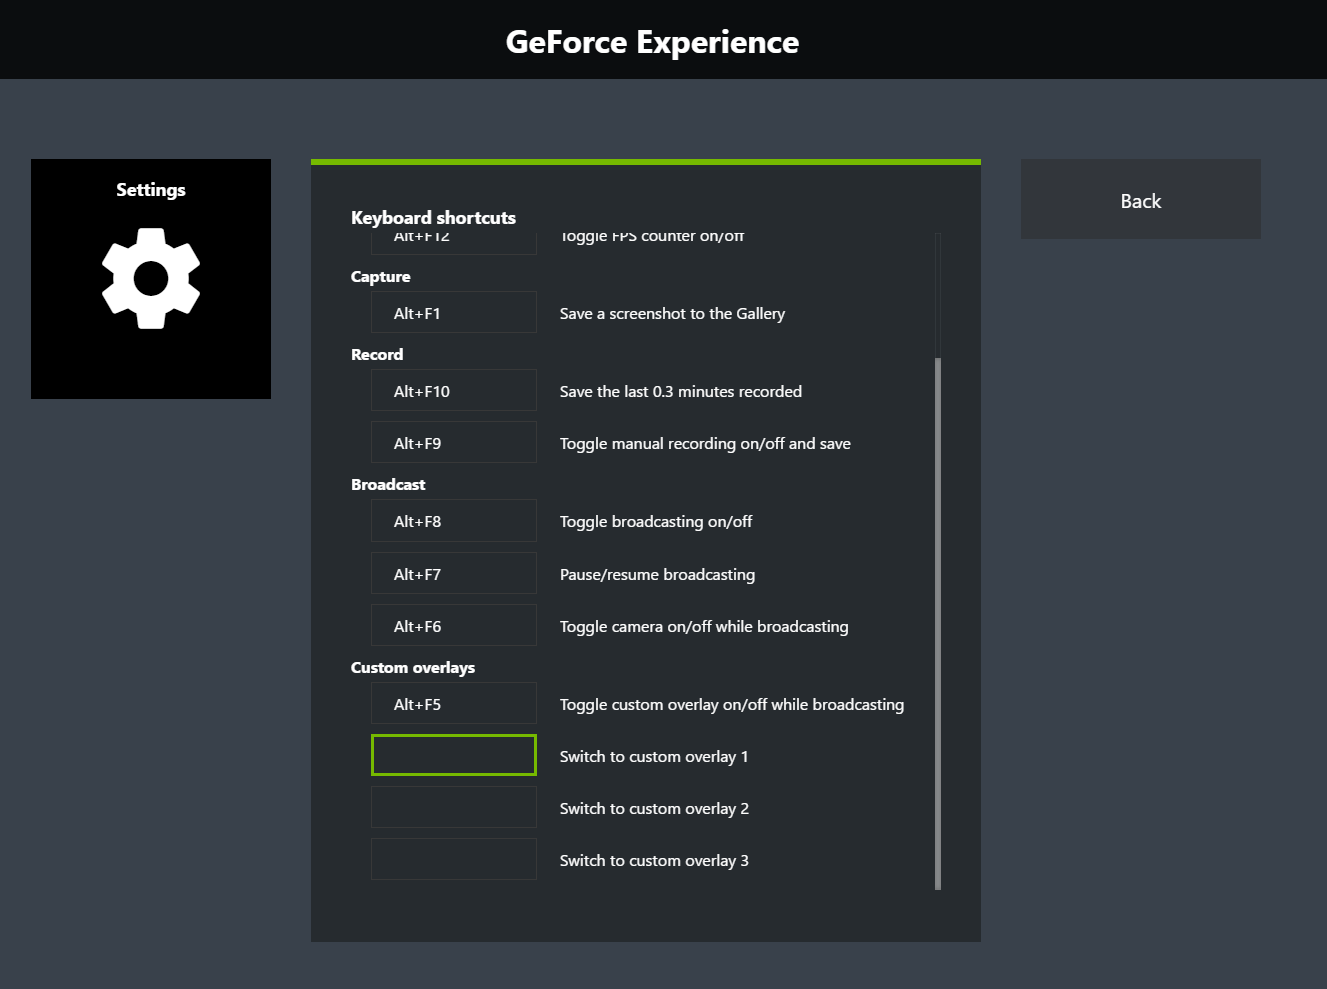
NOTE: you can add hotkeys to each overlay by navigating to settings -> Keyboard Shortcuts.
Starting a Broadcast
For this broadcast, we will be using Facebook Live as an example, although the steps to broadcast are similar for broadcasting to Twitch or YouTube Live.
Before starting a broadcast, ensure that you have properly set up everything first. See the One-time Setup and Connect to Broadcasting Services sections of this guide.
To broadcast using Facebook Live, for example,
- 1. Launch the PC game of your choice.
- 2. Once you are ready to broadcast, press Alt+Z to bring up the Share overlay.
- 3. In the Share overlay, click Broadcast, then click Start.
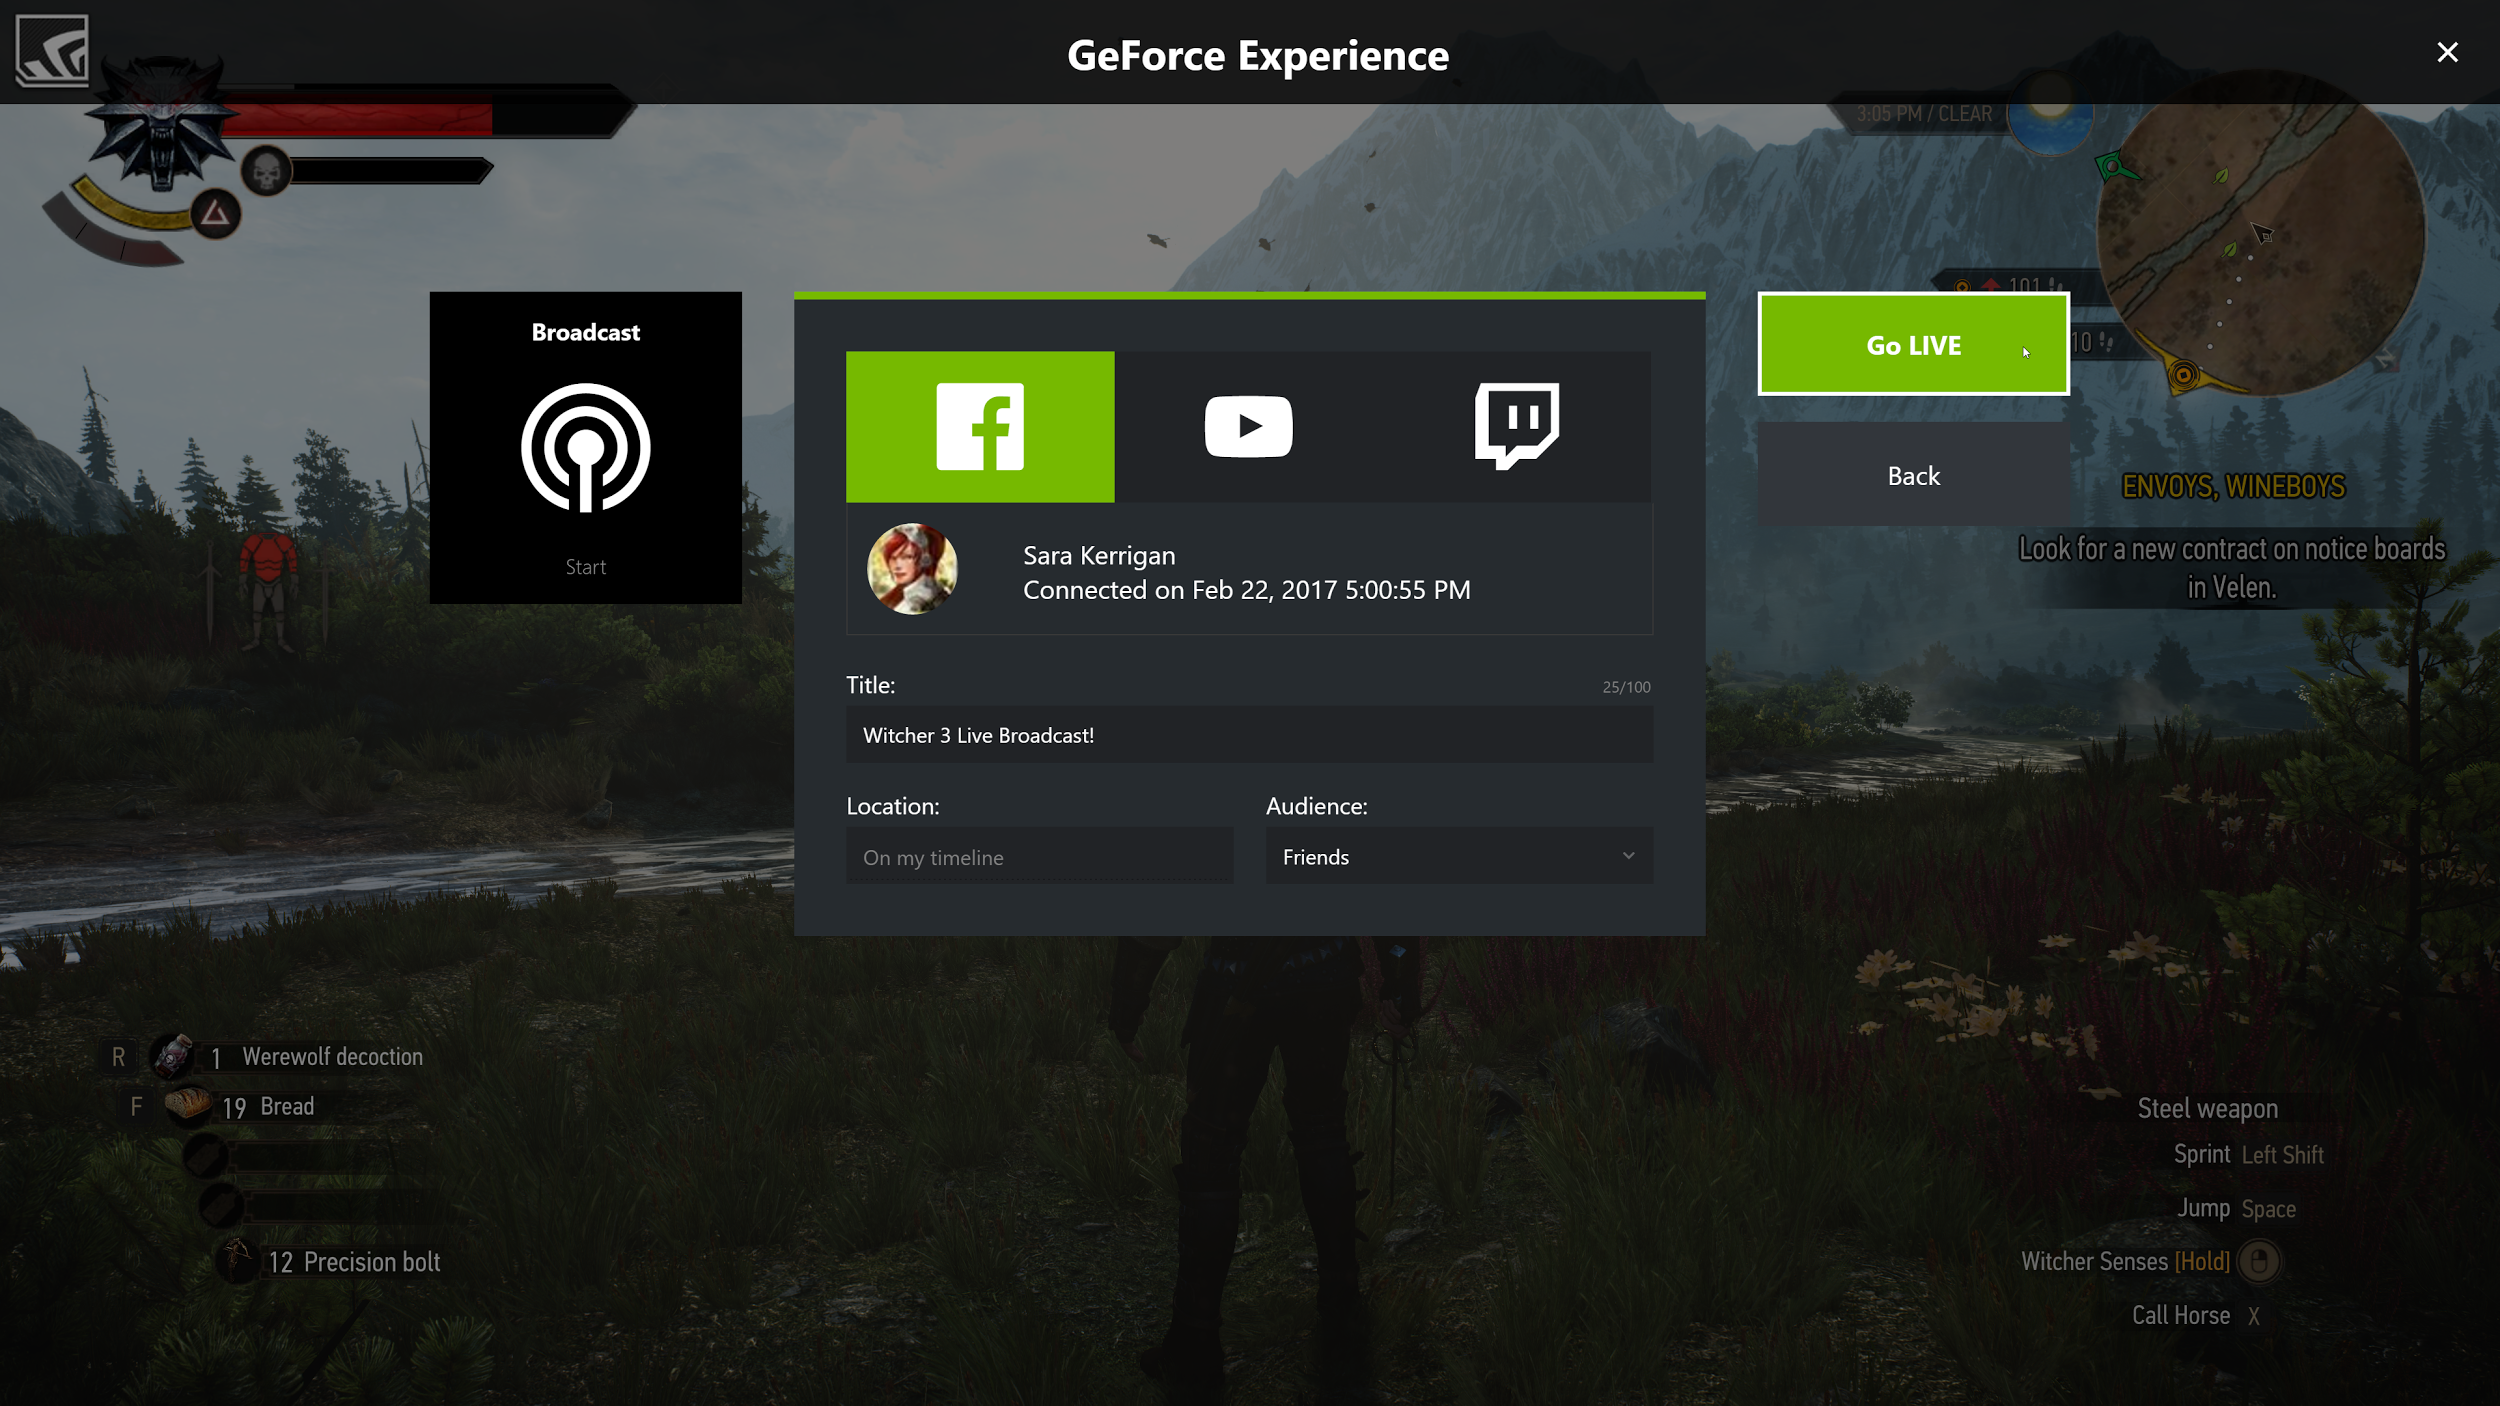
- 4. When the Broadcast dialog appears, select the service where you will live broadcast. For this example, Facebook has been selected.
- 5. Notice that the Broadcast dialog gives you the ability to set the Title, Location, and Audience of your broadcast. These options are specific to the service you selected in the previous step.
- 6. Once you are ready, click on the Go Live button to start your broadcast.
- 7. To stop your broadcast, press Alt+Z to bring up the Share overlay and click on Broadcast, then click Stop.
You are now live! Notice that when you are live broadcasting the broadcast symbol is now green and the status has changed to broadcasting in the Share overlay:
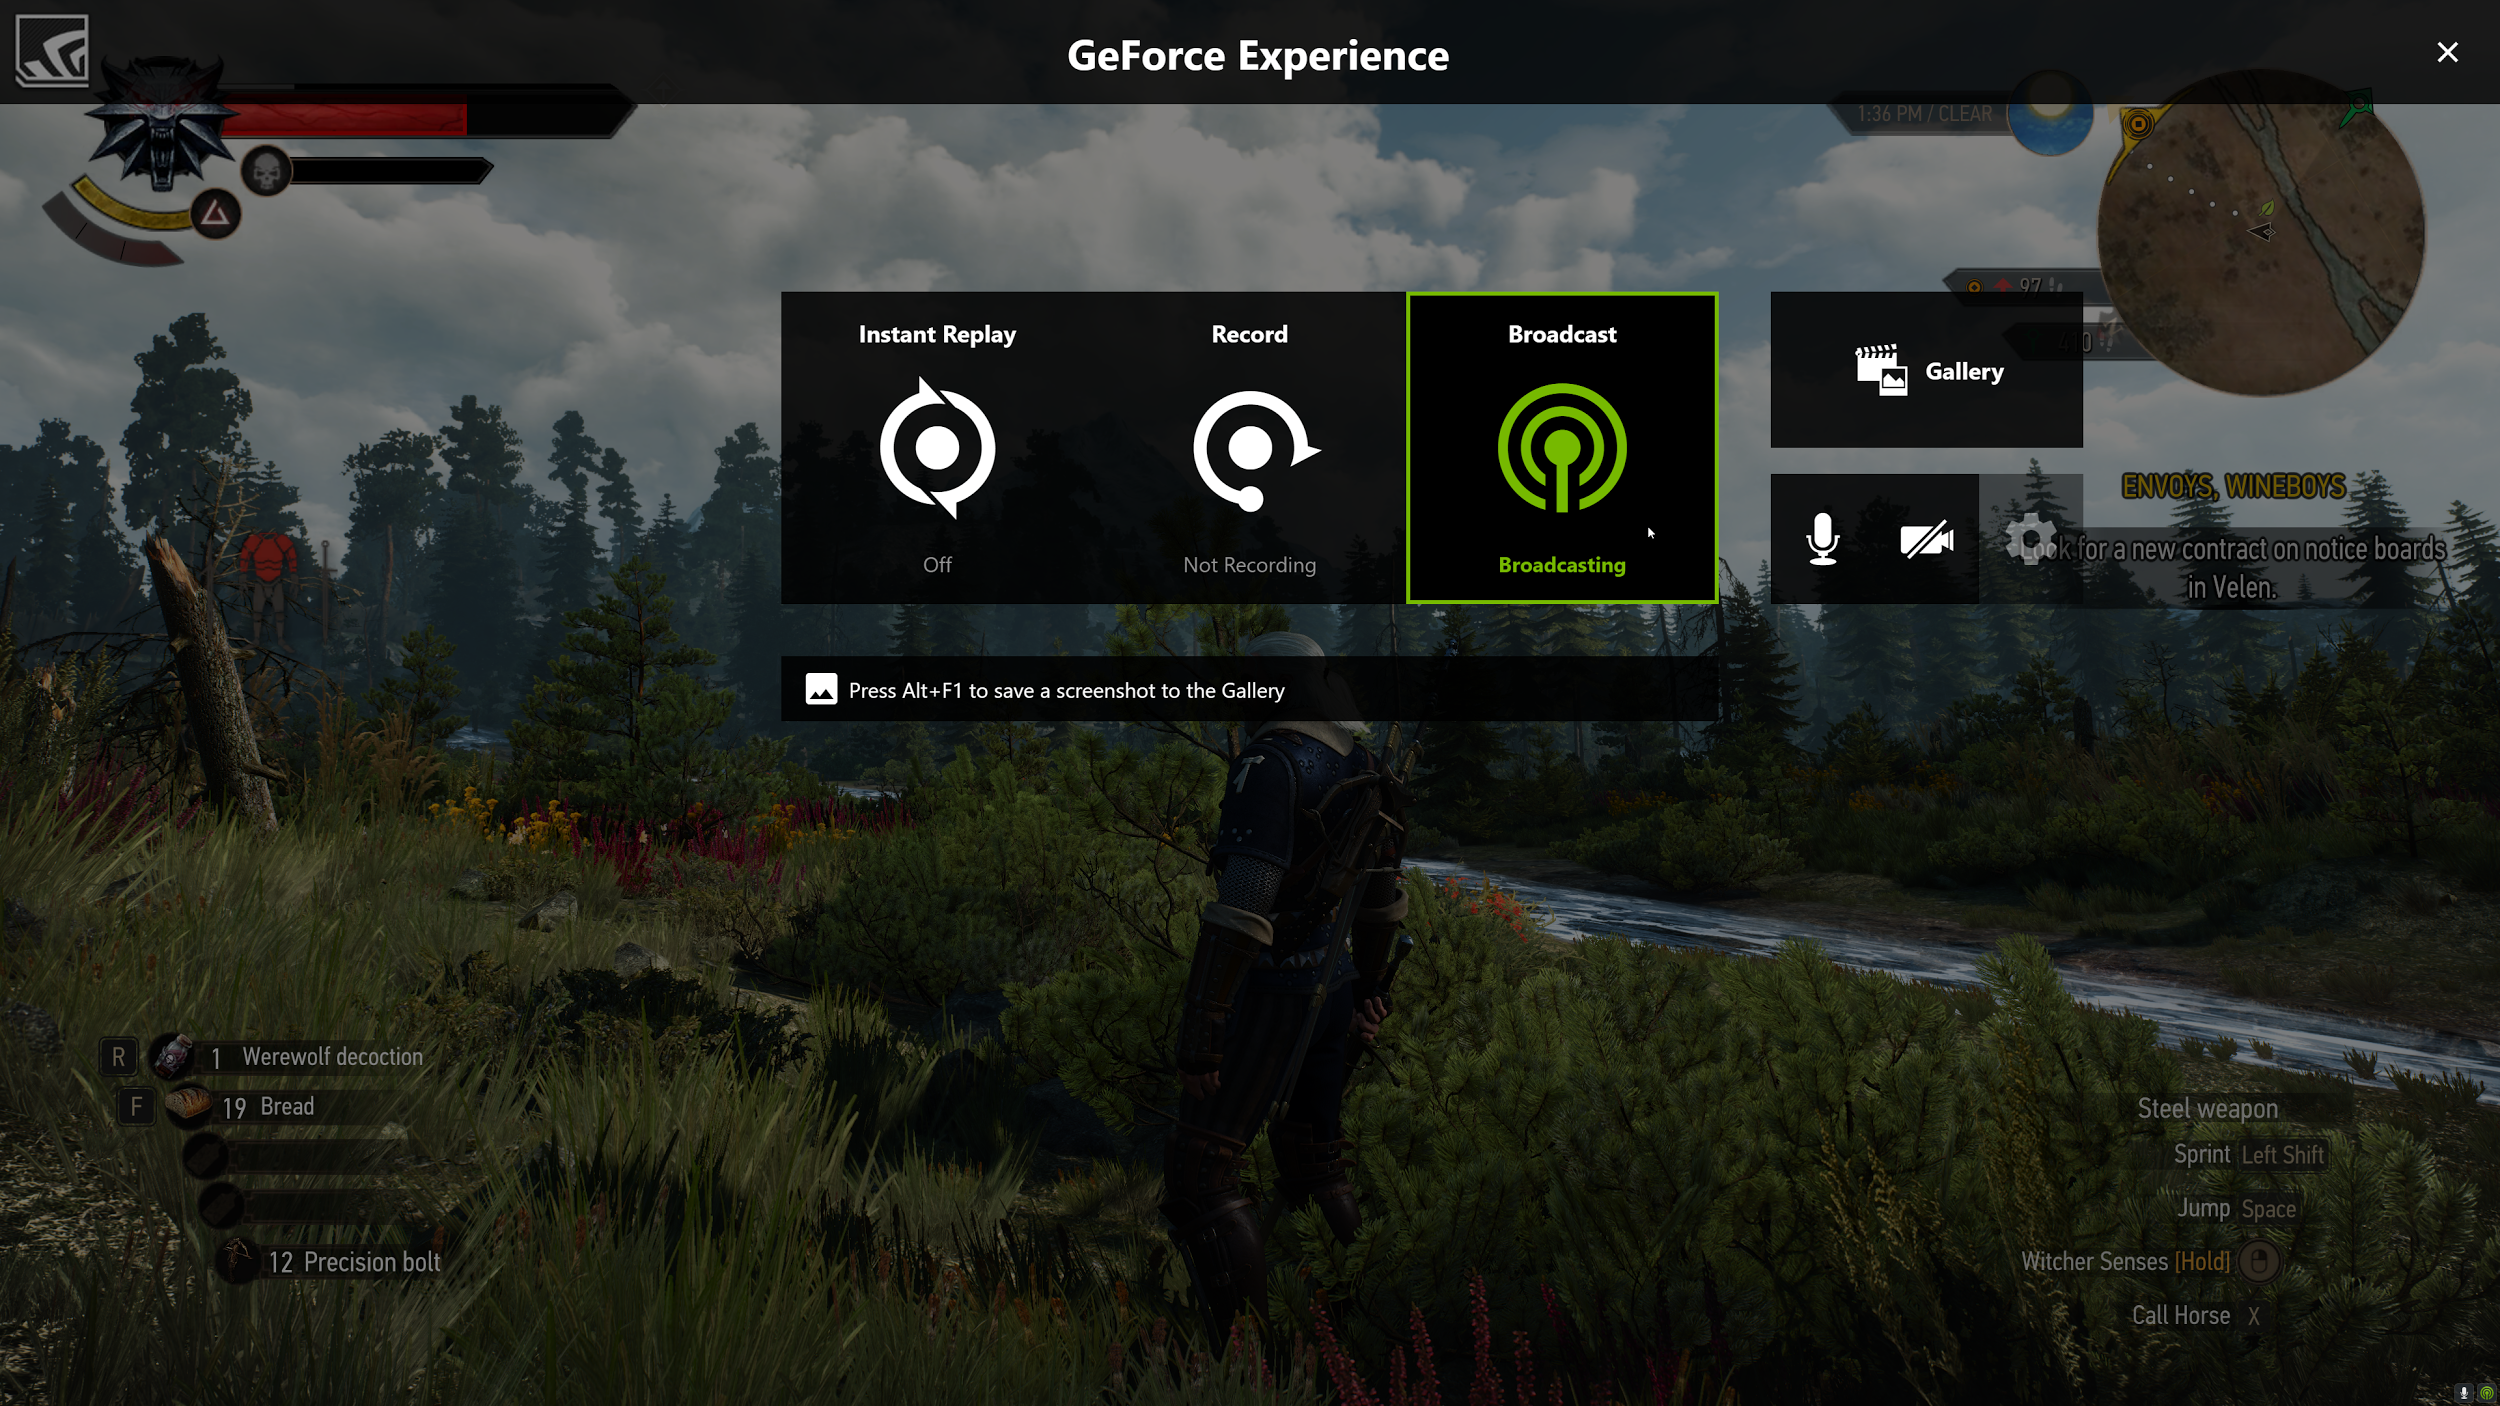
NOTE: If you want to customize your broadcast or make general settings changes, your broadcast must first be stopped.
NOTE: You can only live broadcast to one service at a time.
If you have any questions, please visit the GeForce Experience forum or reach out to NVIDIA support.