Using the most effective hardware is a critical step when putting together a PC, especially since there are so many different options out there. In this guide, we walk you through each of the most important decisions to make when creating your system specifications. We’ll also direct you to some awesome resources to lend a hand, such as trusted hardware review sites and system planning tools. Whether you’re building a home theater PC, a media server, a top-end gaming rig, a video editing beast, or anything in-between, we’ve got you covered.

Before running off and adding a bunch of hardware into your shopping cart, you’ve got to establish a clearly outlined objective for your PC. Otherwise, you might end up spending more money than necessary on parts you might not need. The best place to start is by deciding what your PC’s main duty is going be. The most common roles are for gaming, home theater usage, streaming media or file storage, and photo and/or video editing. Of course, there’s often room for crossover—a video-editing box will likely serve as a fantastic gaming rig. Nevertheless, your PC’s primary function should be what you tailor your parts to.
It can also help to elaborate on your main goal once you have it. For example, are you looking for a mid-range PC that’ll mainly tackle graphics-heavy FPSes? Is your video editing rig going to render 4K video more so than standard HD? Is your storage server mainly going to collect movies instead of photos and documents? Small details such as these go a long ways in determining which types of parts should get the majority of your attention.

Unless you’re swimming in cash, you’ll need to create a budget, and stick to it like glue. This is one of the most difficult steps, and you’ll discover that it’s remarkably easy to bust the bank. With the exception of tossing together a basic storage and media server or a low-end home theater PC, you’ll need to plan on about 600 bucks as a minimum. For mid-level gaming rigs, aim for $1,200. For top-tier video editing machines and high-end gaming boxes (such as those wielding mighty SLI setups), you’ll need around $2,000, and sometimes more.
It’s also important to include room for shipping costs and extras, such as new monitors, keyboards, mice, LED strips, additional fans, and gamepads (not to mention a new OS, if you go that route). The good news is there are plenty of decent, budget parts to choose from. It’s always better to aim for a lower number rather than jacking up your credit card and regretting it later.

It’s entirely possible that some of your current components (if you already own a PC, that is) will do the job just fine in your next machine. Avoiding a pointless upgrade is a terrific way to free up that oh-so-frustrating budget. There’s little reason to toss hard drives and SSDs, and adding smaller storage drives to ones you already have will absolutely save you money. For your RAM, motherboard, GPU, power supply, sound cards, and other parts, you’ll want to check out the tech forums and hardware sites to gather info on whether they’ll work for your next type of rig. Here are some of the handiest places to visit:
When seeking direct feedback from folks, be sure to list out your system’s main goal, and any of those small details that go with it (the more info you provide, the better). And obviously, you’ll need to include the exact specifications of your older hardware. If you’re unsure of what parts you have, download CPU-Z , and click on each of its tabs. For your PSU, you’ll need to pop off the side panel of your case and take a look at its label.

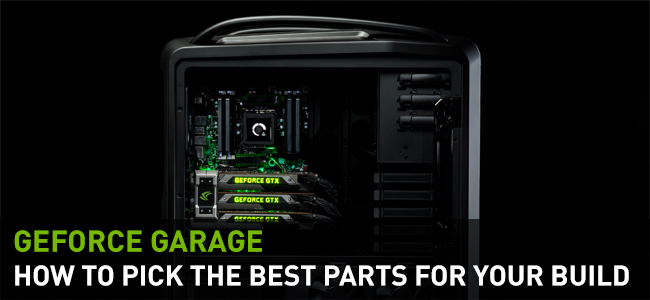
Each type of build goes best with a certain kind of case. For systems with a lot of parts, such as gaming rigs and intensive video/photo editing PCs, a full tower case is a smart choice—the extra space will pay off big time when routing those never-ending power and data cables, and it’ll be easier to keep your system cool (cramped, wire-infested areas tend to degrade airflow from fans, and installing liquid cooling loops in small cases can be rough).
That said, a spacious mid-tower chassis is usually fine as a fallback, especially if your budget is ready to crack. Just keep in mind that smaller cases can restrict upgrading to extra hardware, such as installing 3-way SLI. On the other side of the coin, a small form-factor is best for home theater PCs and storage/media servers, since you’ll likely want those nestled out of view, and taking up as little space as possible.
When it comes to deciding on a particular case brand or visual style, PCpartpicker is an invaluable resource; you can easily compare case types, ratings, prices, and more. It’s also a good move to check out case reviews from well-known hardware sites, to make sure the chassis you’ve got your eye on is truly up to snuff. For more details on that, take a peek at the section below.

Maybe you’ve got a list of desired parts dancing around your head, maybe not. Regardless, it’s in your best interests to read the reviews on all your potential hardware from trusted, reputable sources. This is doubly important if you’re not sure where to start—many places have awesome, pre-configured builds to choose from, which can really save you time and money. PCpartpicker.com is once again at the forefront—it has over 60 pages of suggested builds , each one covering a specific type of rig. You can also use reviews to make sure certain parts will play well with others, and to see what kinds of warranties and perks they offer (some manufacturers pony up free stuff with their gear, such as PC games and software suites). For reviews on specific components, here are some of the best folks in the business:

Getting your parts from the right store is just as important as doing your research through reviews. If you go with a cheap, unknown website or random brick-and-mortar outlet, you’ll risk receiving broken hardware, the wrong gear, or not being able to return anything if something happens to go screwy. If you’ve landed on a store already, double-check its customer feedback by going to Reseller Ratings and typing in its name. Speaking of Reseller Rating, they also have a long list of PC hardware/software selling options here . Take special note of the starred ratings next to each outlet, and click “See Reviews” to get more info. If you’re still a little wary, or if you’d like to streamline the process, take a look over the articles on some of the top stores below.
Once you’ve taken a deep breath, opened your wallet, and bought all your hardware, kick off your shoes and relax for a bit—you’ve earned it! After that, it’s time to unpack the parts, lay everything out, and start putting the system together. You might even consider making a build log , so you can show off the evolution of your wonderful new rig from start to finish. If you’re really itching to make your PC stand out, take a look at our GeForce Garage Cross Desk Series for how-to guides on some jaw-dropping mods and tweaks.
Got any recommended builds or suggested parts you’d like to share? Let us know in the comments below!