Featured News
How to Update Your Motherboard BIOS Using a Simple USB Stick
While we love meticulously cherry-picking the highest performing components for each new monster build, we know all too well that maintaining those components is equally important for peak performance over the long haul. Like most things, a strong foundation is key to the efficiency of any system and updating your motherboard's basic input/output system (BIOS) can do everything from adding new features and functions, support for new CPUs, squashing bugs, refreshing a corrupted UEFI environment, and much more.
The simplest way to update a BIOS is via USB, and today in the GeForce Garage we'll show you how. First, you need the right tools for the job.
Required Items
- Blank USB thumb drive (Bootable for DOS method)
- Rufus (other options include HP USB Disk Storage Format Tool, MSI DOS Tool, UNetbootin etc…)
- Updated BIOS + update utility
- Working PC containing main board/motherboard on which you would like to FLASH/Update BIOS
- Internet Connection to download BIOS update from manufacturer's company website
Locate Current BIOS Version
To update your BIOS, first check your currently installed BIOS version. It's easy to determine your currently installed BIOS. Restart your computer and press or hold down the appropriate key to enter your system BIOS. This is usually the
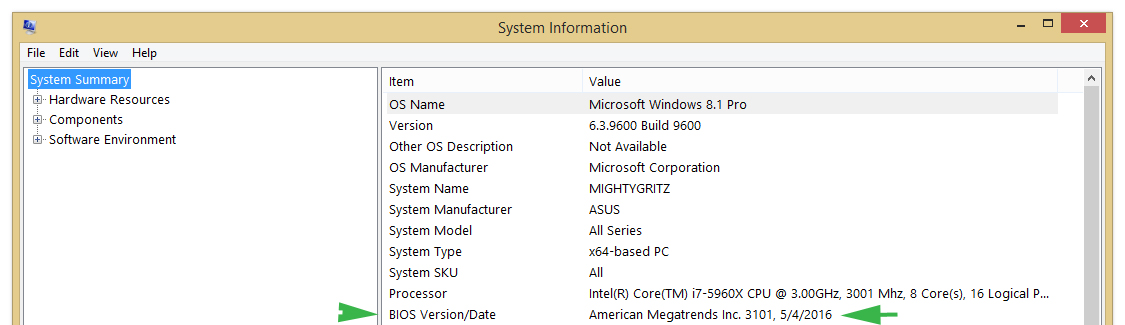
You can also locate your current BIOS while in Windows. Press Window Key+R to access the "RUN" command window. Then type "msinfo32" to bring up your computer's System Information log. Your current BIOS version will be listed under "BIOS Version/Date". Now you can download your motherboard's latest BIOS update and update utility from the manufacturer's website. The update utility is often part of the download package from the manufacturer. If not, then check with your hardware provider. If one is not available, you can still use the USB stick to update your BIOS in an UEFI environment, if such is a feature of your motherboard.
Updating BIOS - UEFI Method
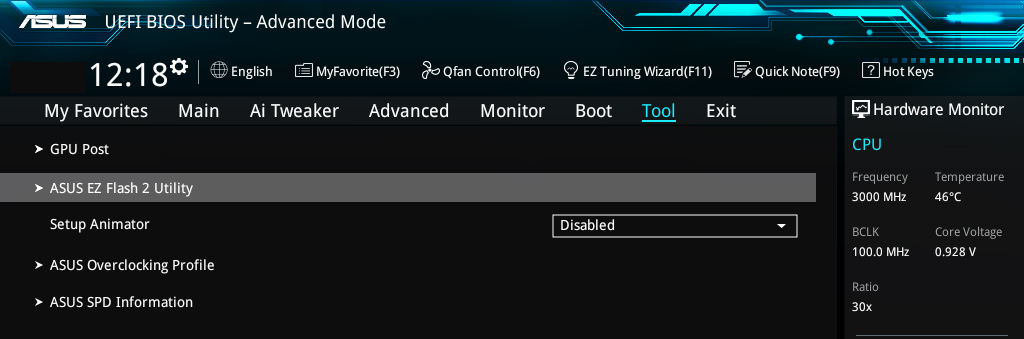
Take the BIOS update you downloaded from the manufacturer's website and place it on the USB stick. Leave the stick plugged in to your computer and then restart the system. Upon restart, enter the BIOS again using the method above. Use the boards UEFI interface to navigate to the board's BIOS update section usually dubbed "EZ-Flash," "M-Flash" or the like. Once started, you will be asked to navigate to the BIOS file. Select your USB stick and follow the onscreen instructions to complete your BIOS update.
Updating BIOS – DOS Method
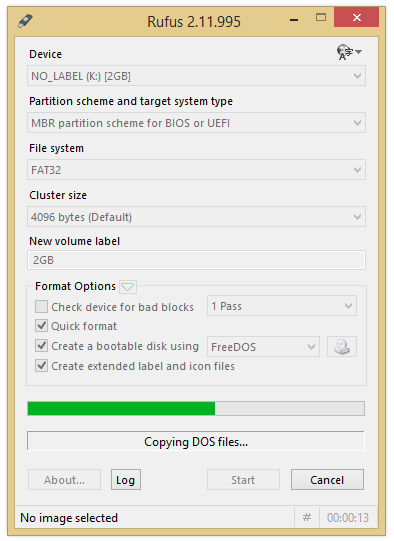
To update your BIOS via DOS, you will need a bootable USB. Creating one is easy enough. We're using Rufus, but you can use any of the options listed above. Rufus formats your USB into a FAT32 file format by default, targeting UEFI or DOS system types. It will create a bootable USB using MS-DOS or FreeDOS depending on your preference. You can also create one from an existing ISO image if you would prefer. Press
Take the updated BIOS version and BIOS update utility you downloaded from the manufacturer's website and copy them to the newly bootable USB stick. Leave the USB stick plugged in to the computer. Then restart the system. Press or hold F11 as the system restarts. This will take you to the Boot Selection where you can set a boot device. Make sure you set your bootable USB stick as your boot device and then press
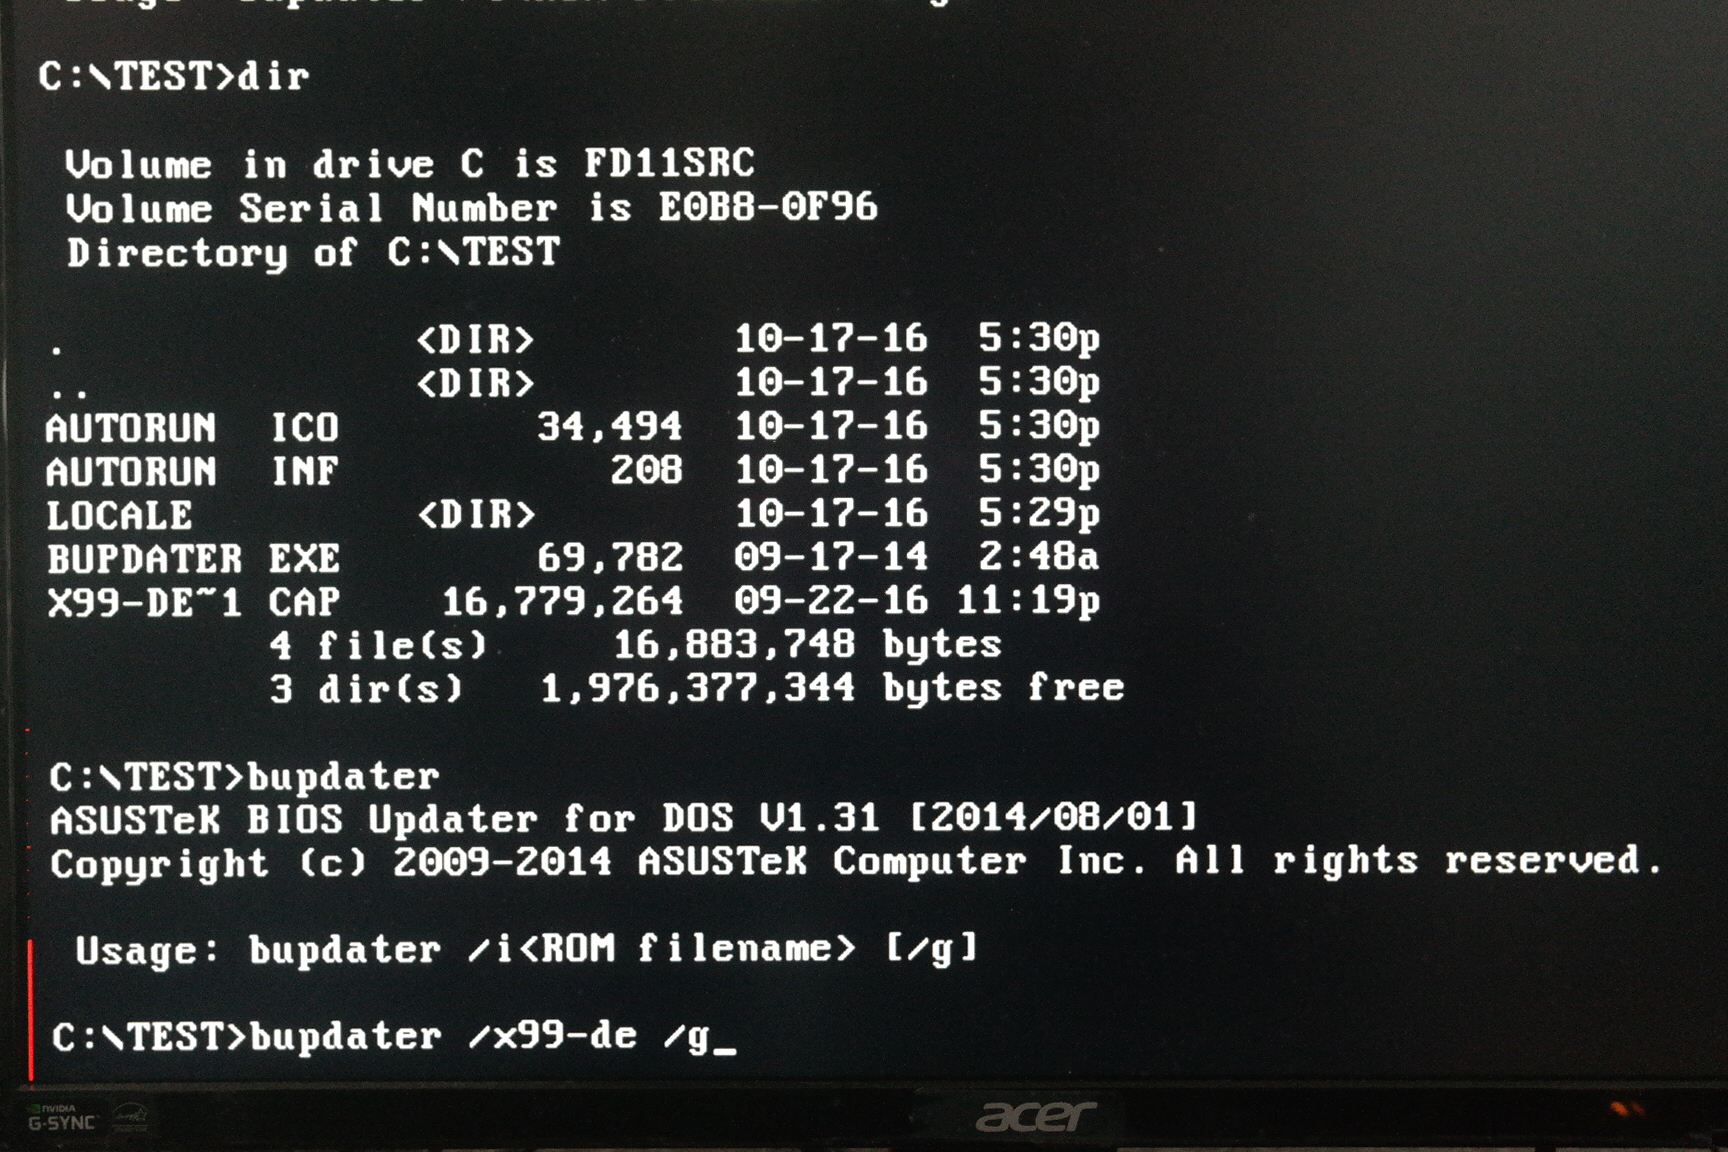
Once the prompt appears, you will need to type the exact name of your BIOS update utility or flash tool such as "bupdater" or "afudos" or "awdflash." If your files and update tool are located within a different folder, such as ours seen in the image above, then you need to first access that folder using the command "cd
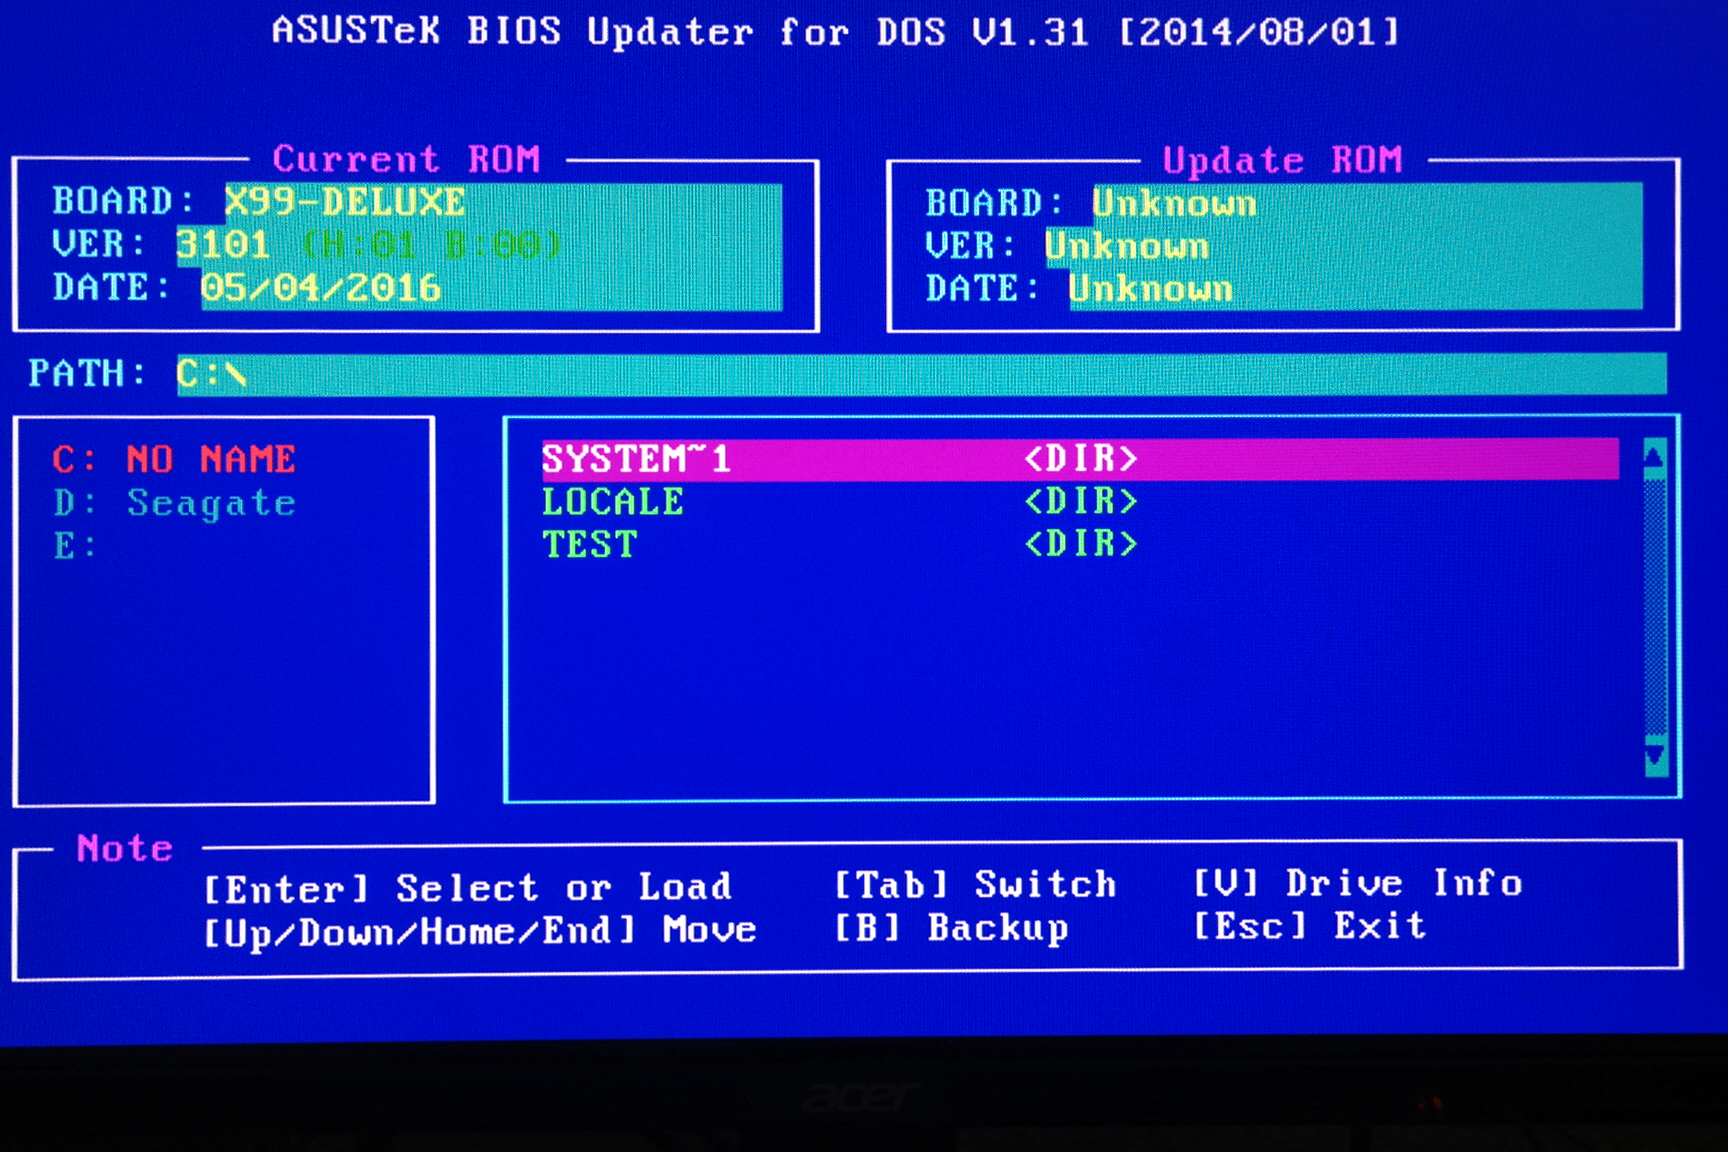
After a check for compatibility the update should be ready. Click
We're Done!
Remember to back up your existing BIOS before beginning. This will be handy if you run into issues during the update or if you do not like the performance or features that come with the updated BIOS. Not all new updates are preferred. Ultimately it will be up to you to decide if your system will benefit from an updated BIOS. Nonetheless, you're now armed with a slick and efficient way to update your BIOS using a simple USB stick.