A lovingly cared for engine keeps a car performing at its best. It’s not much different when it comes to your computer. If you clean your hardware and nurture your software, you can expect smoother gaming sessions and fewer system errors. And it doesn’t take much effort to keep everything in check; all you need to do is follow the advice below and hammer out the tasks at the appropriate times. Performing all of these steps isn’t mandatory, but we recommend tackling each one—it’ll only make your life easier in the end.
CRITICAL TASKS
Each step below is essential for keeping your rig at maximum strength. If you’re really strapped for time, be sure to complete these projects above all others.

Tools needed: NVIDIA GeForce Experience (NVIDIA GPUs only)
How long: 10 minutes
How often: Whenever prompted(or monthly, if checked manually)
Updating GPU drivers these days is comically simple, and if you like playing games as fast and as stable as possible, it’s incredibly important. For those rocking NVIDIA video cards, just mosey on over to GeForce.com and download GeForce Experience (if, for some bizarre reason, you don’t already have it). After that, the program will automatically alert you when a new driver is ready. Just make sure to actually install the driver when that happens. Alternatively, you can check for NVIDIA drivers manually here.

Tools needed: Canned Air
How long: 10 minutes
How often: Monthly
Lightly dusting out your gear is the easiest, fastest, and most effective chore ever, but oddly enough, it’s often neglected. All you need to do is shoot a few short, compressed bursts of canned air (in a well ventilated area) into the inside of your case, keyboard, and mouse. Set a recurring time and day to make sure this gets done, such as after your Friday night World of Warcraft raids. Don’t worry about taking out GPUs, RAM, or storage drives—that comes later.

Tools needed: Antivirus suite (MSE, Kaspersky, etc.)
How long: Varies, but about 1 – 2 hours average
How often: Monthly, or enable automatic scans
As long as your antivirus protection is on and active, you don’t need to worry too much about weekly or daily scans. Typically, if a virus is detected, your software will alert you as soon as it happens and you can take action immediately. But that doesn’t mean your shield against harmful files is bulletproof. Take the time at the end of each month to run a full system scan. Many of the programs out there let you auto-schedule the timing, so you won’t even need to worry about hitting start.
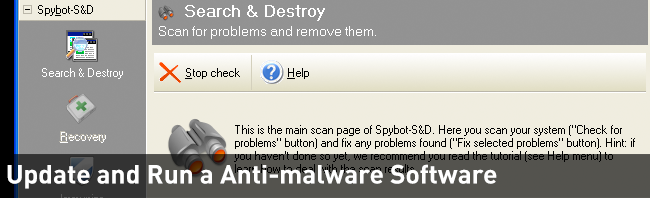
Tools needed: Anti-malware programs (Spybot Search & Destroy, etc.)
How long: Varies, but about 15 – 30 minutes average
How often: Weekly
If your antivirus suite doesn’t have any anti-malware options, you’ll want to download a free program, such as the trusty Spybot Search & Destroy. While viruses can be rare, malware will clog up and stymie your PC in no time flat (browsers hijacks are especially annoying). Just be sure to check for updates and install any new versions before running each system sweep. Don’t ignore this task—malware can creep in from everywhere, even from seemingly legitimate websites and apps.
HELPFUL TASKS
These steps aren’t as paramount as others, but knocking them out at the right times will result in a PC that’s as vigorous and clean as the day you brought it to life.

Tools needed: Active internet connection
and a lot of patience
How long: 5 – 10 minutes for each program
How often: Weekly
We admit it, this one is annoying. You’ve probably got dozens and dozens of high-use software on your machine, such as Adobe Flash, Adobe Reader, Java, Chrome, Steam, and Windows Updates, to name but a paltry few. As tempting as it is to ignore these updates—of which there are many—downloading and installing all the latest versions protects your PC and keeps it quick. Yeah, it’s likely that every other day a message will pop up and prod you for attention (we’re looking at you, Firefox), but the more you toss these updates aside, the more you’re at risk for exploits and instability.

Tools needed: External storage drive or backup software
How long: Varies greatly based on file sizes and backup method
How often: Weekly
Always be backing up. Always be backing up! Even a champion of a PC can suffer from a failed hard drive, corrupted OS, or an unbootable partition. As awful as it sounds, these things happen, and sometimes without any warning. The good news is it really doesn’t take much to protect your games’ save files, important documents, and more. Manually saving your files on an external drive is the simplest method, but there are tons of fantastic programs as well (most of which you can set to backup automatically on a schedule).

Tools needed: ASUS GPU Tweak, 3DMark, Intel XTU
How long: 30 minutes
How often: Every six months
Your video card and processor have to stay frosty to function, especially when stressed. Intel’s handy XTU software has built-in CPU benchmarking and temperature monitoring, and you can use ASUS’s GPU tweak to record your video card’s info while 3DMark runs its course. Anything over 91° C for either part (while being benchmarked) means trouble, so you should consider reapplying thermal paste on the CPU or installing more system fans near the video card if that’s the case. Liquid cooling and third-party coolers aren’t bad choices either, if you can afford them.

Tools needed: Canned air, alcohol wipes, magnetic tray, screwdriver, microfiber cloth
How long: 1 hour
How often: Every six-to-twelve months
This is the biggest project on the list, but deep cleaning your PC will do wonders for its longevity. Unplug every cable from the back and front of your rig and remove all of your add-in cards, RAM, and storage drives. (The PSU can stay put.) Use the microfiber cloth to wipe down the case and the surfaces of all your other parts. Take the canned air and blast out any of the case’s dust filters. Lastly, use canned air to thoroughly dust out the motherboard, GPU, and any accessories. For stubborn spots, such as fan blades, clean off the grime with alcohol wipes. Then just pop everything back inside the case and you’re in the clear!
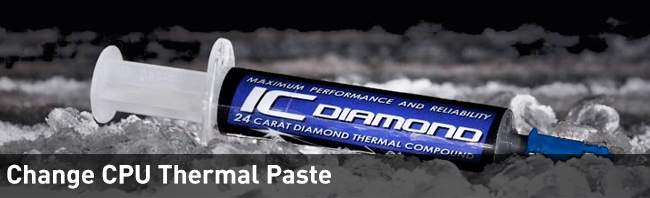
Tools needed: Alcohol wipes, Quality Thermal Paste
How long: 30 minutes
How often: Every one-to-two years (depending on TIM used)
Whether you’re overclocking or not, it’ll do your processor good to reapply its thermal interface material (TIM) every year or two. This is particularly true if you used the stock thermal paste that came with the hardware, or use short-lived but extremely efficient TIM like Coolaboratory Liquid.
Removing the old gunk is pretty simple—unplug your PC and pop off the cooler by following its manual (leave the CPU installed in your mobo). Then just take an alcohol wipe or two and clean off the existing paste. After that, push out a pea-sized portion of new thermal paste into the middle of the CPU (don’t glob it on, too much is just as bad as too little!) and reapply your cooler. For further tips on this process, check out this old, but still relevant article about applying TIM, and this equally relevant roundup evaluating the performance of 39 TIMs.
Got any maintenance tips of your own? Let us know in the Comments!