NVIDIA Broadcast App: Setup Guide
About NVIDIA Broadcast
NVIDIA Broadcast transforms any room into a home studio, upgrading standard webcams and microphones into premium, smart devices through the power of AI. Improve the video and audio quality of your livestream through AI capabilities such as microphone noise and room echo removal, virtual background, auto frame, and video noise removal. With dedicated AI processors called Tensor Cores on NVIDIA RTX GPUs, the AI networks are able to run high-quality effects in real-time.
- Download: https://www.nvidia.com/broadcast-app/
- Support: https://www.nvidia.com/broadcast-app-support/
- FAQ: https://www.nvidia.com/broadcast-app-faq/
- Help us train the AI networks: https://www.nvidia.com/broadcast-feedback/
Requirements
| GPU | NVIDIA GeForce RTX 2060, Quadro RTX 3000, TITAN RTX or higher |
| RAM | 8GB RAM or higher |
| CPU | Recommended: Intel Core i5 8600, AMD Ryzen r5 2600 or higher |
| Driver | NVIDIA Studio Driver 570, Game Ready Driver 570, NVIDIA RTX Enterprise Driver 570, and above |
| Operating System | Windows 10 64-bit |
| Connection | Internet connectivity during installation |
Quick-Start Guide
NVIDIA Broadcast creates virtual devices on your Windows PC that take your microphone, speaker or webcam output and apply an AI effect to it, enhancing them in different ways. You want to select this virtual device (called NVIDIA Broadcast) in your live streaming or video conferencing apps.
Installation:
- Download the App.
- Install it. During the installation, the app will download the necessary files for your system. The download requires ~3GB of additional storage so make sure you have good connectivity and enough storage space.
Setup:
- Set up NVIDIA Broadcast:
a. Open the NVIDIA Broadcast app.
b. Navigate to each device and select the input device at the top.
c. Select the effect you want to apply.
i. You may combine multiple effects.
ii. We recommend that you only turn on the effects you need to avoid consuming unnecessary GPU resources.
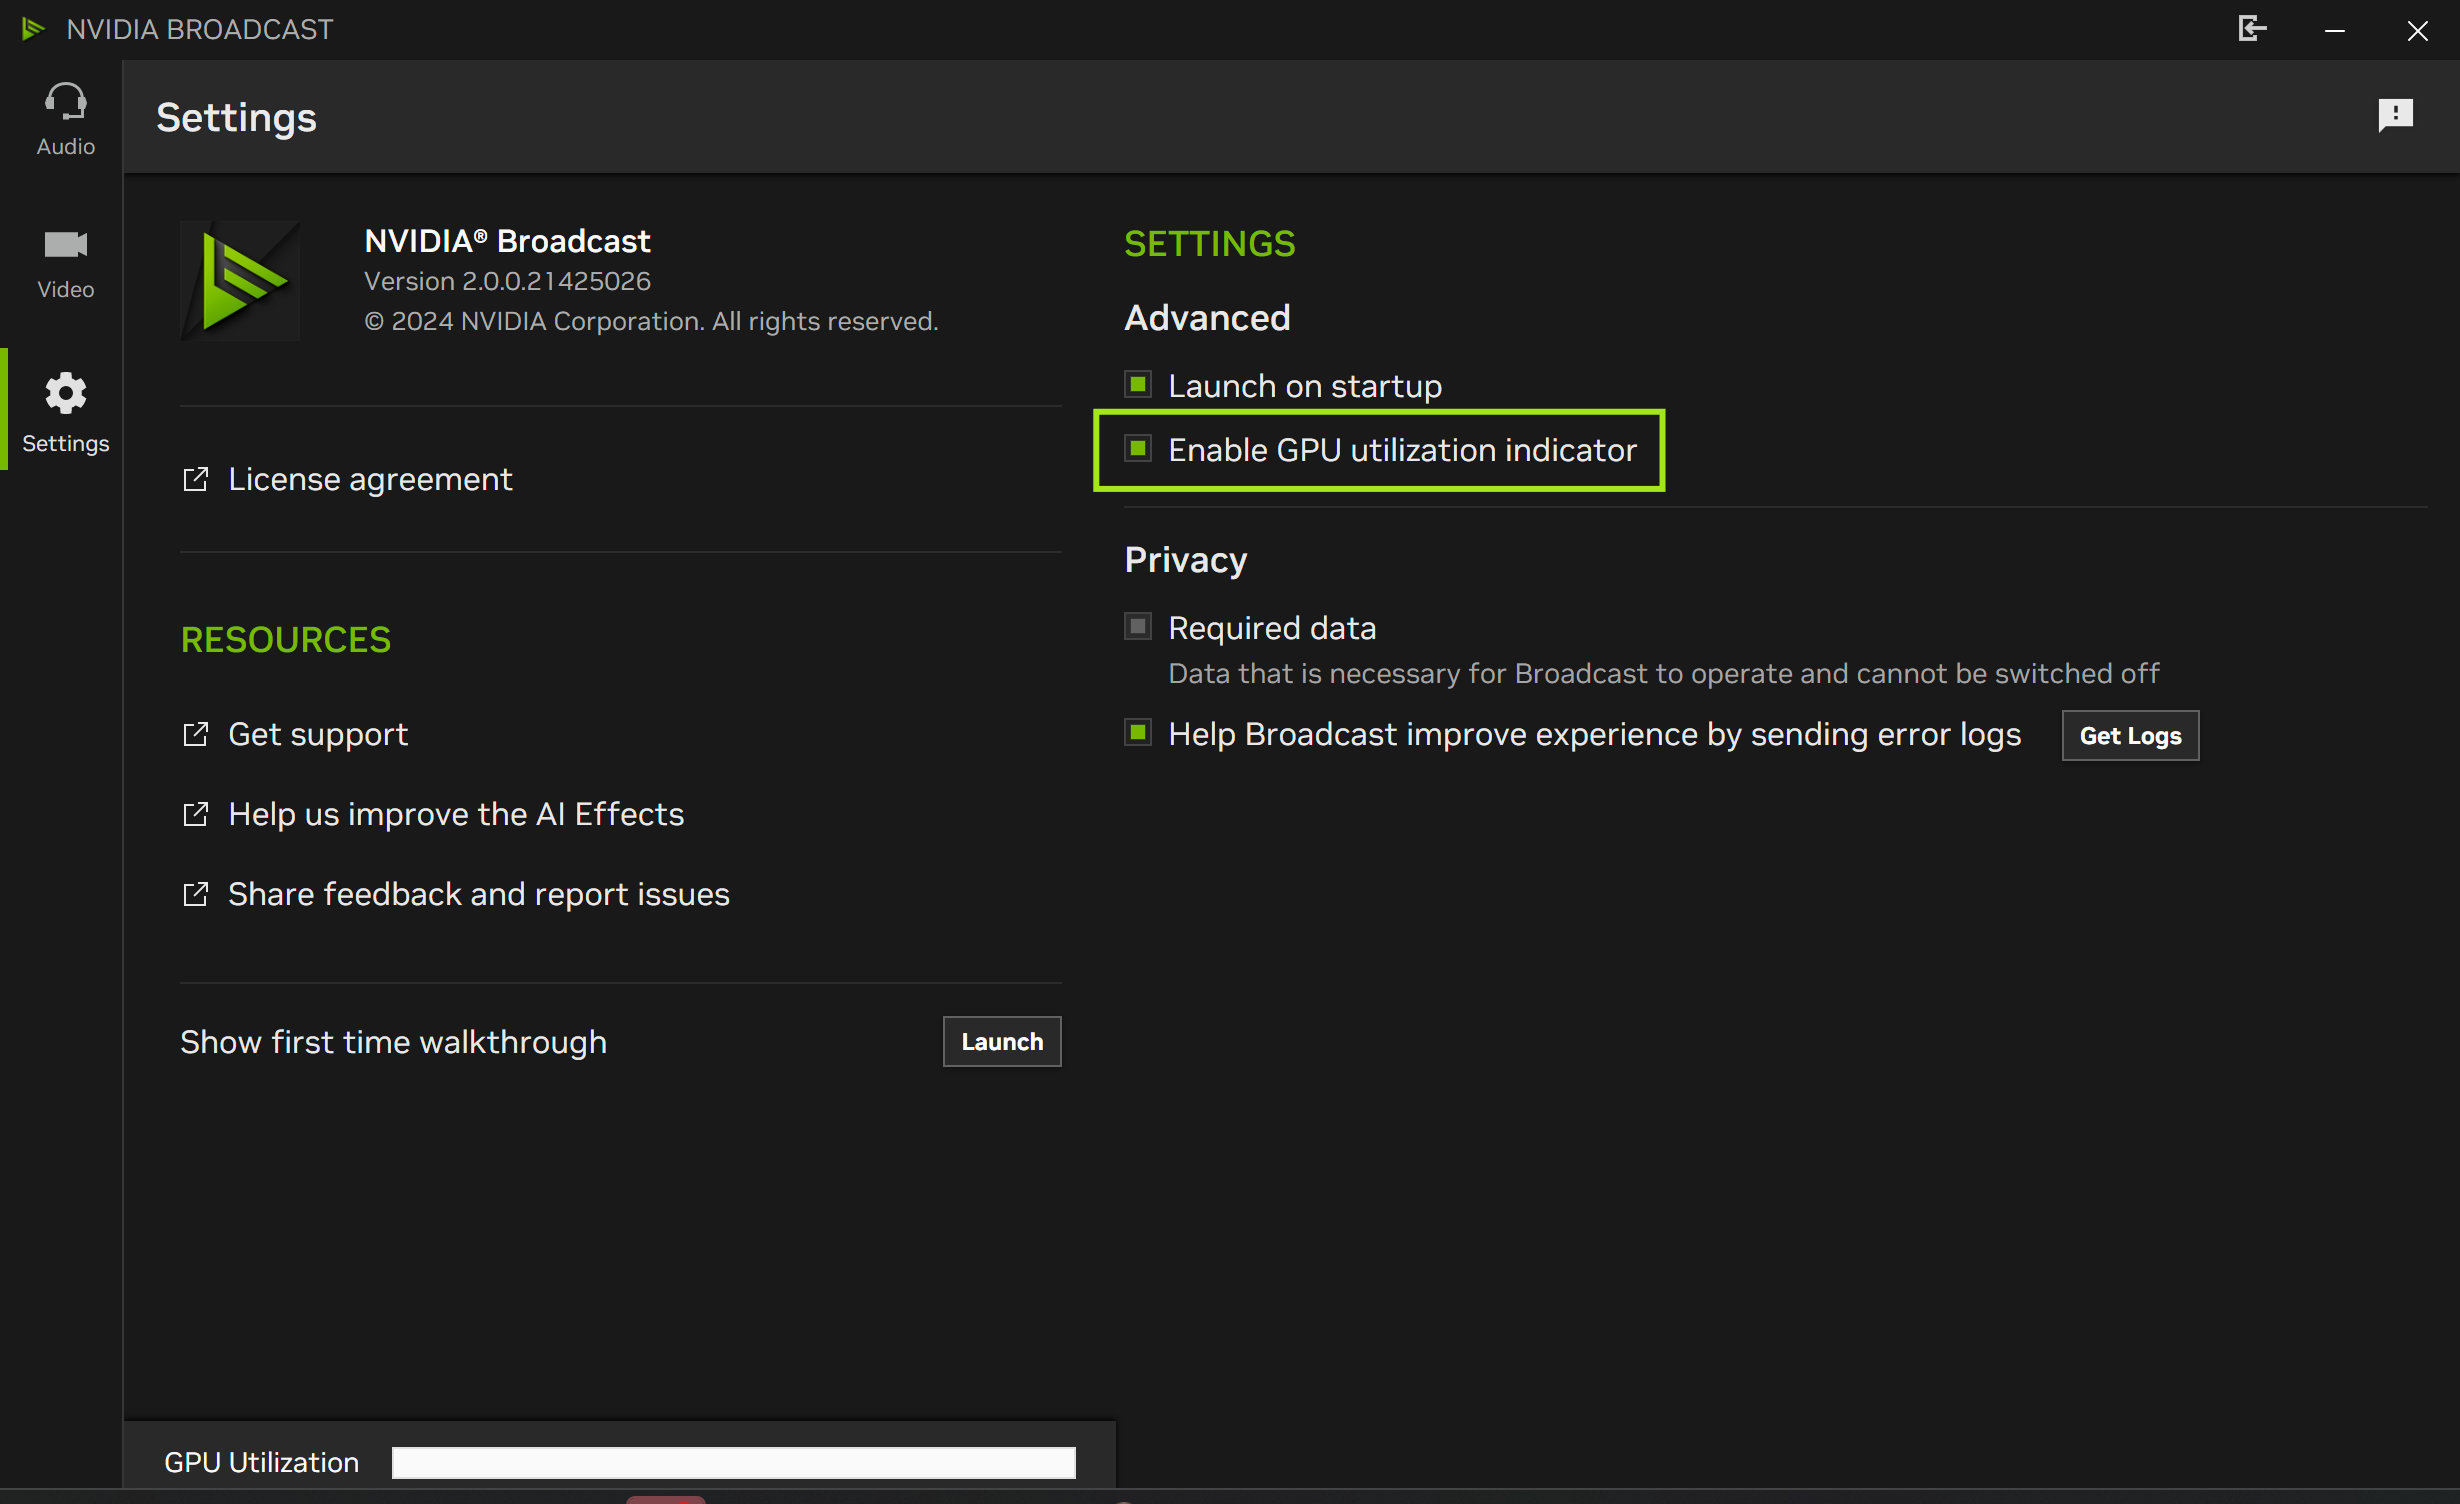
iii. To check GPU usage for the effects you’ve enabled, enable the GPU Utilization indicator in “settings”.
d. For some effects you can adjust the settings of the effect with the sliders or options under it
2. Review your Windows Sound Settings
a. Go to Windows Settings > System > Sound and make sure your headset or speakers are set as the Output device. You don’t want NVIDIA Broadcast Speakers as default, as you would filter out all system sounds.
b. You may select the NVIDIA Broadcast Microphone as input. This way you don’t need to configure it per app. In this case, make sure you select your actual microphone in the NVIDIA Broadcast app.
3. Configure your live-streaming or video conferencing apps:
a. Open the app that you want to use
b. Go to Settings, then navigate to the Audio and Video sections
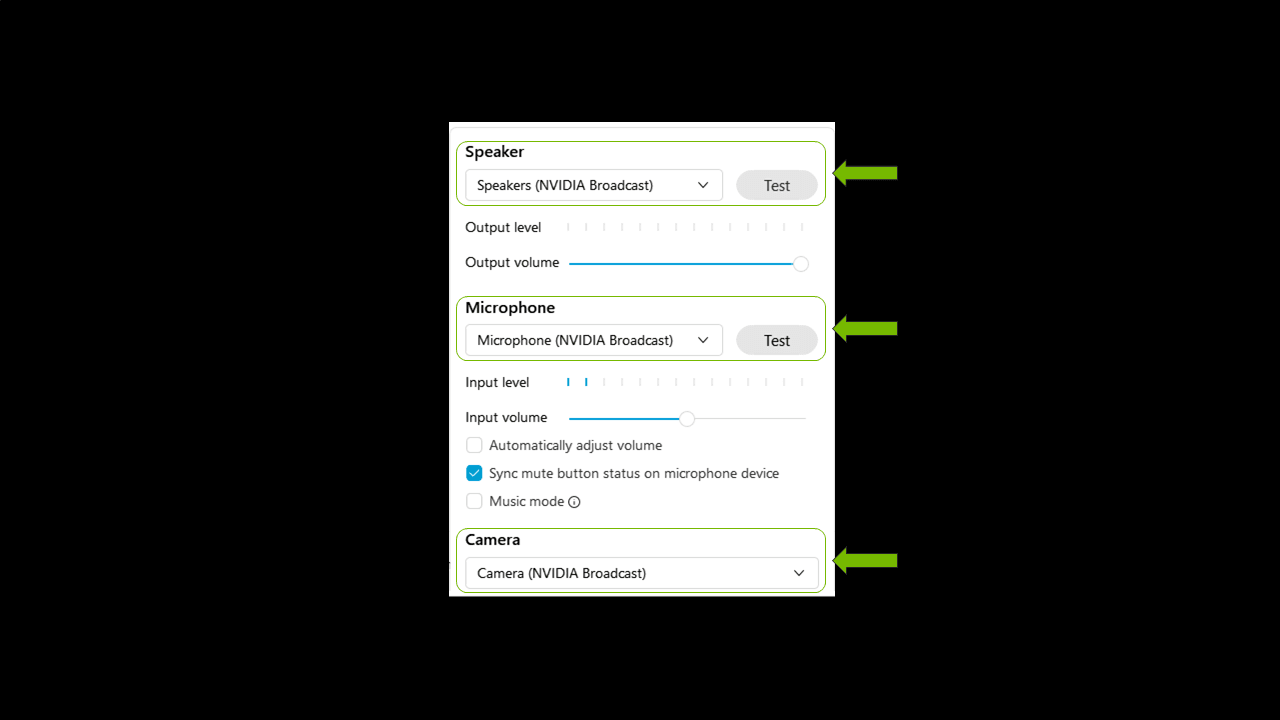
c. Select the NVIDIA Broadcast devices:
i. Microphone (NVIDIA Broadcast)
ii. Speaker (NVIDIA Broadcast)
iii. Camera (NVIDIA Broadcast)
For more information on how to configure a specific app, click here.
You are good to go!
Advanced Settings:
- About Multi-Effects: You may combine AI effects per device.
- Running more than one effect will increase the GPU usage of the app.
- Not all effects can be combined. For example, Studio Voice cannot be combined with microphone background noise reduction.
- Avoid issues with third party filters: Applications can sometimes apply effects, such as noise cancelling, similar to those in NVIDIA Broadcast. Applying an effect twice will often result in the effect not working correctly. We recommend disabling such effects in your app and drivers.
- Keyboard Shortcuts: You can control when camera, mic, and speaker effects are enabled or disabled by pressing assignable Keyboard Shortcuts. Go to Settings to enable Keyboard Shortcuts and edit their keyboard mapping. Each time a shortcut is pressed, it enables or disables the last selection. Optionally, Elgato Stream Deck users can leverage their devices to control the Keyboard Shortcuts. Simply download and install the plugin from the Elgato Marketplace here and follow the instructions.
- Changing Resolution. If you wish to adjust the camera resolution you need to do so with NVIDIA Broadcast. In your streaming/video conferencing app you should leave settings as default, or match your NVIDIA Broadcast settings. If you change the resolution of your webcam in NVIDIA Broadcast, you will need to reload the camera in your app (i.e. turn it off and on, and adjust the resolution if it’s not set to Auto).
- If you connect/disconnect microphone/speakers often: If you change your microphone/speakers often (i.e you plug and unplug them), you can select (Default device) as your inputs in NVIDIA Broadcast. This will automatically use any microphone/speaker that Windows detects as the new default as inputs, so you don’t have to keep configuring them every time.
- Setting NVIDIA Broadcast as the default device in Windows Sound settings: NVIDIA Broadcast can be selected as your default Microphone in Windows so that you don’t have to change it in every application. If you opt to do this, make sure that in NVIDIA Broadcast you select your actual microphone. Do not do this for Speakers, as you would start filtering all audio coming through your device, such as videos and music.
- Wide display mode: NVIDIA Broadcast now supports two sizes - a vertically oriented display, ideal for users who want an app with a small footprint for easy access, or a wider display mode for easier navigation and a larger video previews.
- To expand or collapse the app view, click on the expand/contract button on the top windows bar.


How To Test
NVIDIA Broadcast has a test feature embedded in the app:
- To test your microphone, record yourself speaking with a background noise. You can now play the file and turn the effect on and off, or adjust the strength, to see how the effect changes the audio.
- To test your speakers, we have included several recordings that you can listen to while turning on and off the effect to see the change. You can also adjust the strength of the effect.
- To test your webcam, just use the preview window.
- The preview window has a new “before/after” feature. This lets you compare the raw camera output with NVIDIA Broadcast output with AI effects applied. To enable, click on the side by side icon in the camera preview window
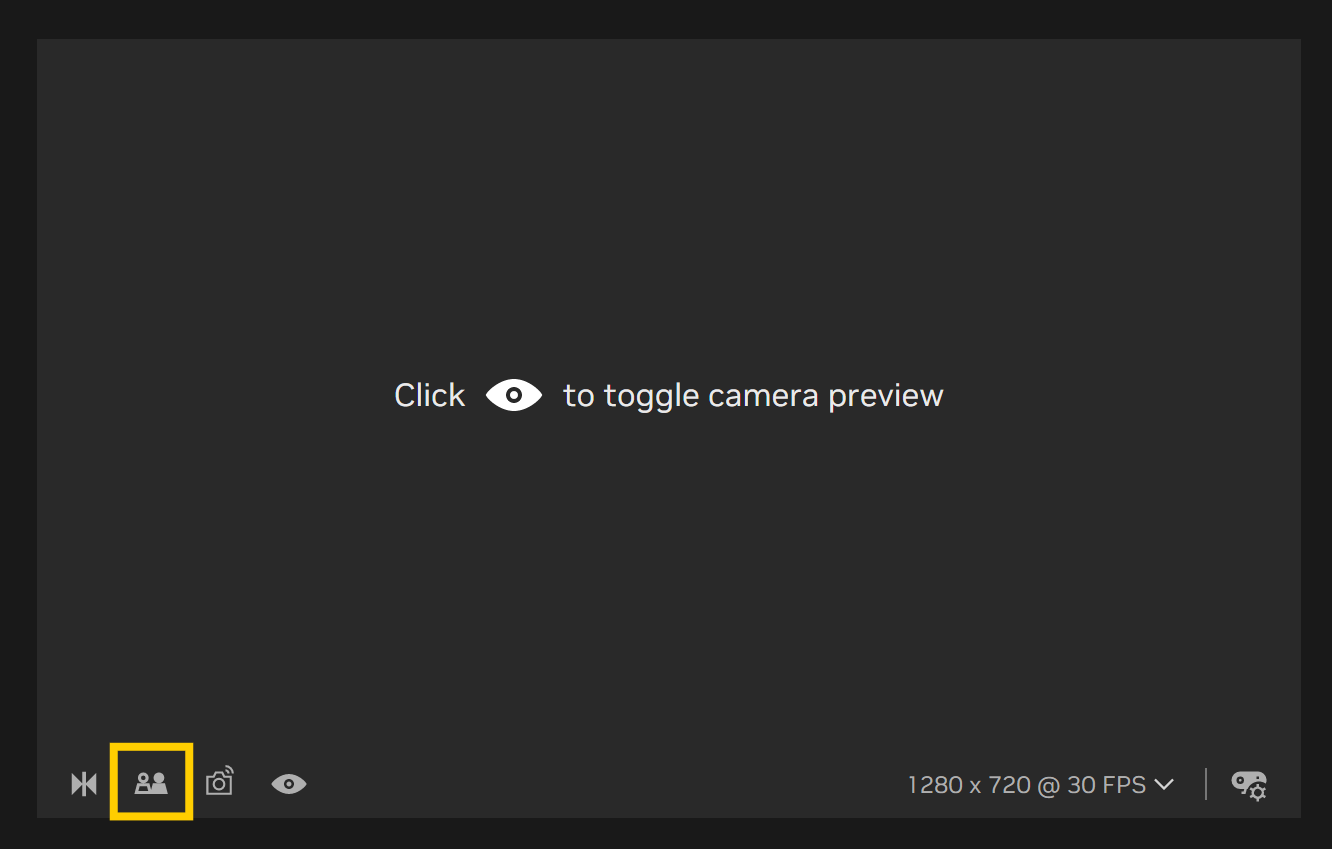
- Note: Make sure you disable this feature before broadcasting or joining video calls, or your audience will also see the side by side video.
Give us your Feedback!
NVIDIA Broadcast Studio Voice and Video Noise Removal are currently in beta. Version 2 introduces a refreshed user interface. Please share your feedback to help us continue improving.
- If you encounter any issues, please report them here.
- Help us train the AI network
Configuration Per App
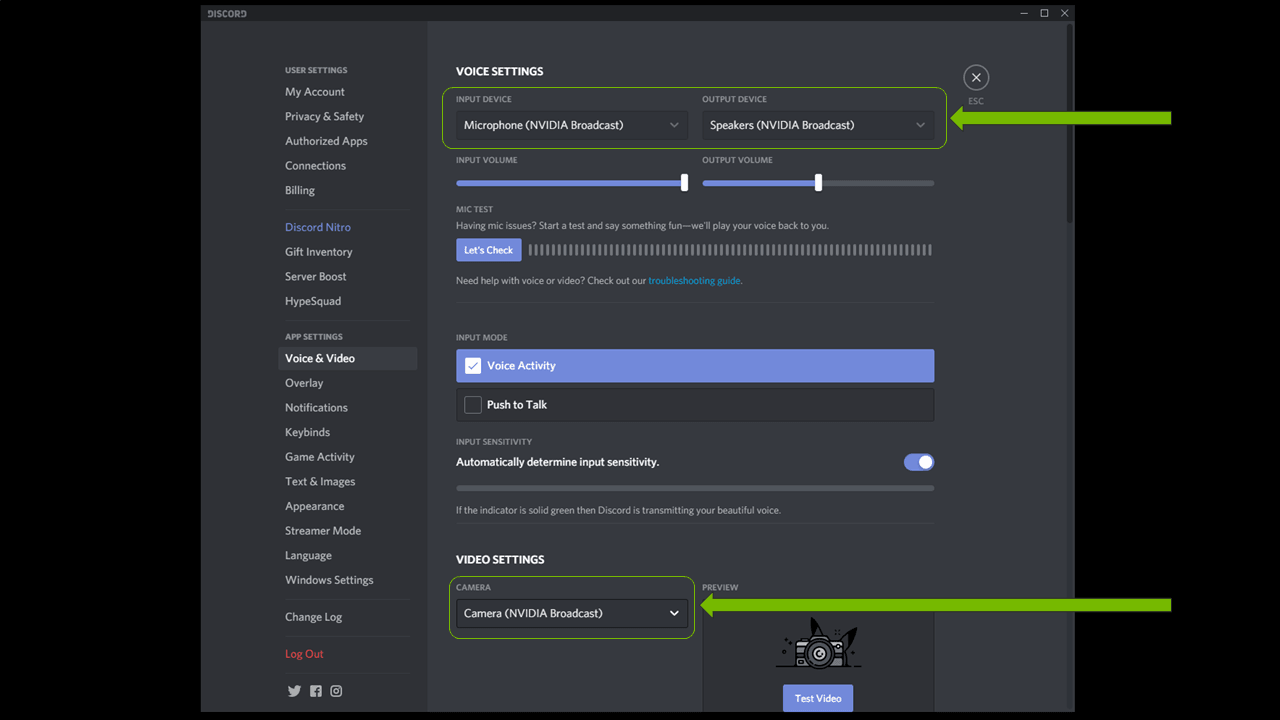
Discord
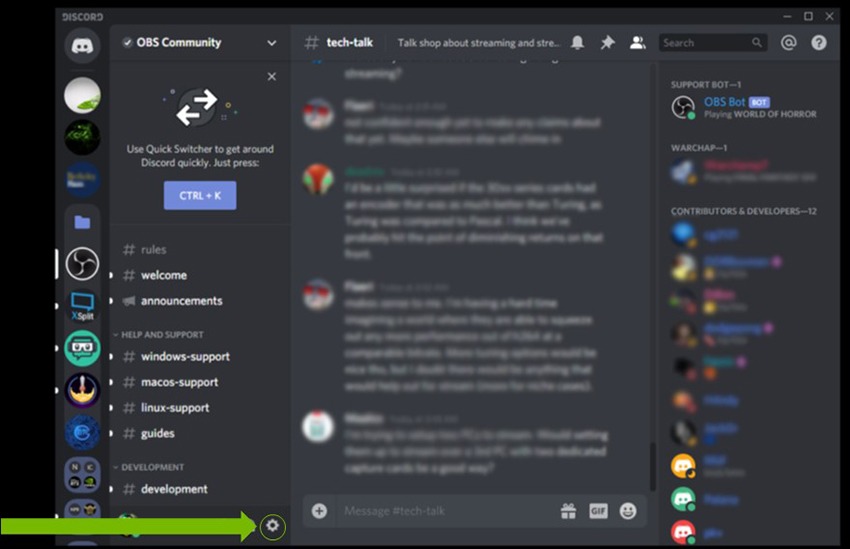
1. Go to Settings (cog wheel), and then select Voice and Video.
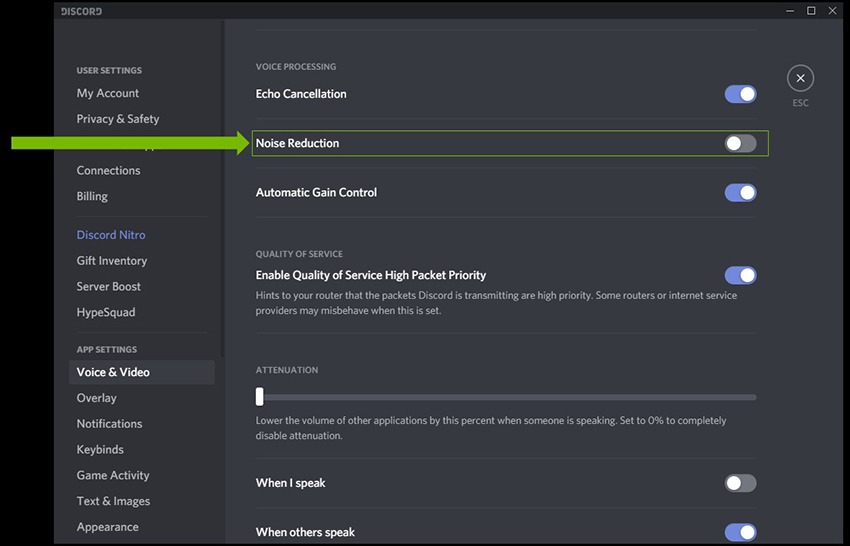
2. Select the NVIDIA Broadcast Microphone, Speaker and Camera as your Input and Output devices, and Camera.
3. For best quality, make sure that you disable any noise cancelling/removal effects in Discord.
OBS Studio
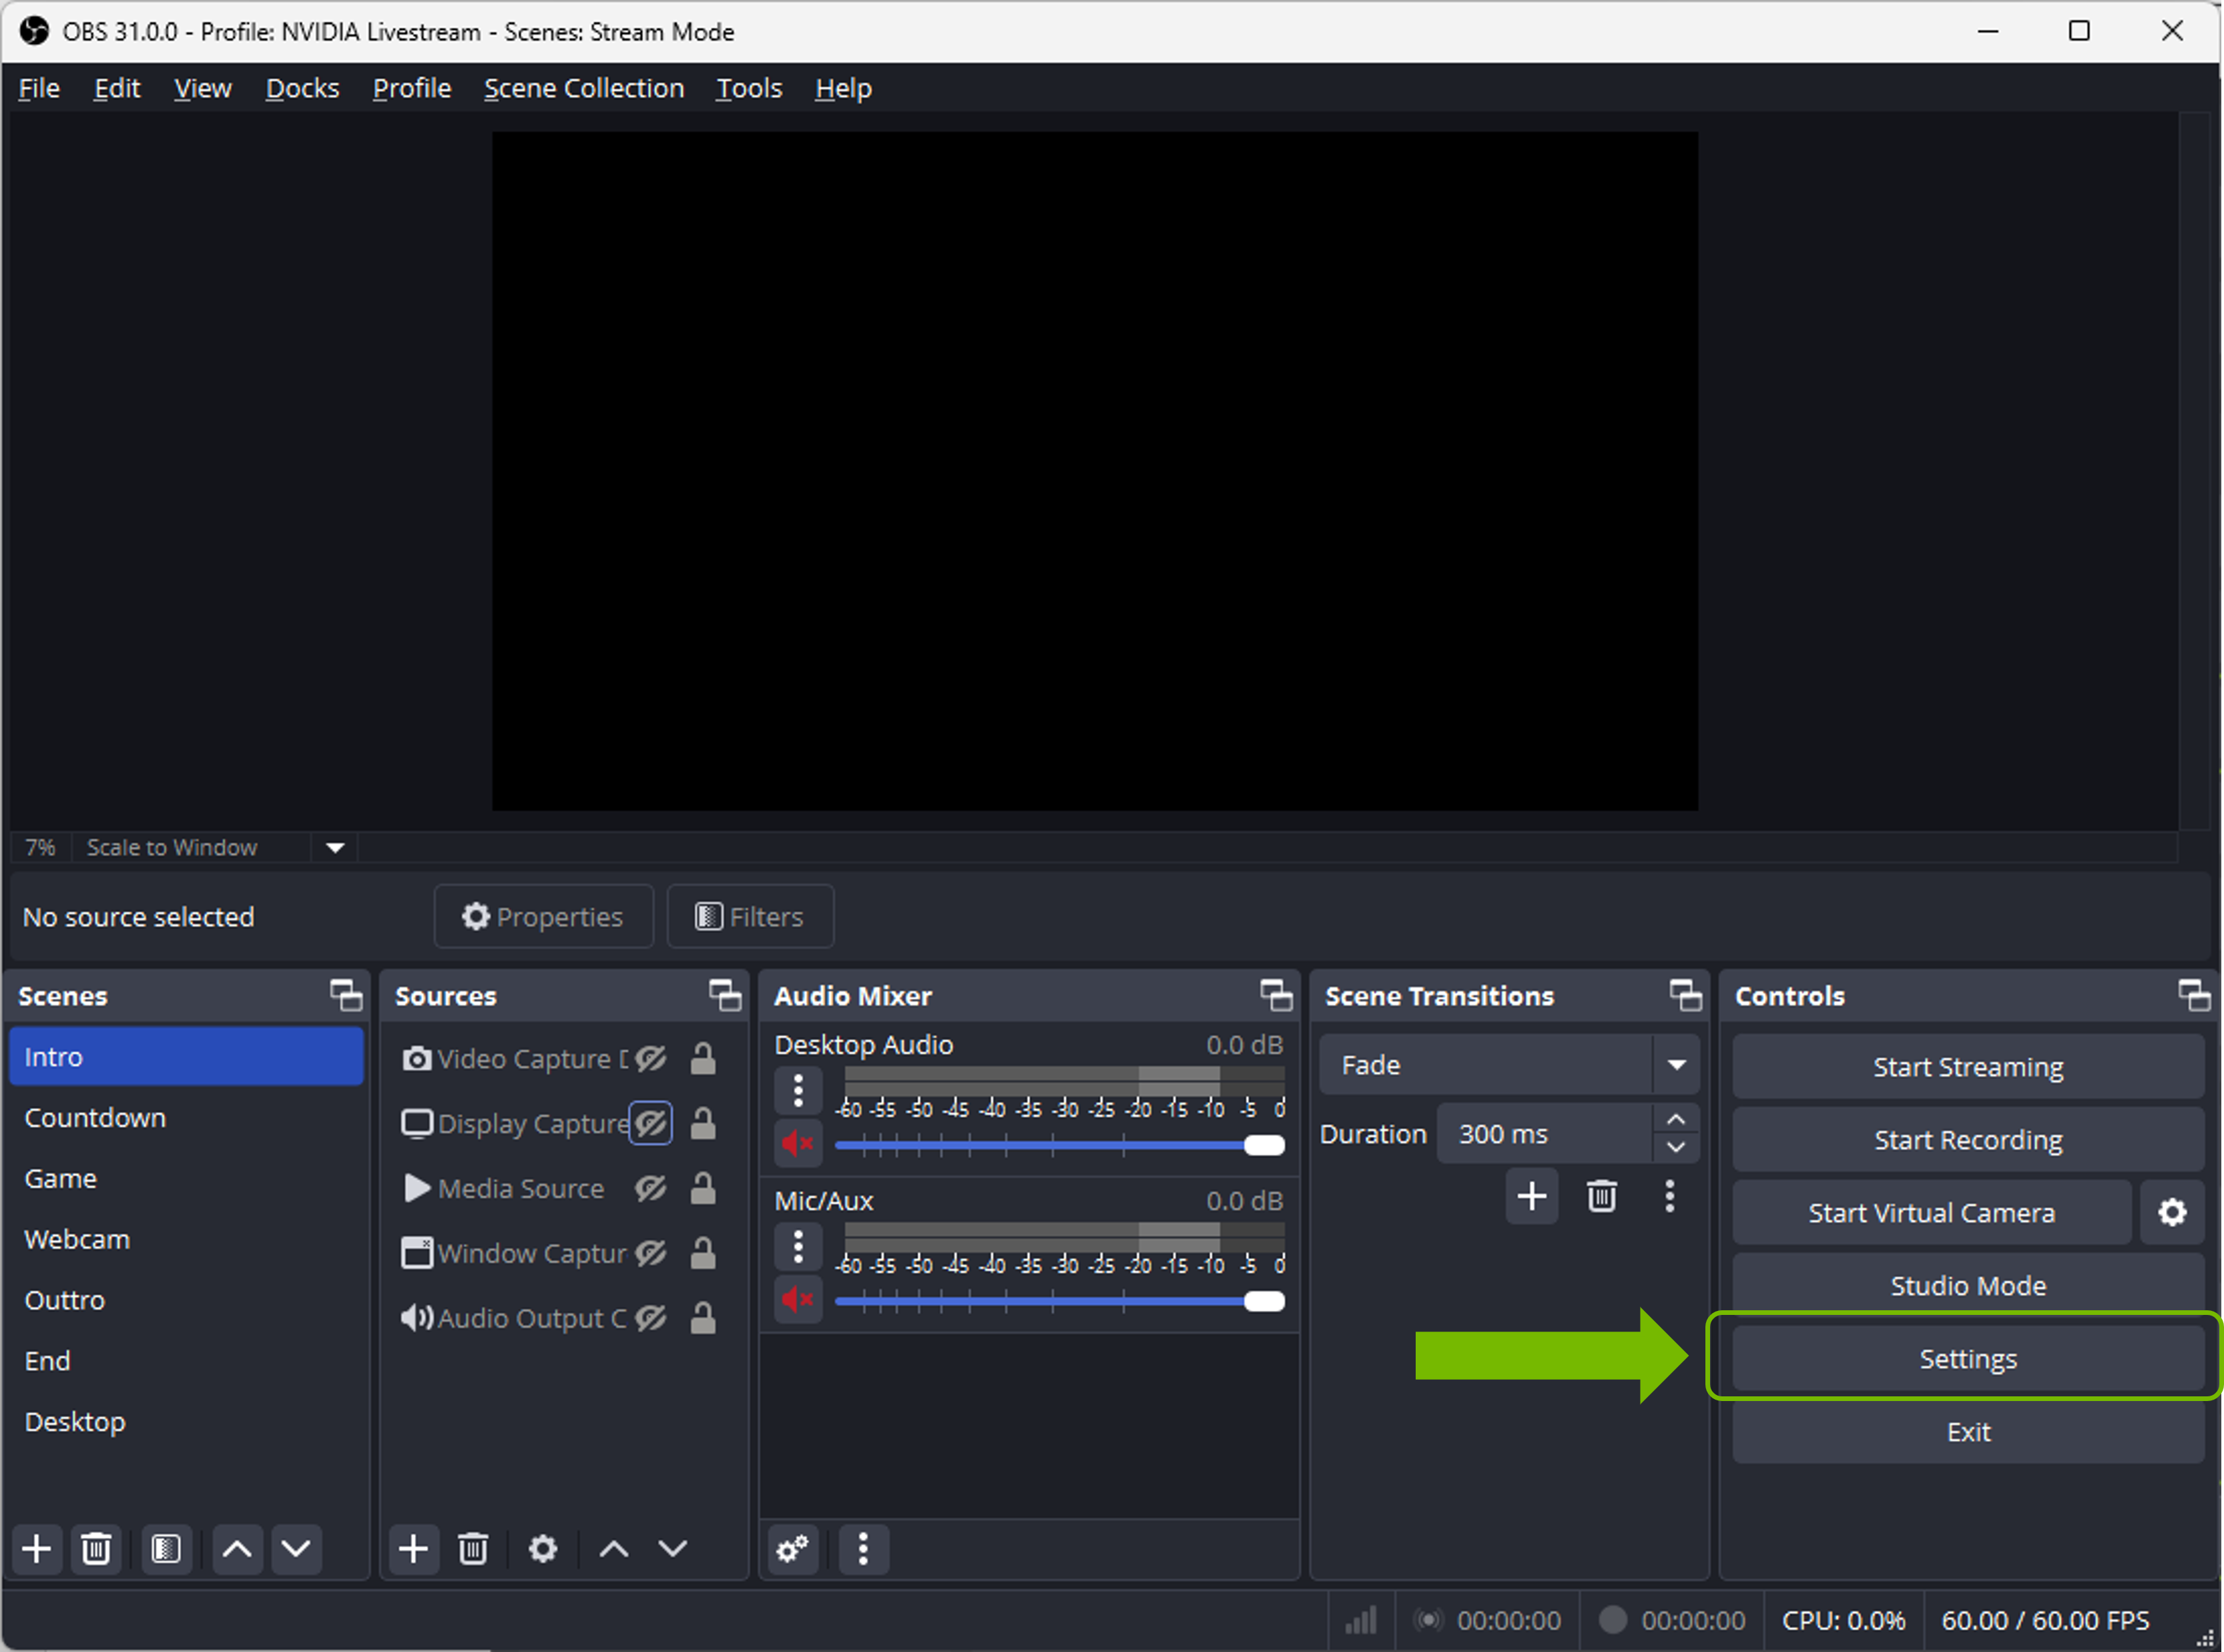
1. Go to Settings > Audio.
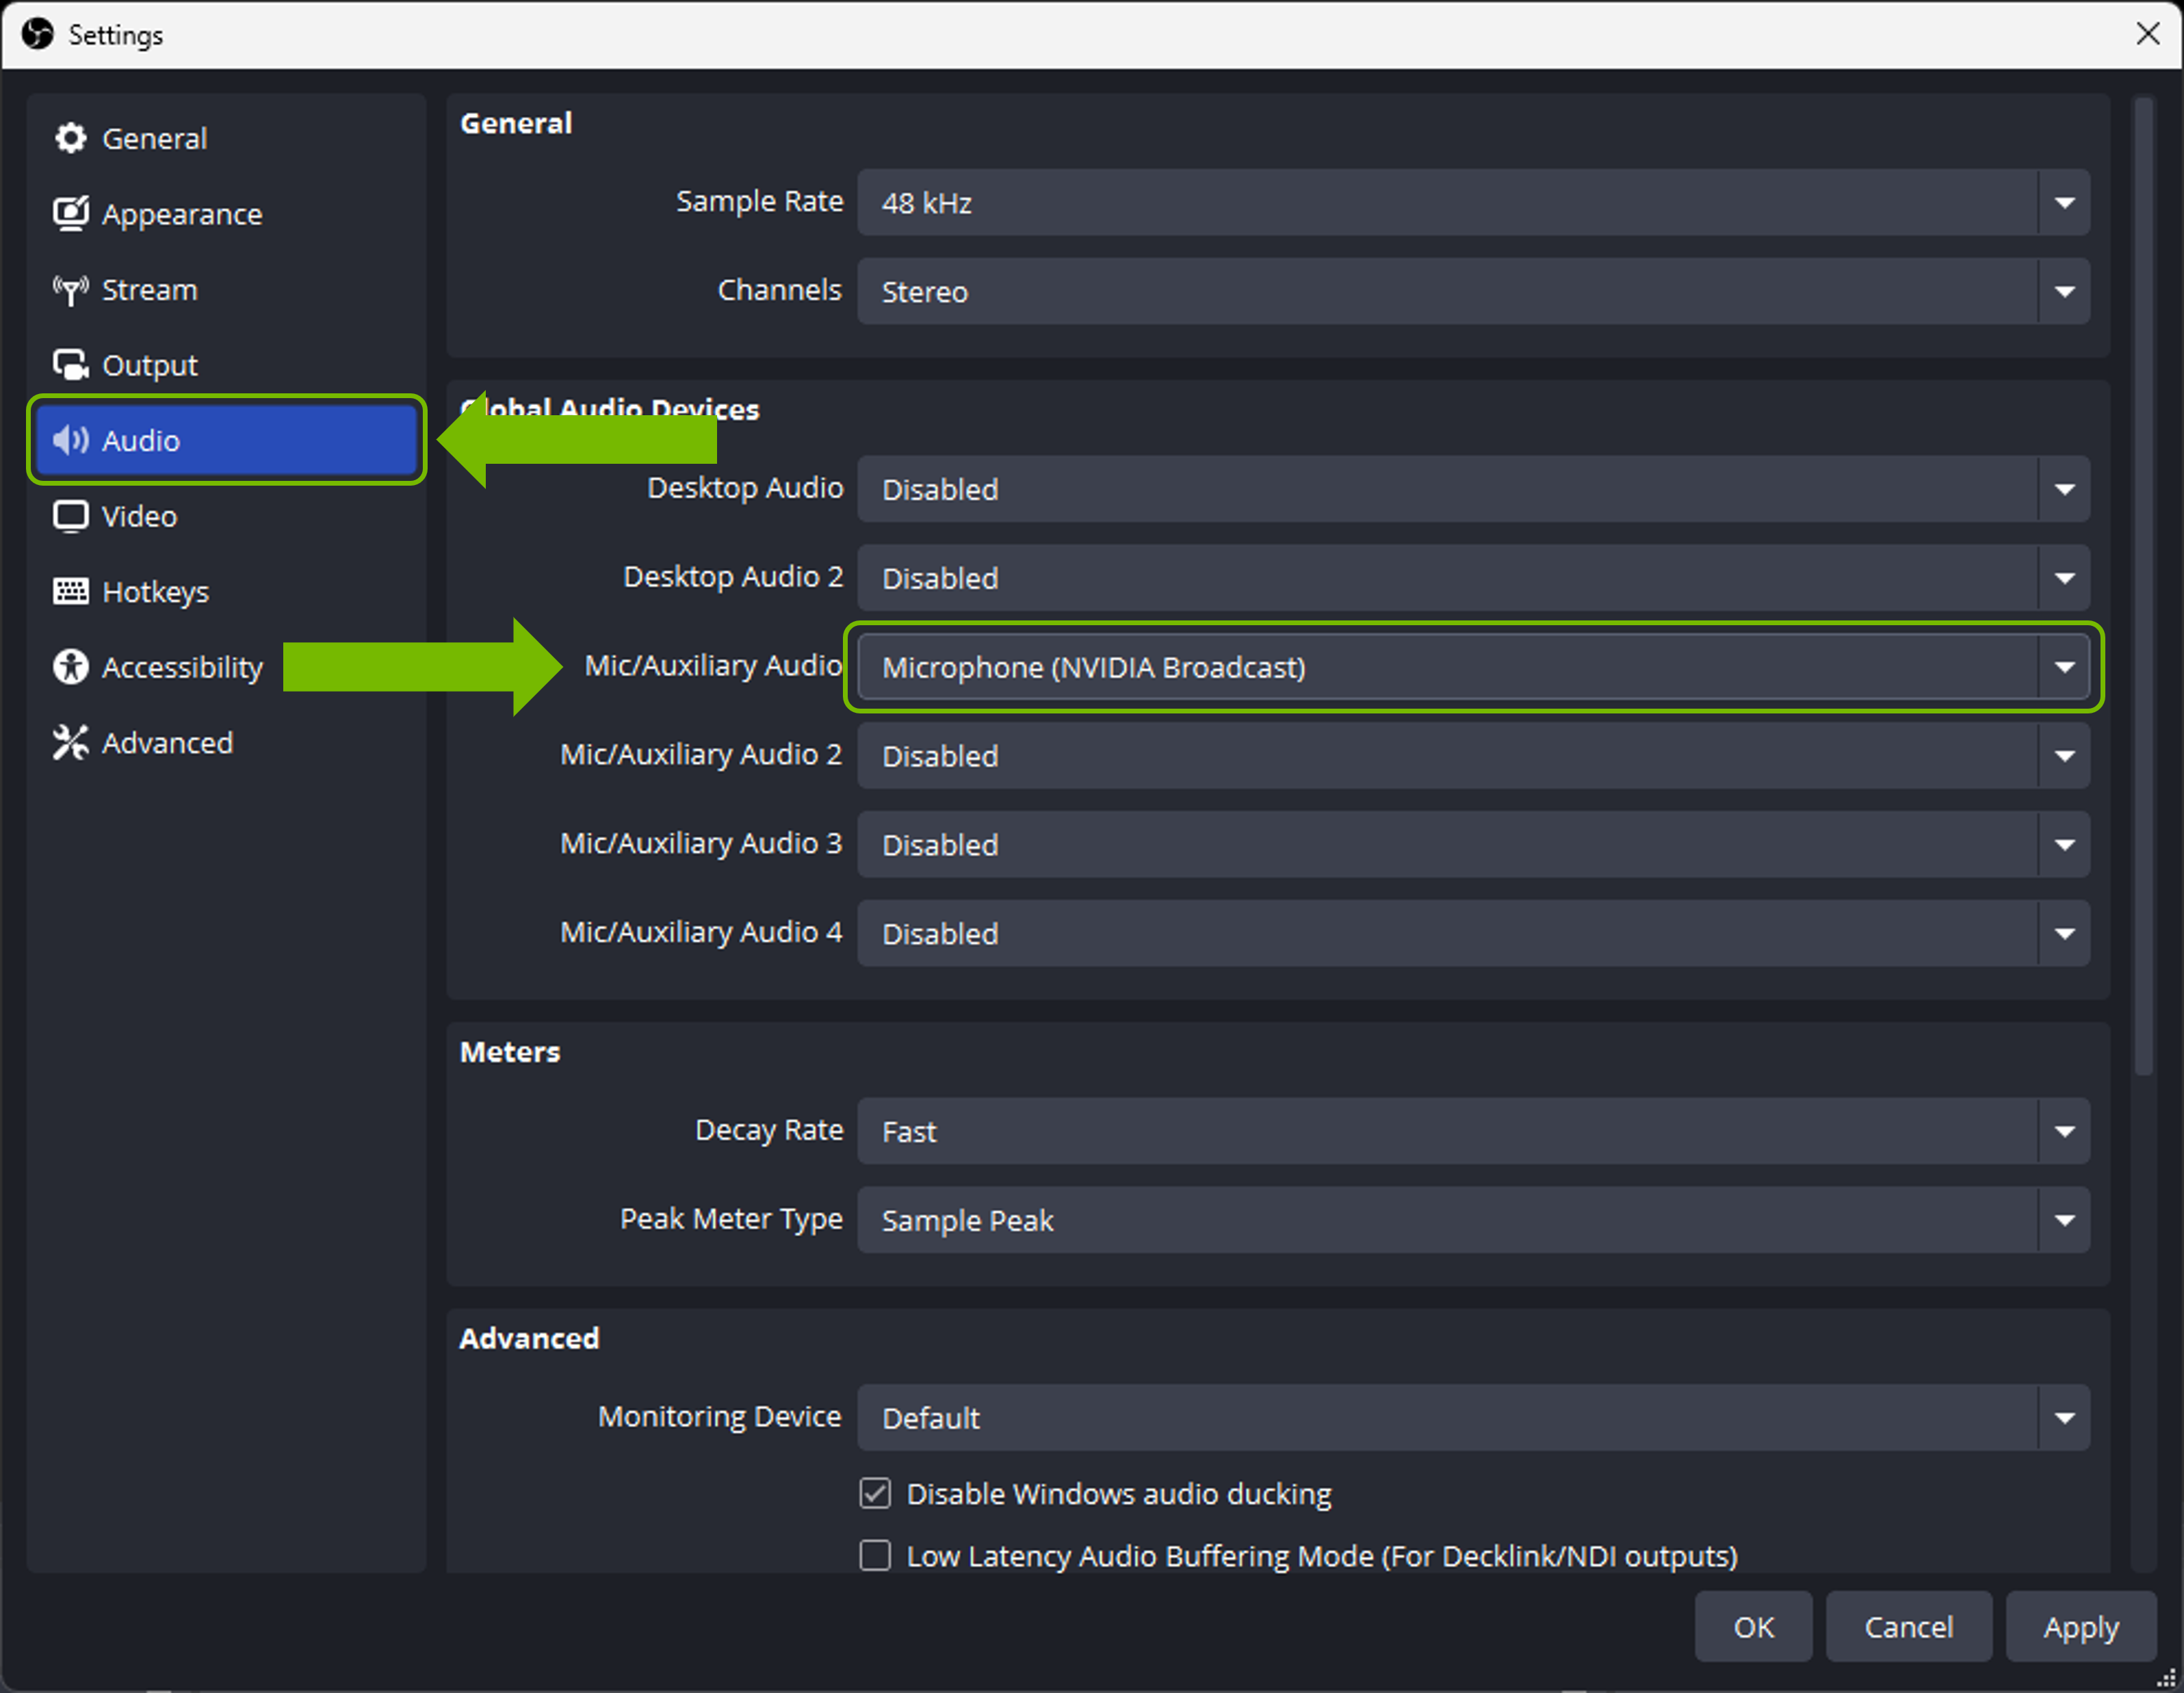
2. Select NVIDIA Broadcast as your devices - Devices > Mic/Auxiliary Audio, select Microphone (NVIDIA Broadcast).
3. To select the NVIDIA Broadcast Camera, add a Video Capture Source to your scene, and select Camera (NVIDIA Broadcast). Leave all settings at default. If you wish to change the camera resolution, you must do so with NVIDIA Broadcast.
StreamLabs
1. Go to Settings.
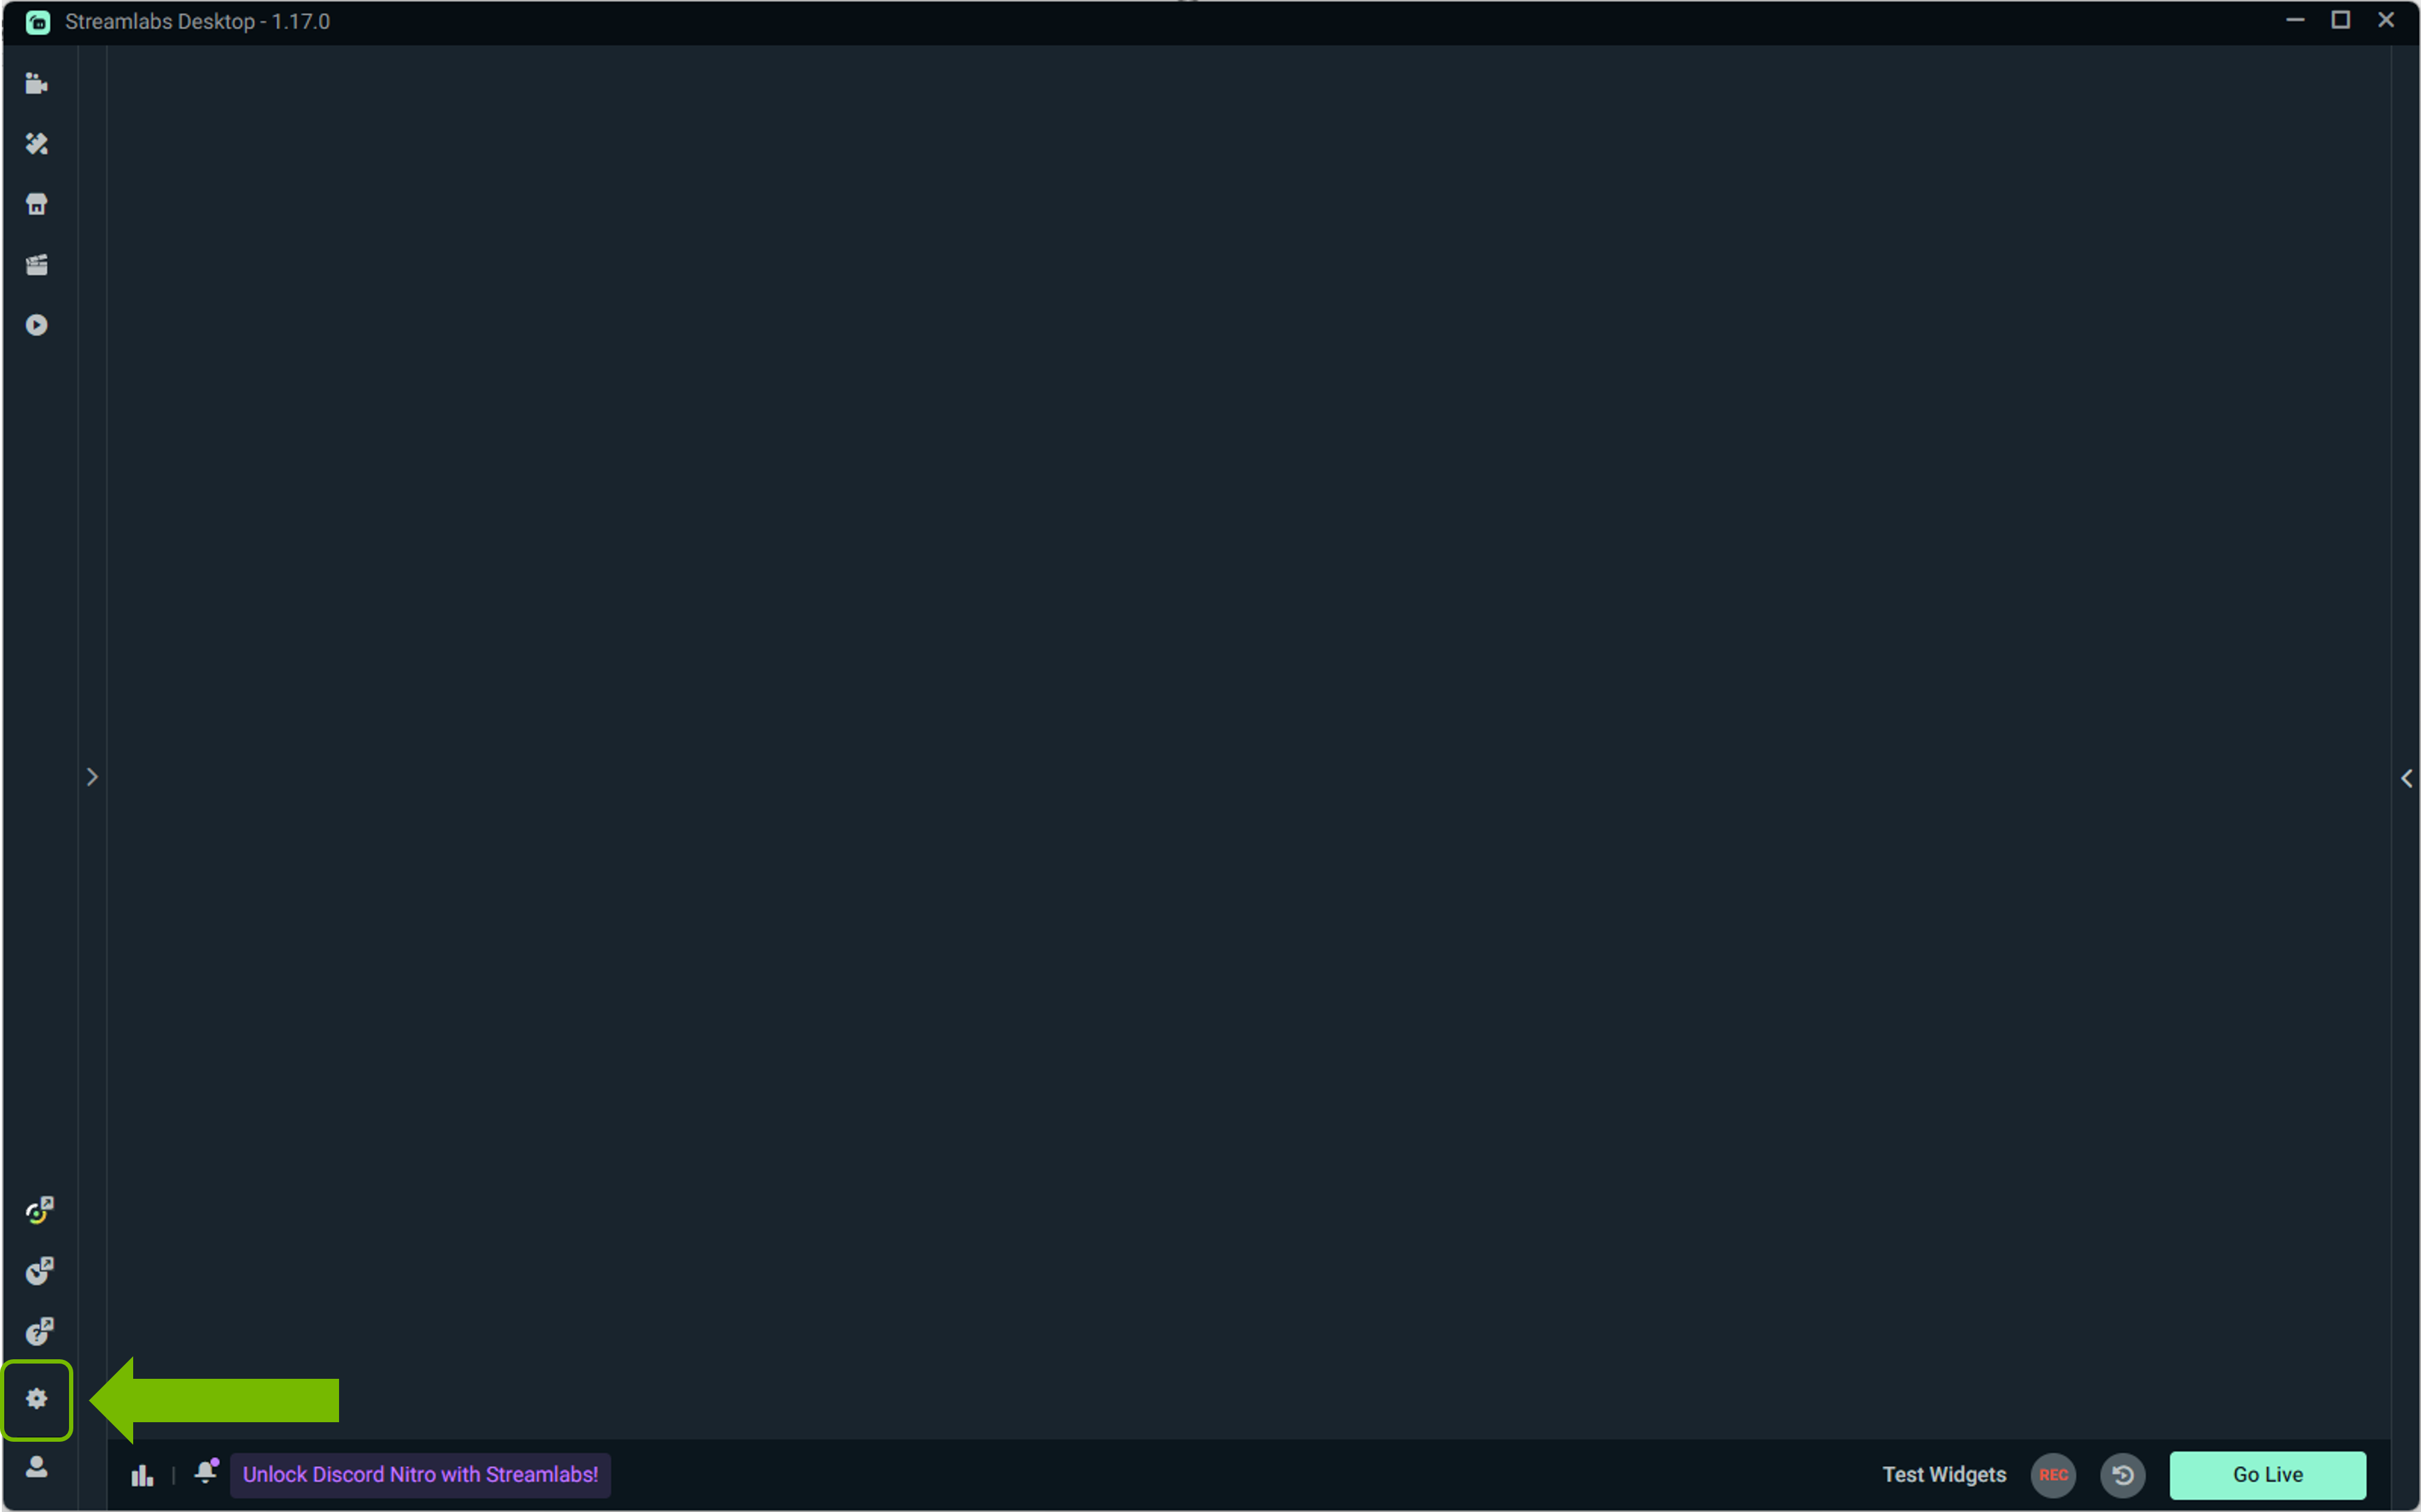
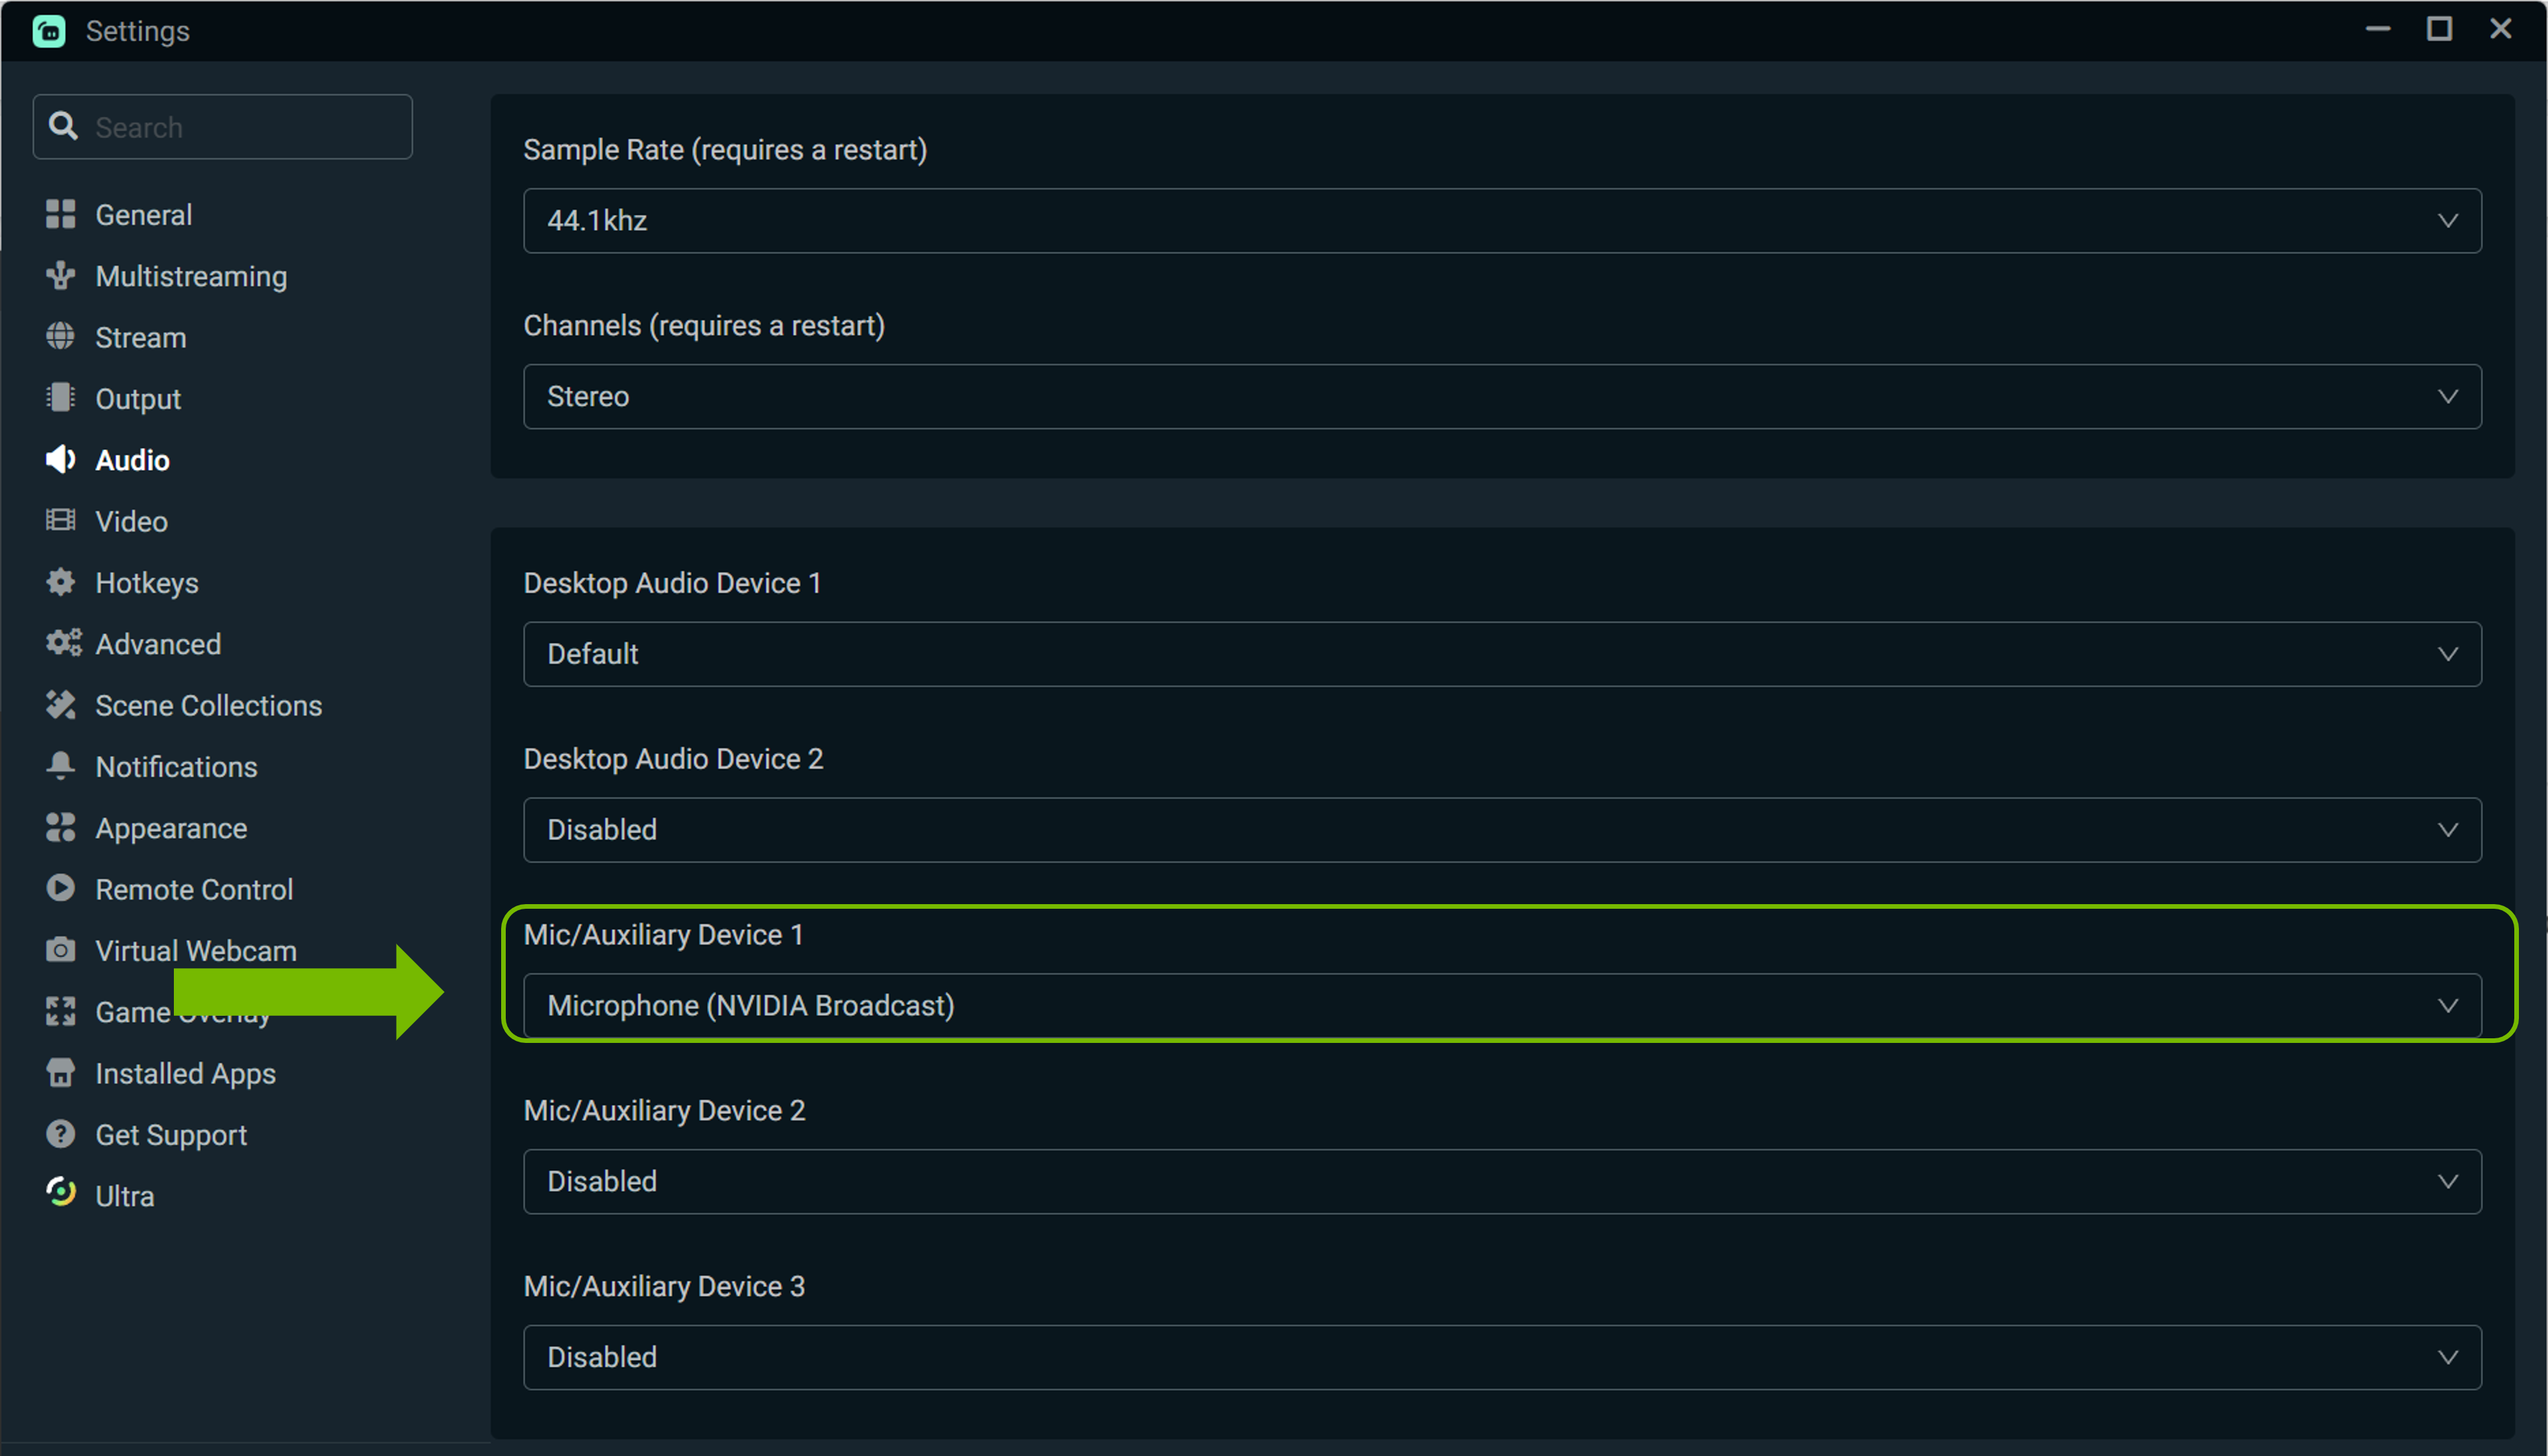
2. Go to Audio, and under Mic/Auxiliary Device 1, select Microphone (NVIDIA Broadcast).
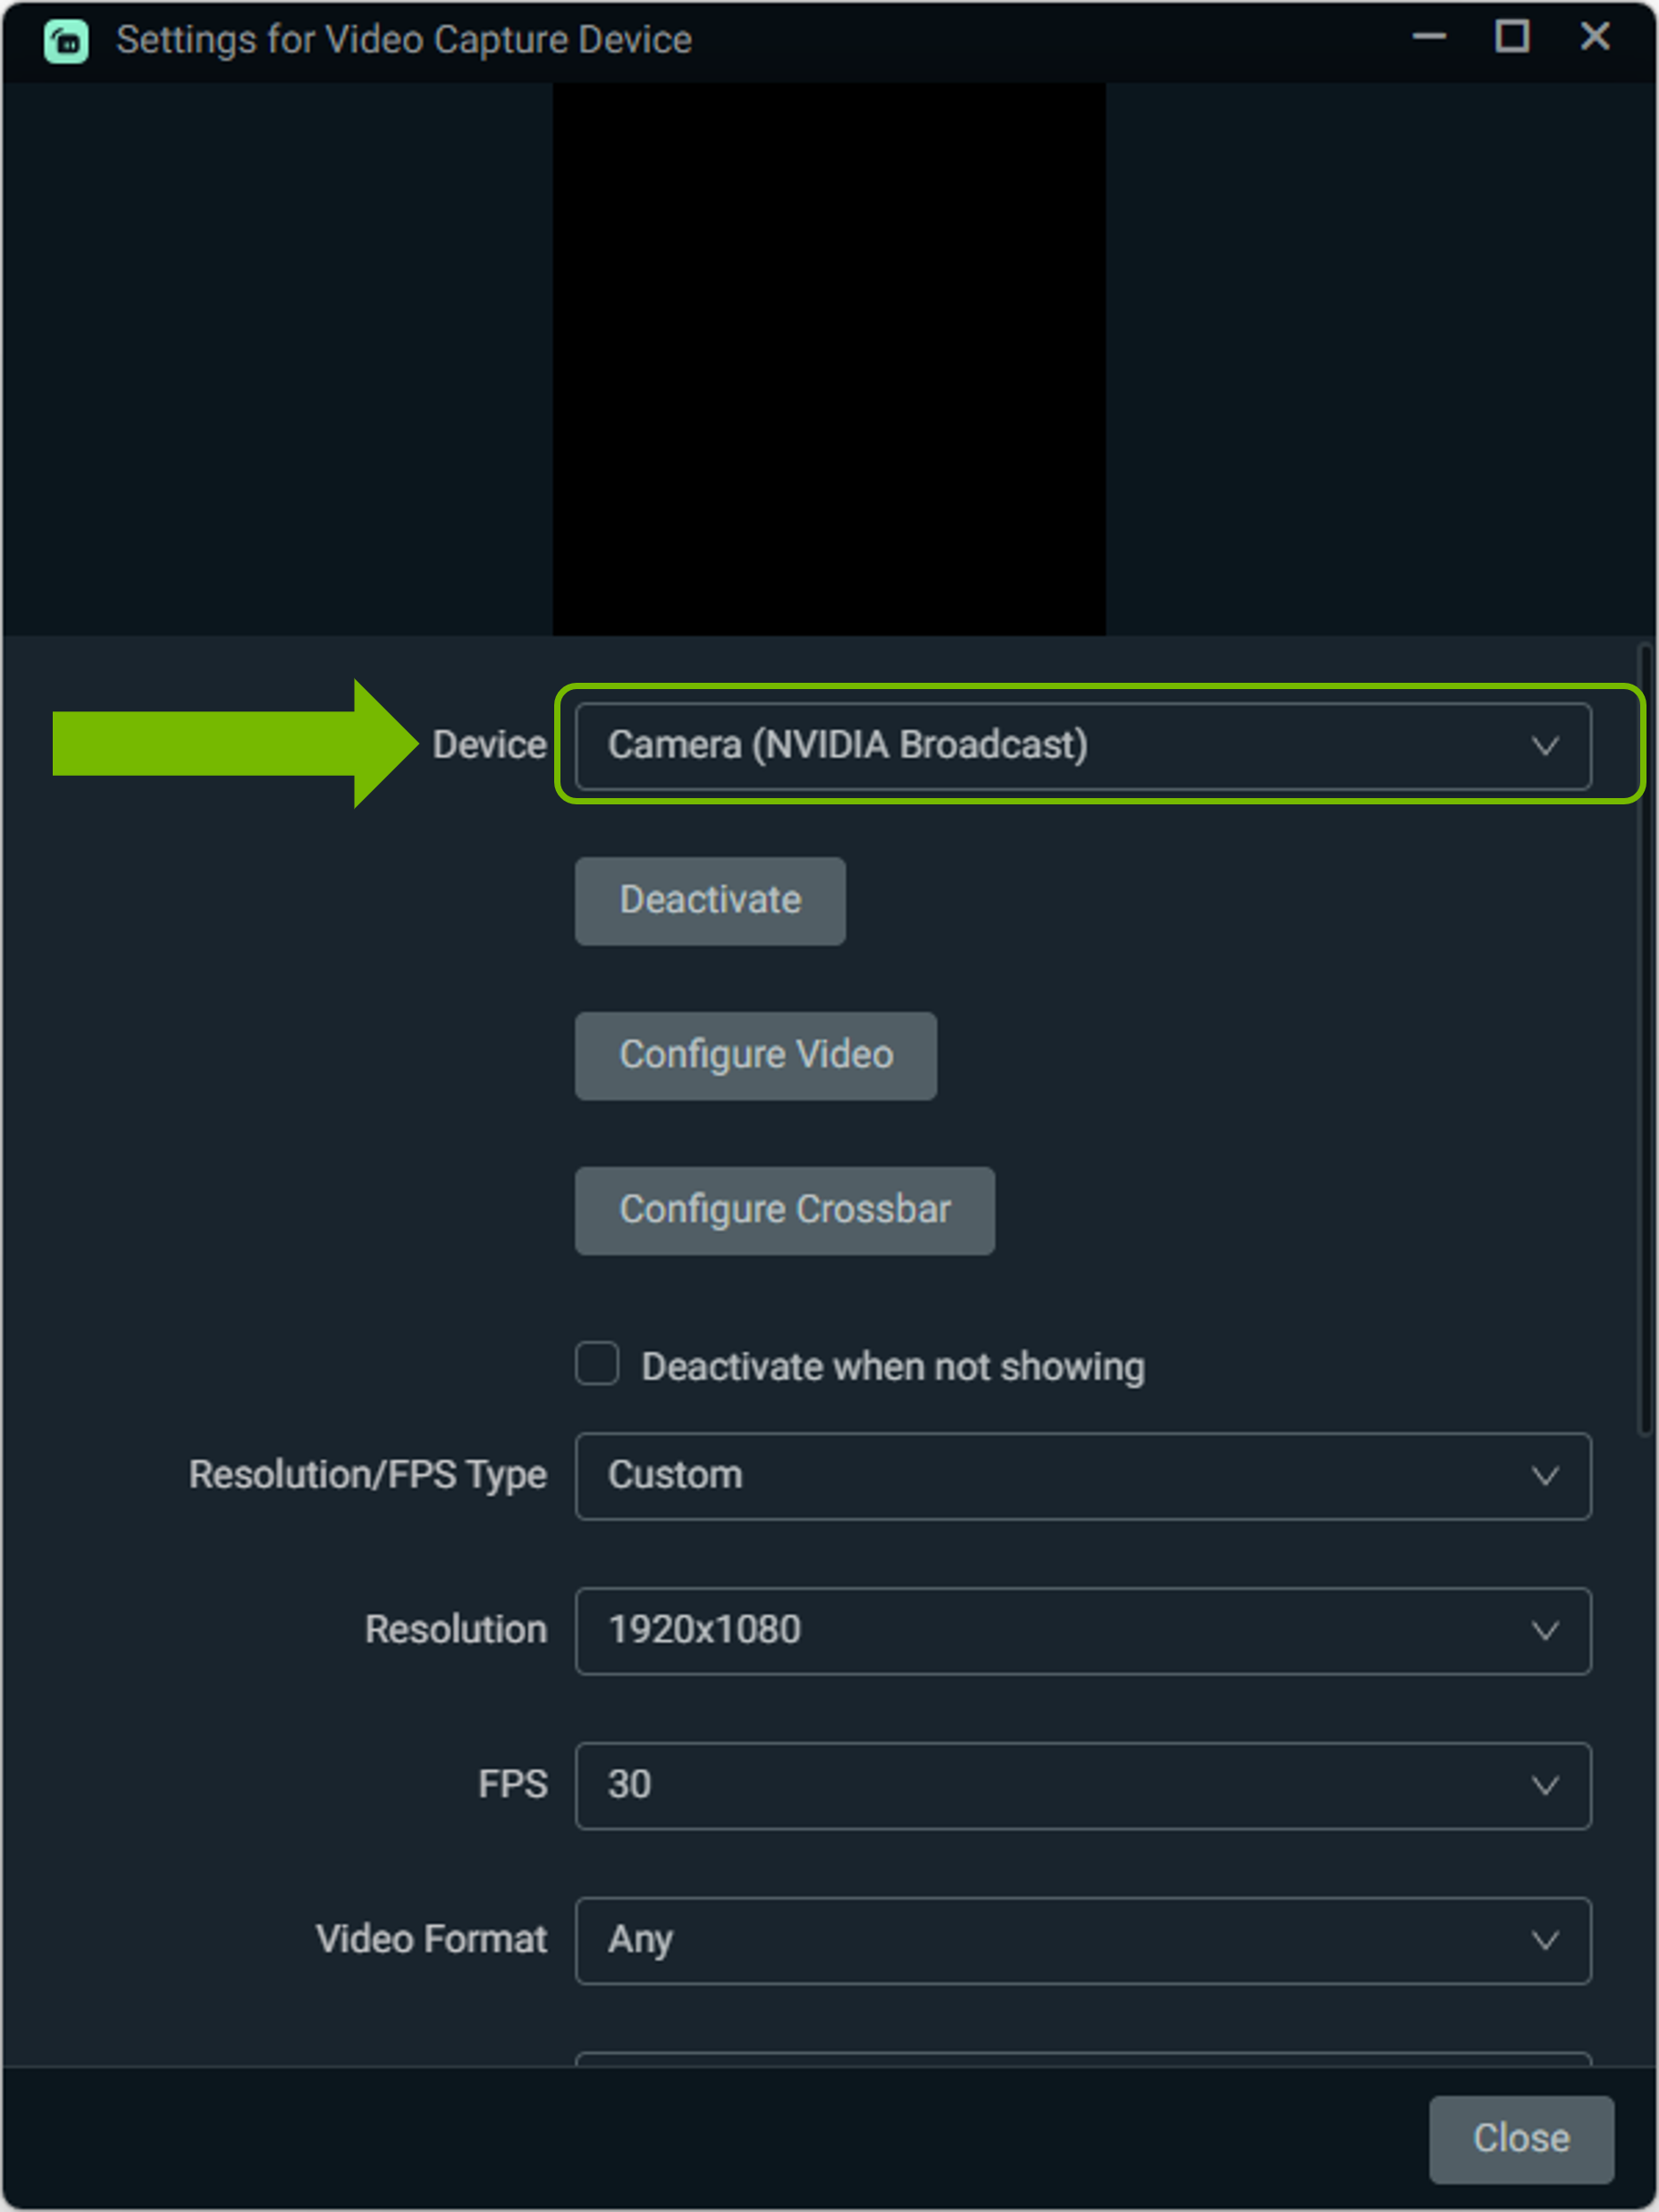
3. To select the NVIDIA Broadcast Camera, add a Video Capture Source to your scene, and select Camera (NVIDIA Broadcast). Leave all settings at default. If you wish to change the camera resolution, you must do so with NVIDIA Broadcast.
XSplit Broadcaster
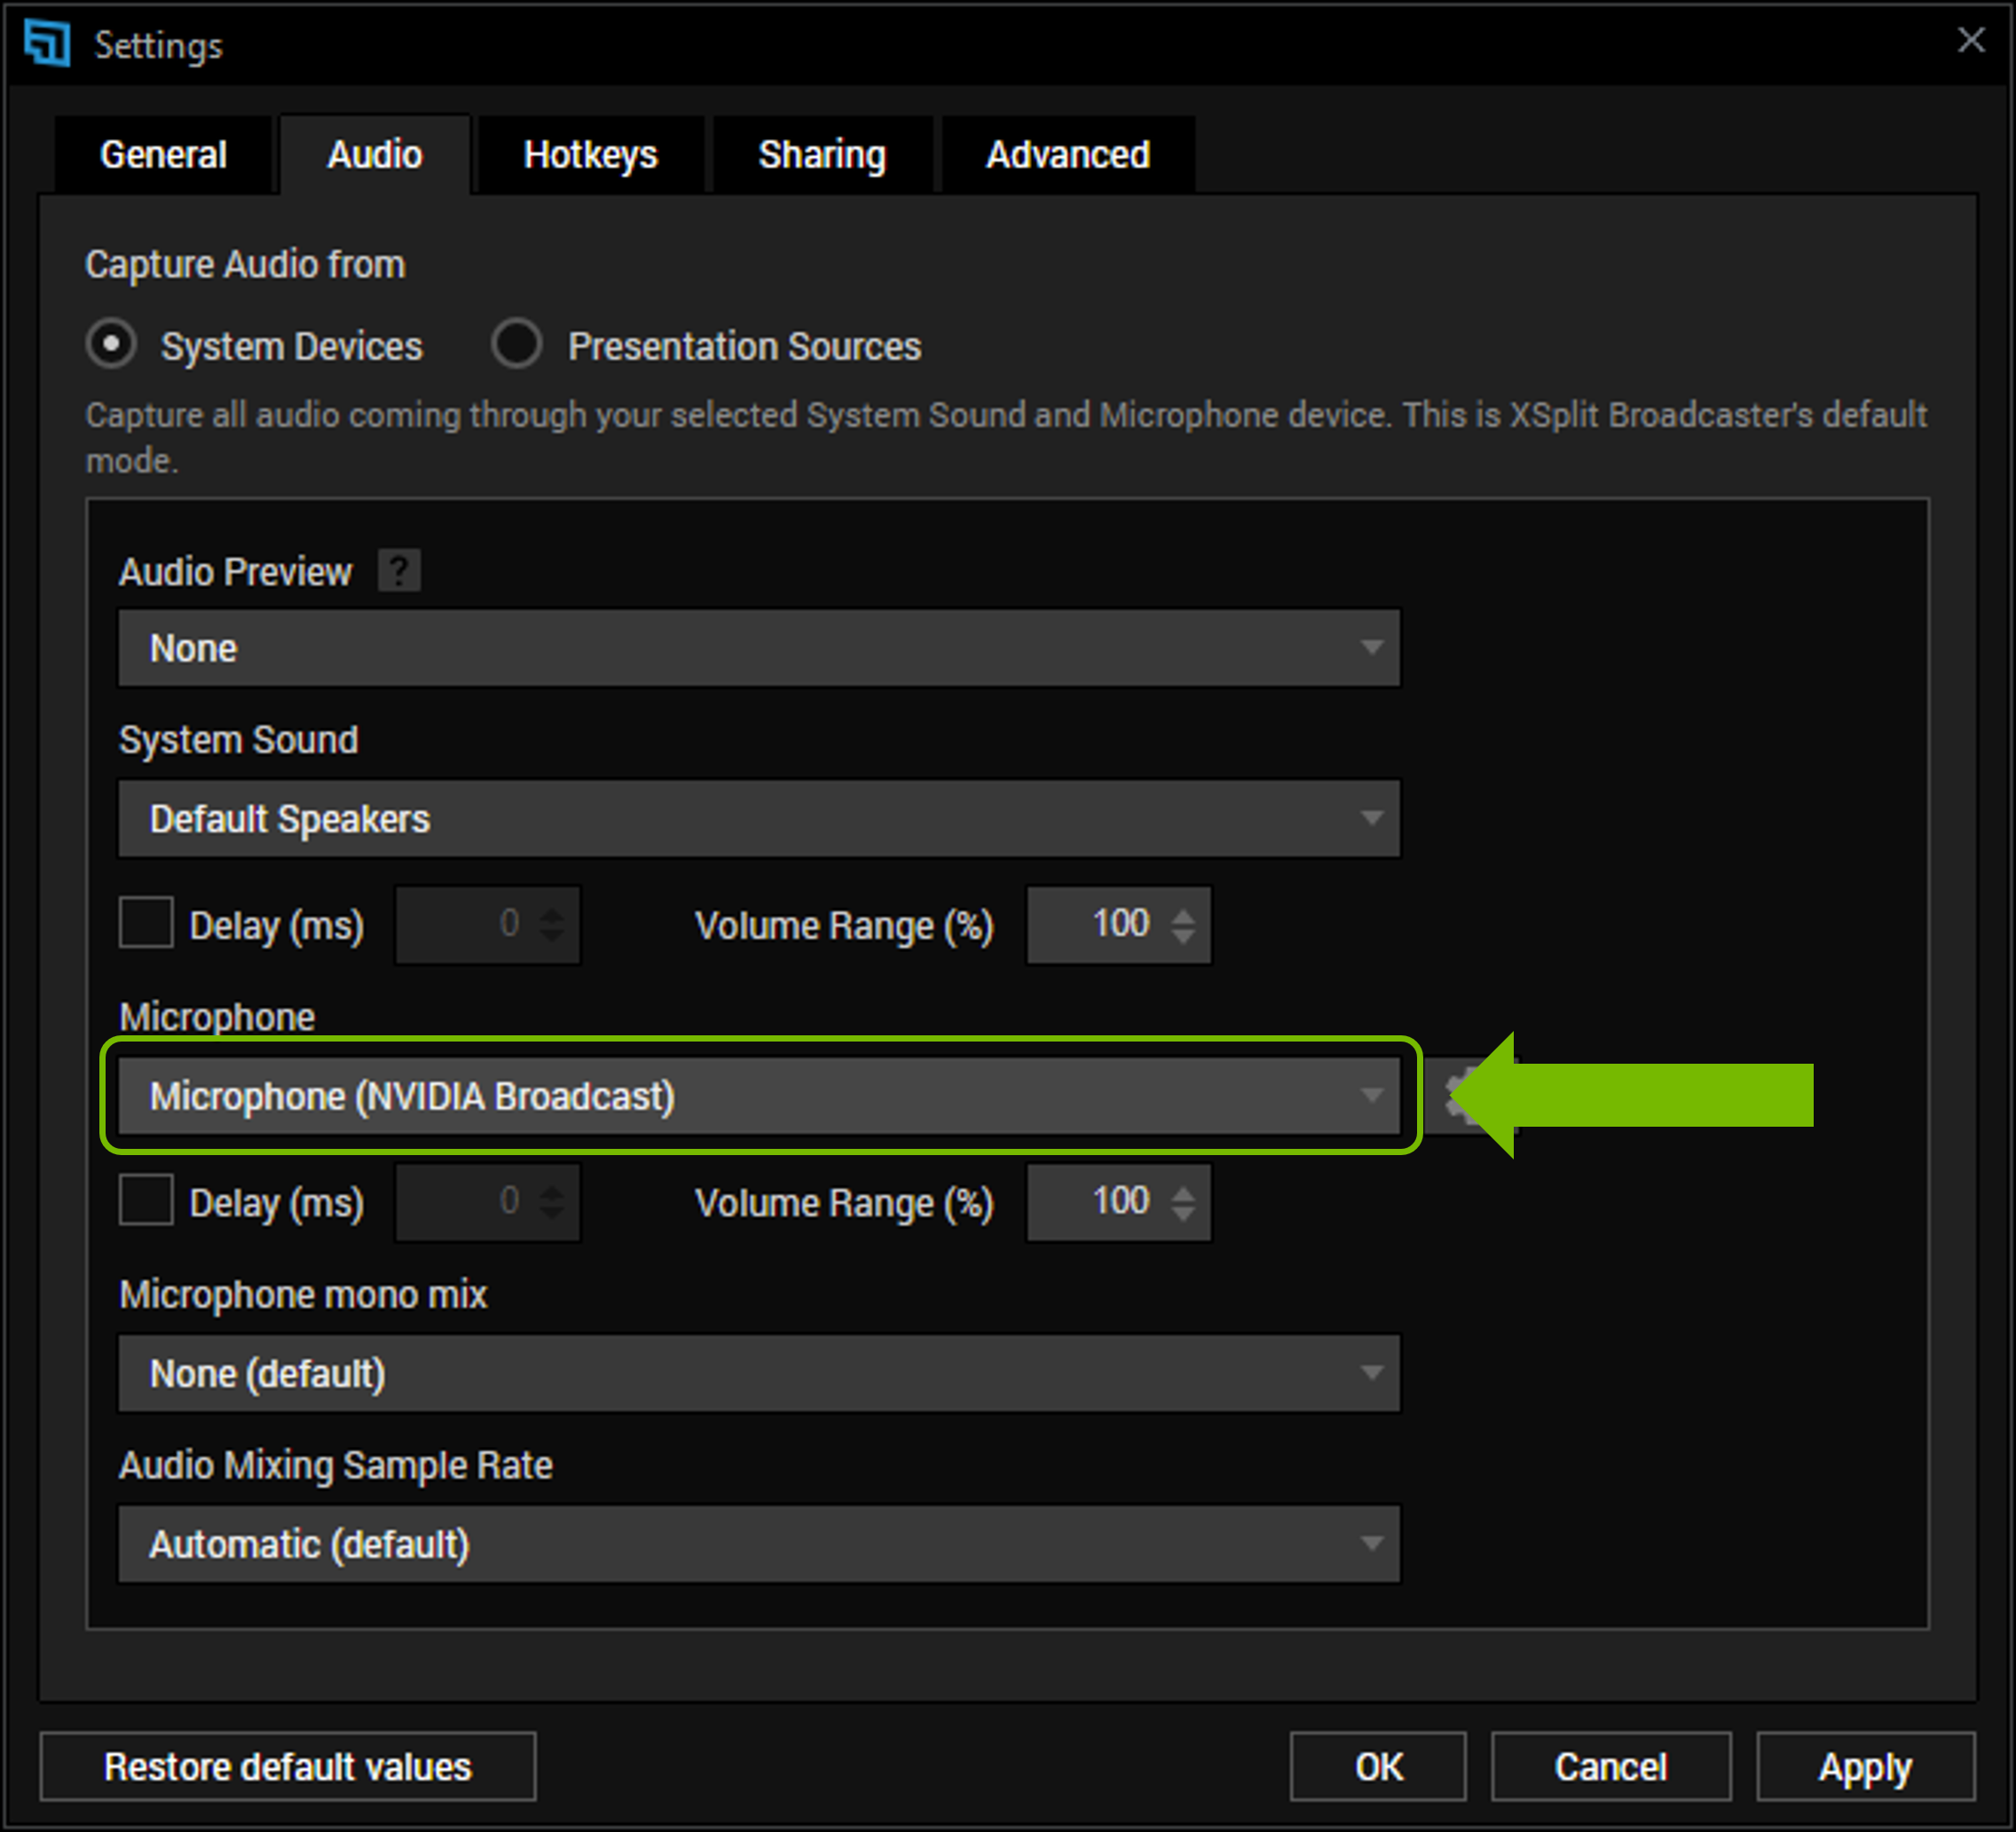
1. Under File->Settings, select the “Audio” tab

2. Select NVIDIA Broadcast as your devices:
a. Under Audio Preview, select Speakers (NVIDIA Broadcast).
b. Under Microphone, select Microphone (NVIDIA Broadcast).
3. To select the NVIDIA Broadcast camera, add a Device Source to your scene, and select Camera (NVIDIA Broadcast).
WebEx
You can configure WebEx in 2 ways:
1. When you connect to the WebEx meeting you are asked how you want to connect to the meeting. Select Call Using Computer, and select NVIDIA Broadcast for your devices.
2. When you are already connected, you can change your settings by going to Audio > Audio and Video Connections.
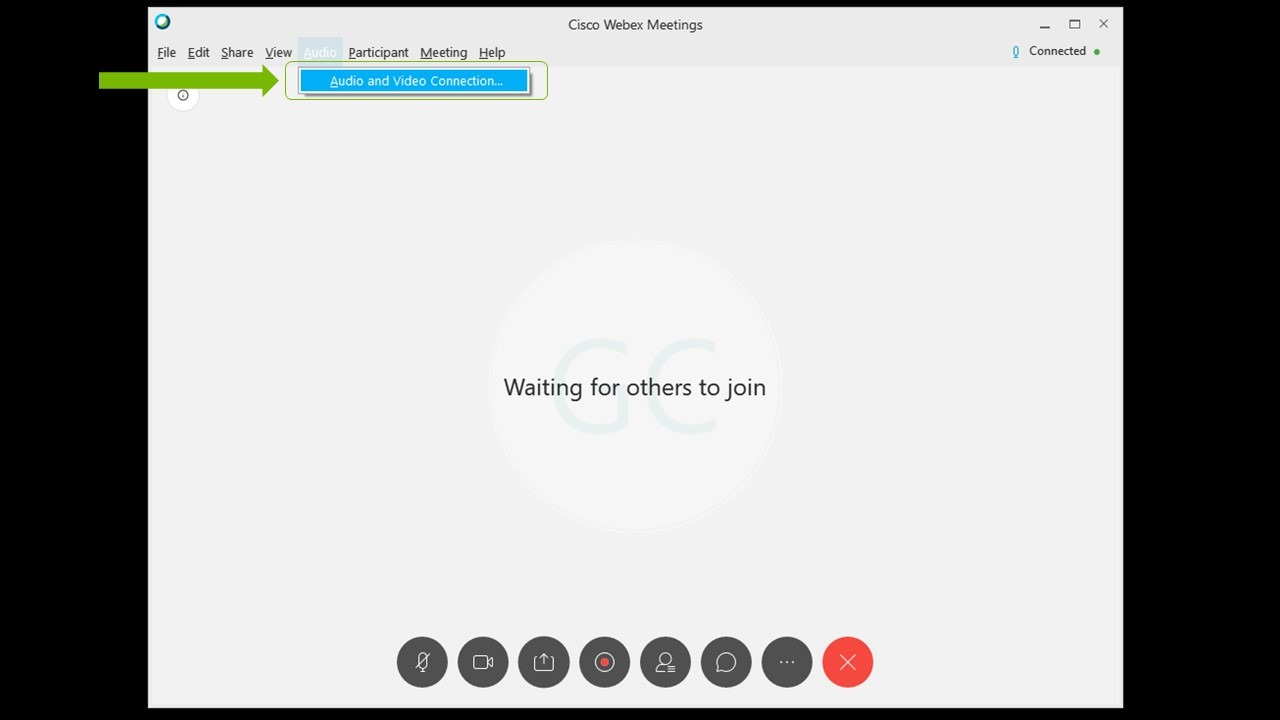
a. Then select Change Settings.
b. Configure your device settings to use NVIDIA Broadcast.
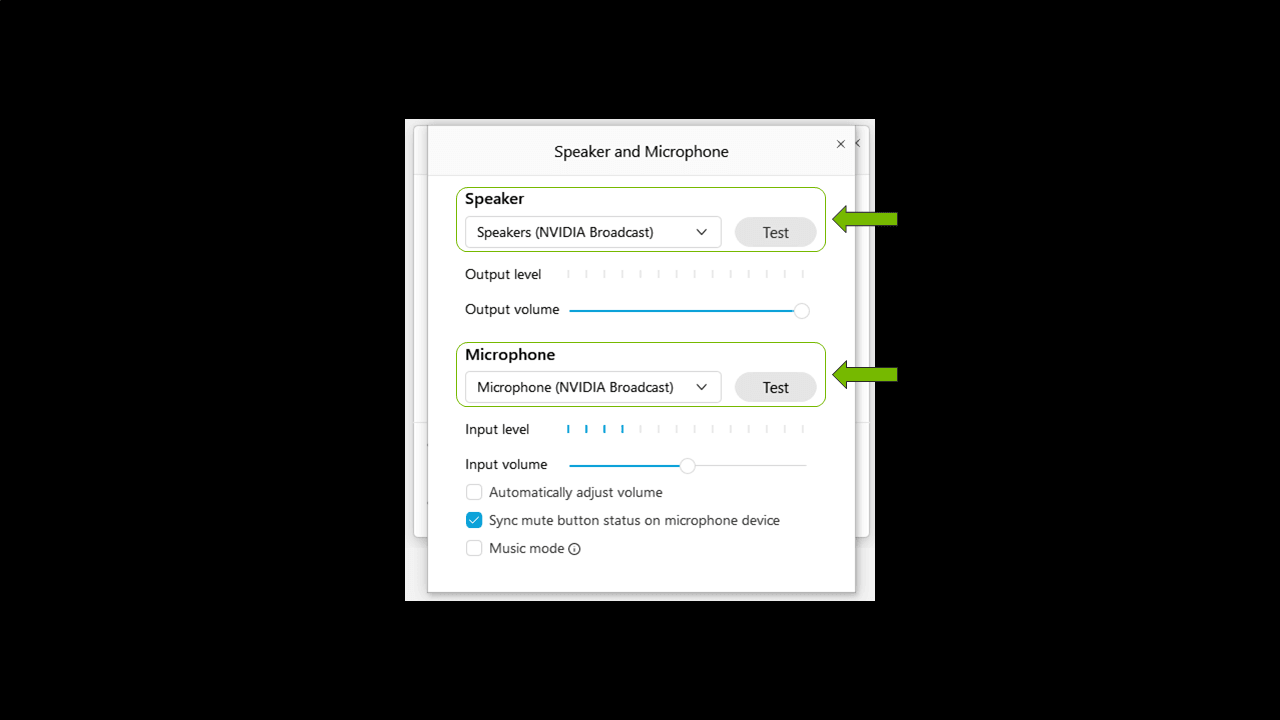
We recommend unchecking Automatically adjust volume and setting it manually.
Zoom
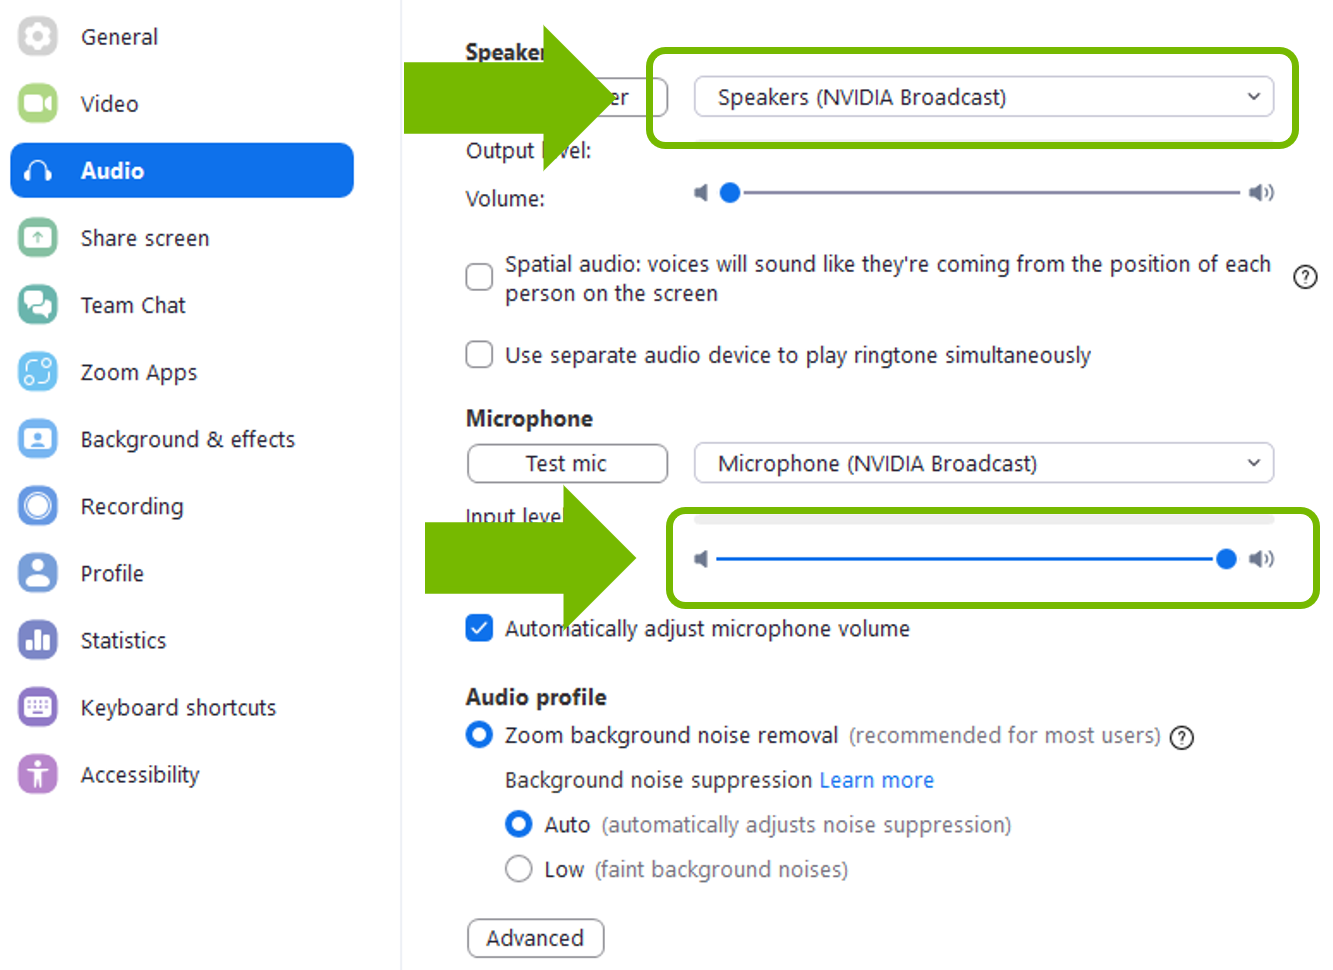
1. To configure the desktop application, go to Settings > Audio Settings.
2. Select NVIDIA Broadcast as your Speaker and Microphone device.
3. Go to Video and select Camera (NVIDIA Broadcast).
4. For the best quality, make sure that you disable or lower noise cancelling effects.
You can also configure your devices within a meeting:
1. Click on the little arrow in the bottom left option.
2. Select the NVIDIA Broadcast Microphone and Speakers as your devices.
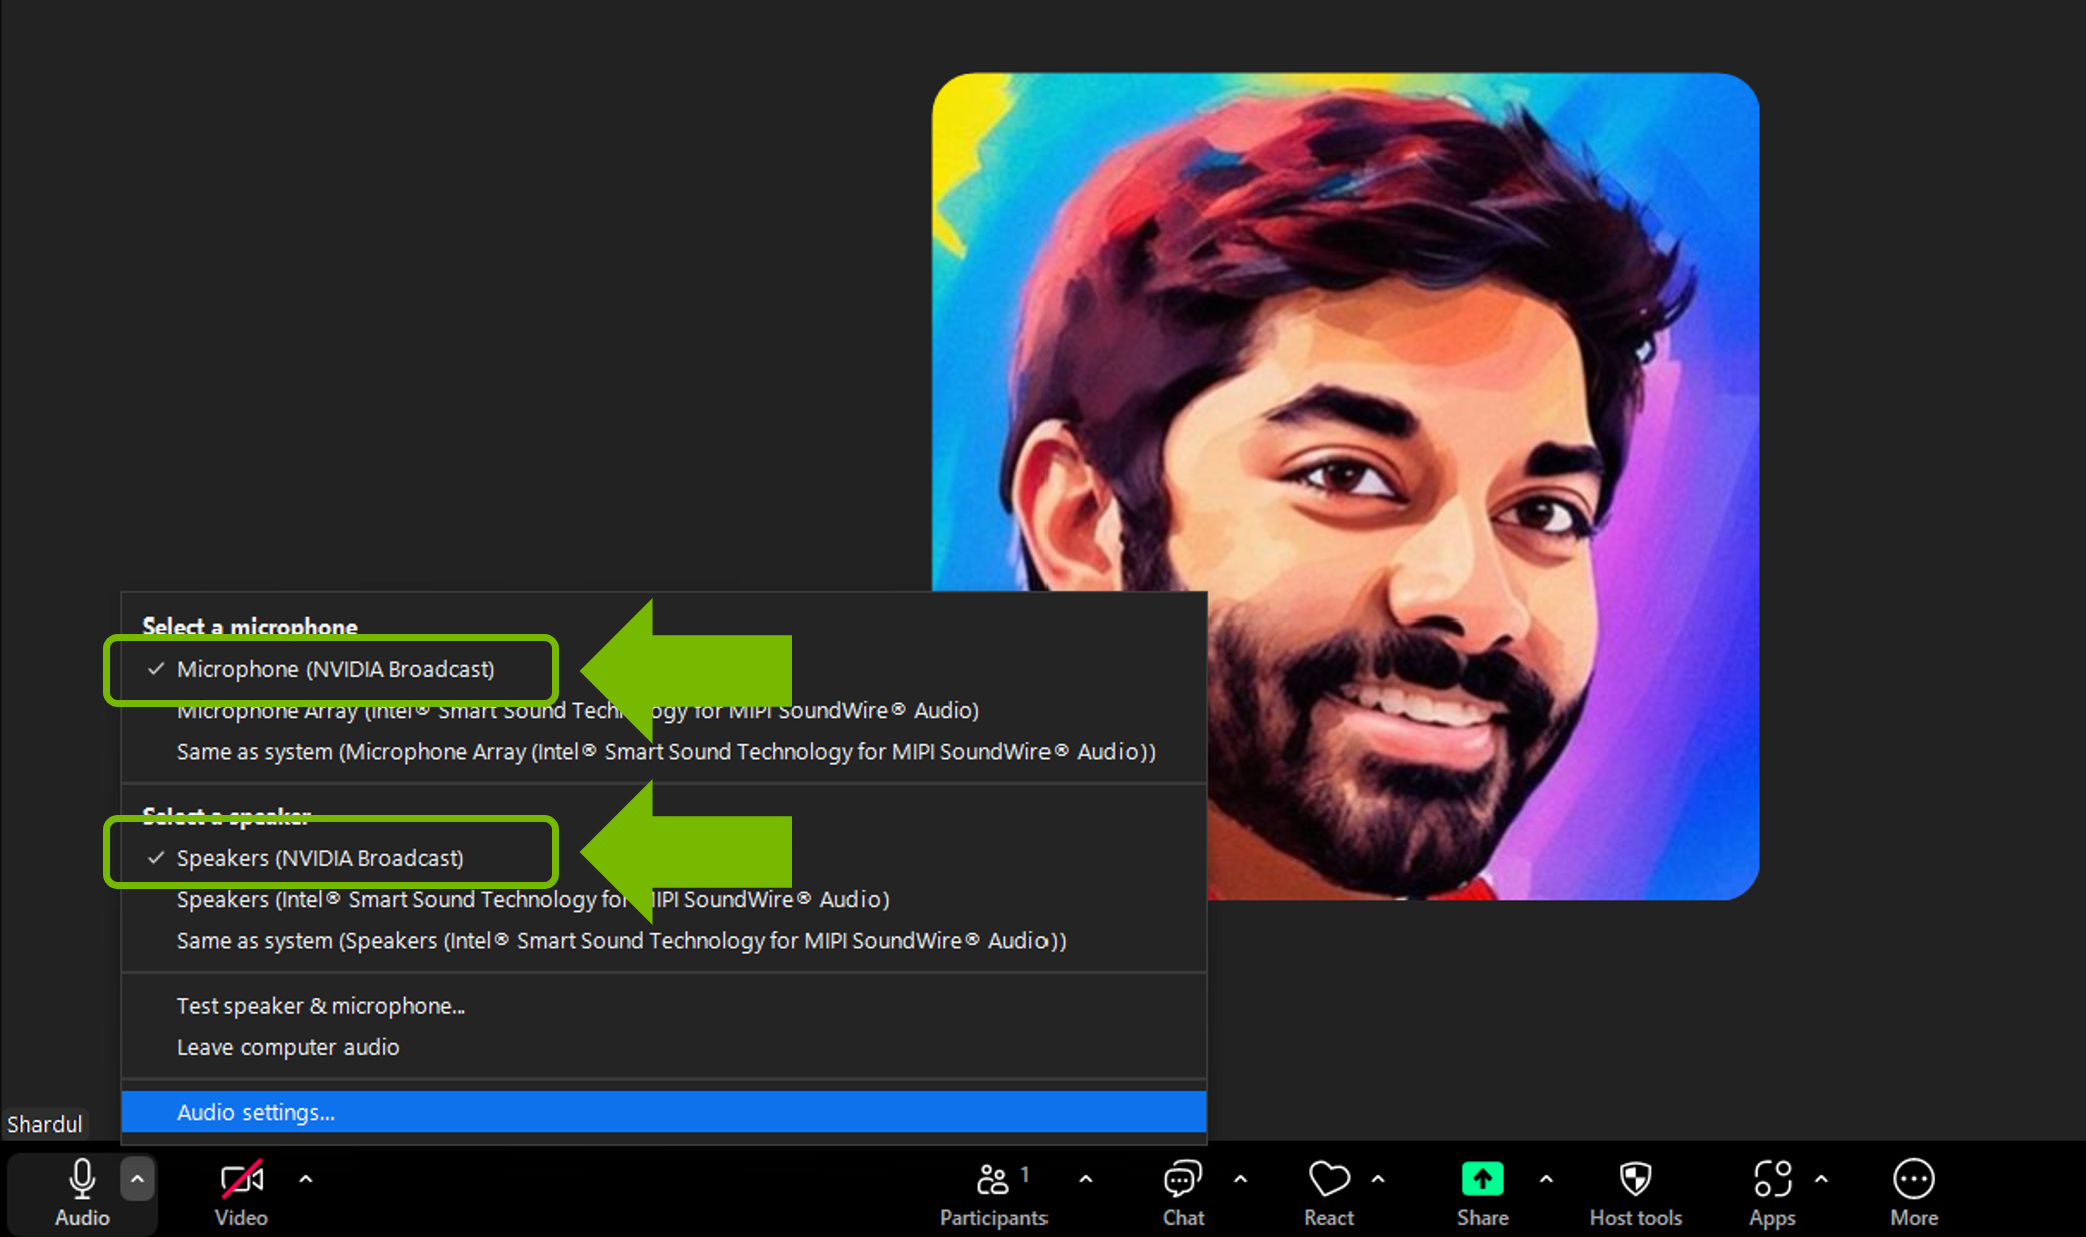
3. Repeat the same in the Video option (second on the bottom left) to select Camera (NVIDIA Broadcast).
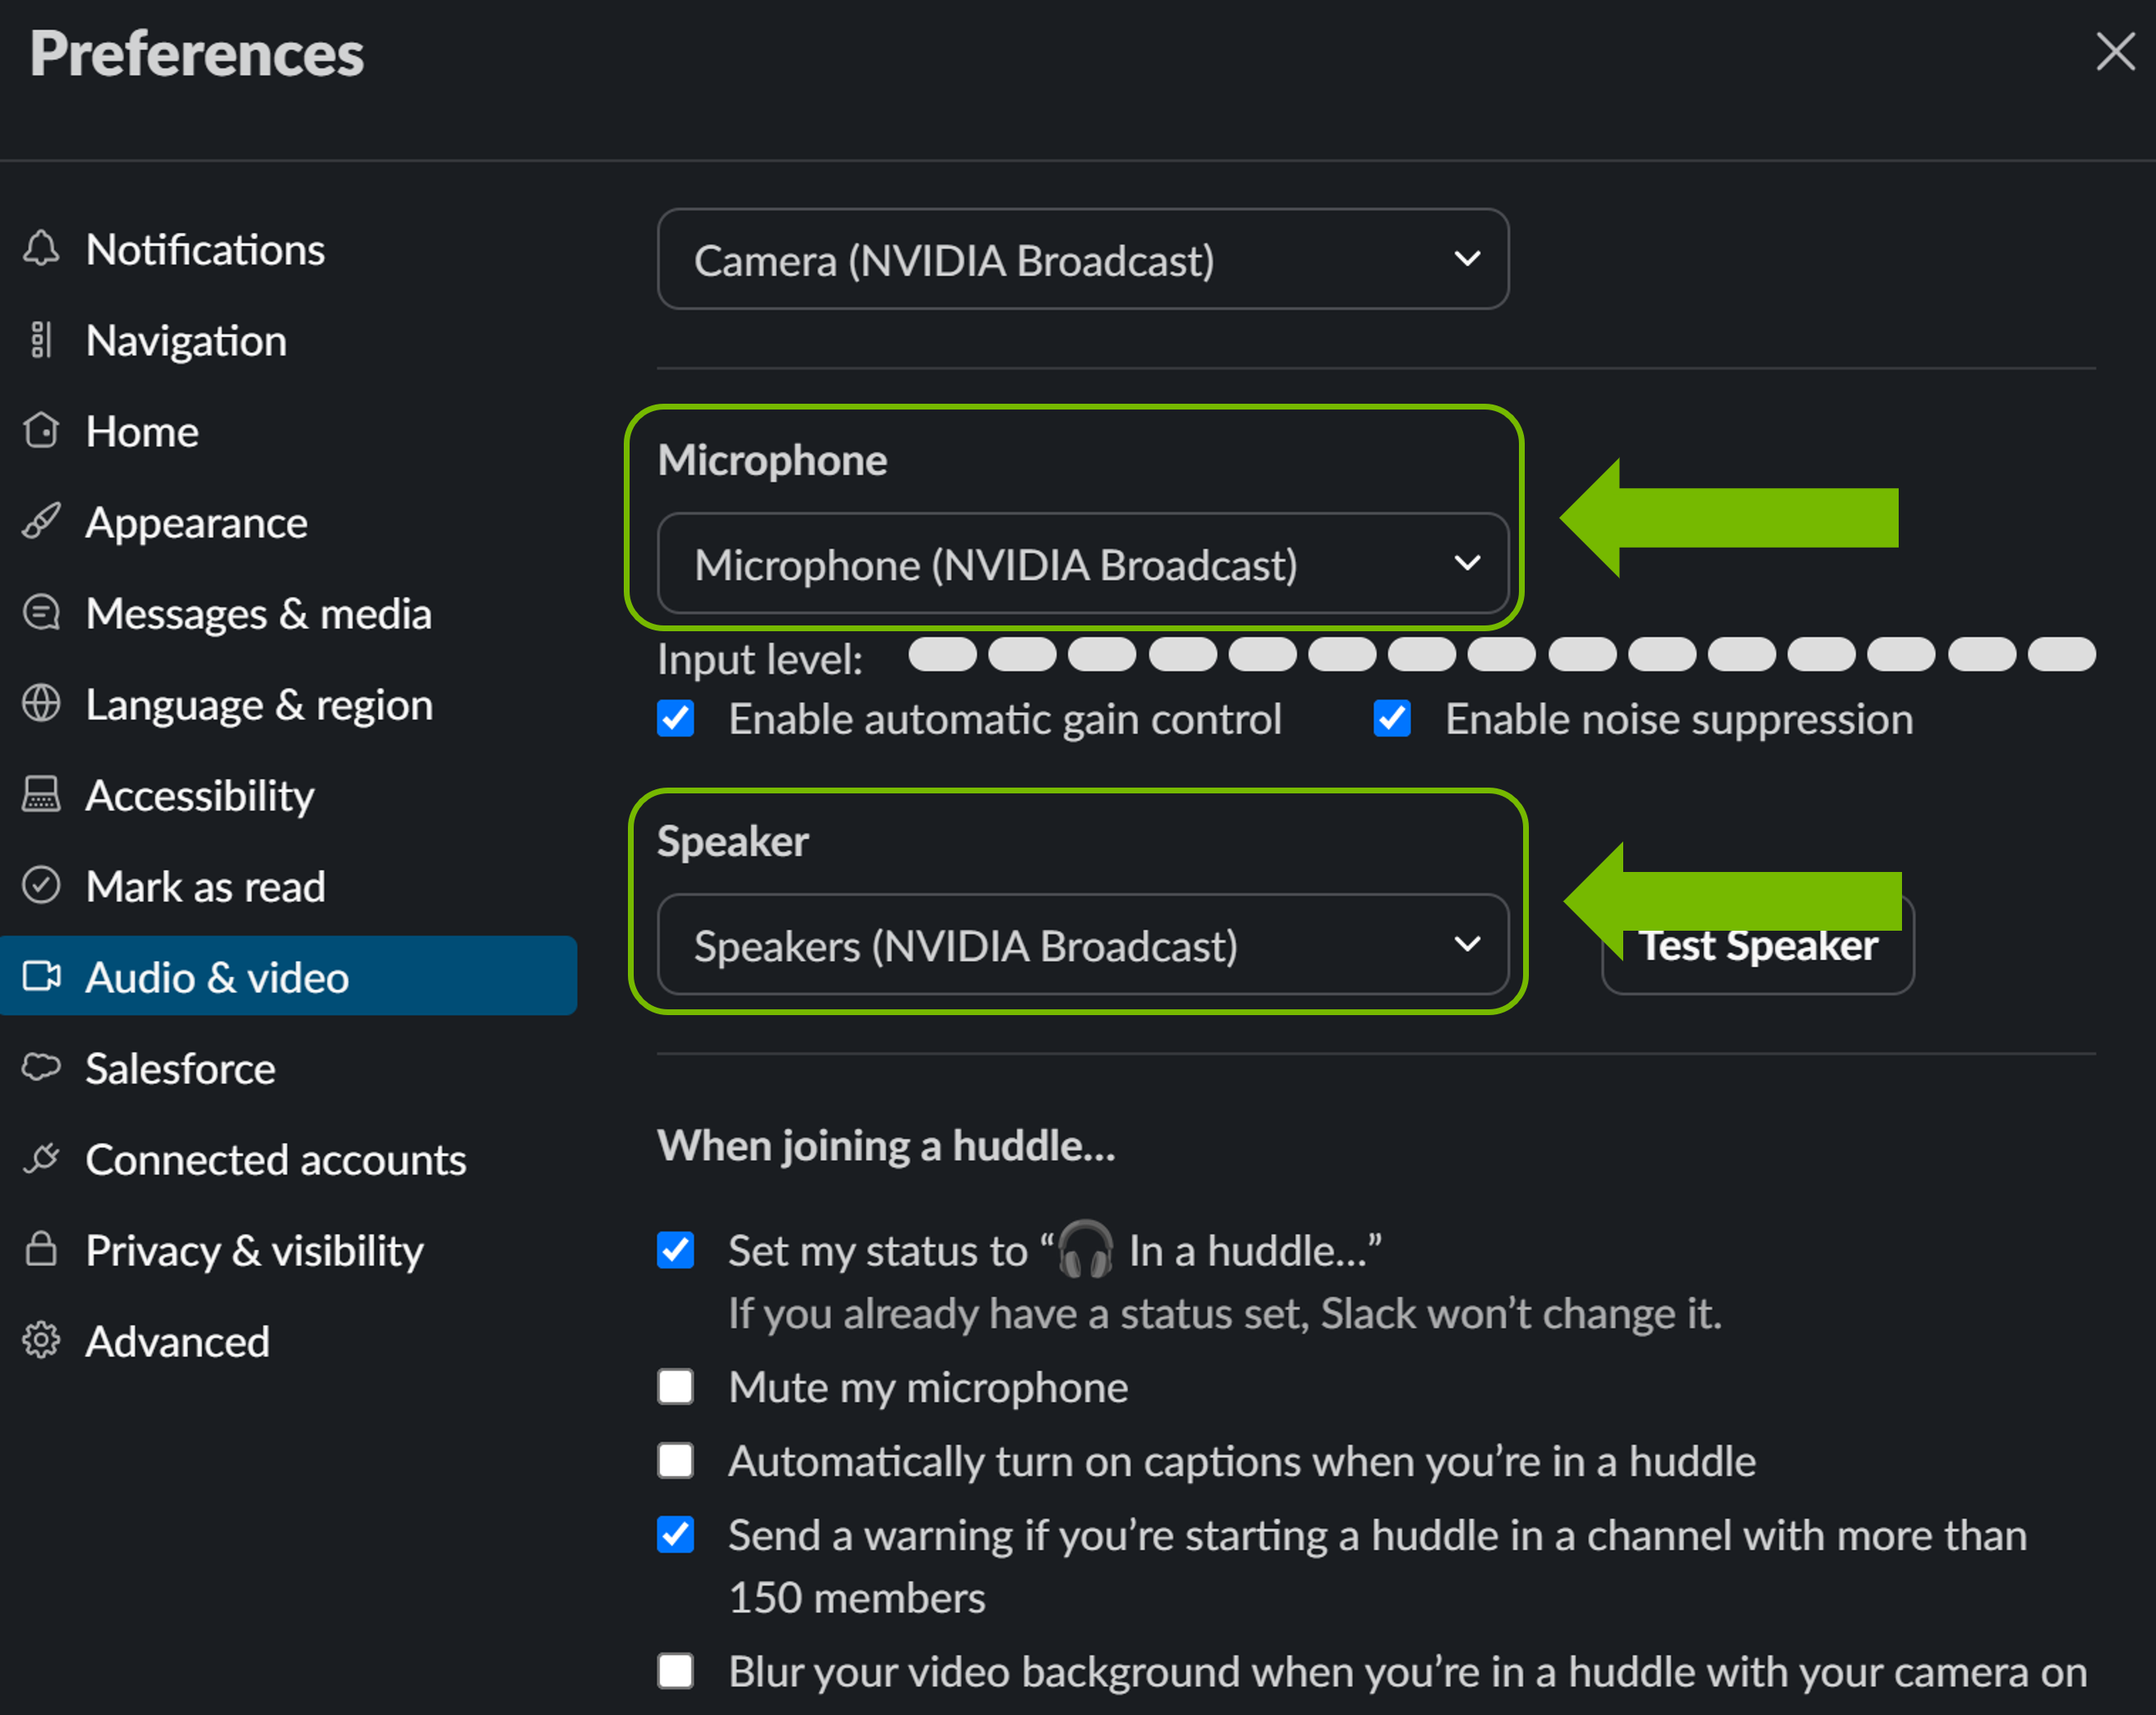
Slack
1. Click on your icon in the bottom left, then on preferences.
2. Select audio and video
3. Then configure NVIDIA Broadcast as your devices.
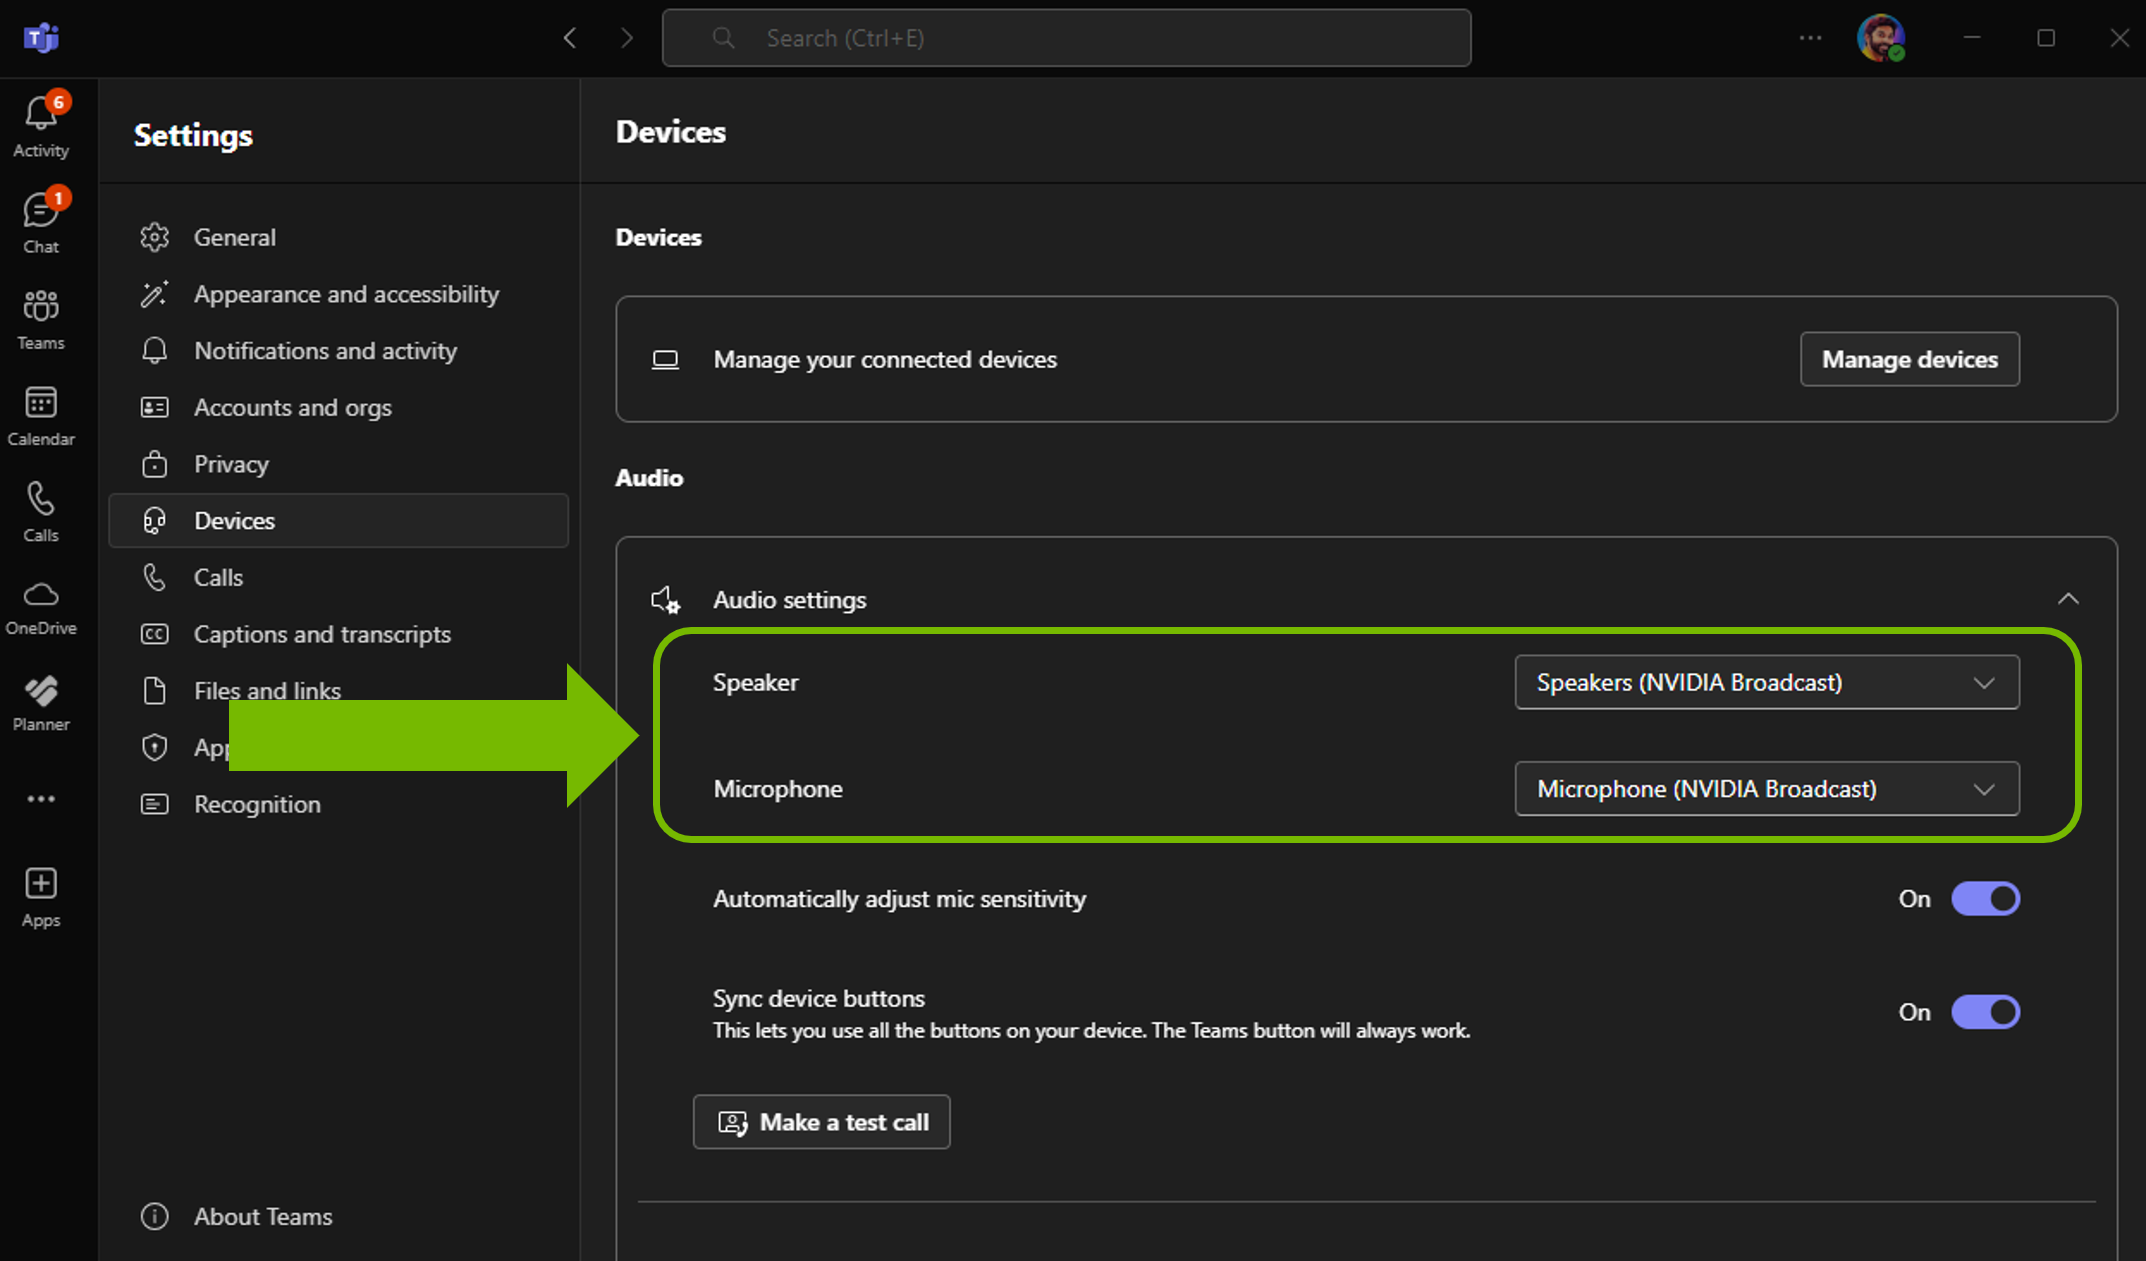
Microsoft Teams
1. Click on Calls on the left menu
2. Go to Devices, under Audio devices select Custom Setup.
3. Configure NVIDIA Broadcast as your devices.
4. For best quality, make sure that you disable any noise cancelling effects.
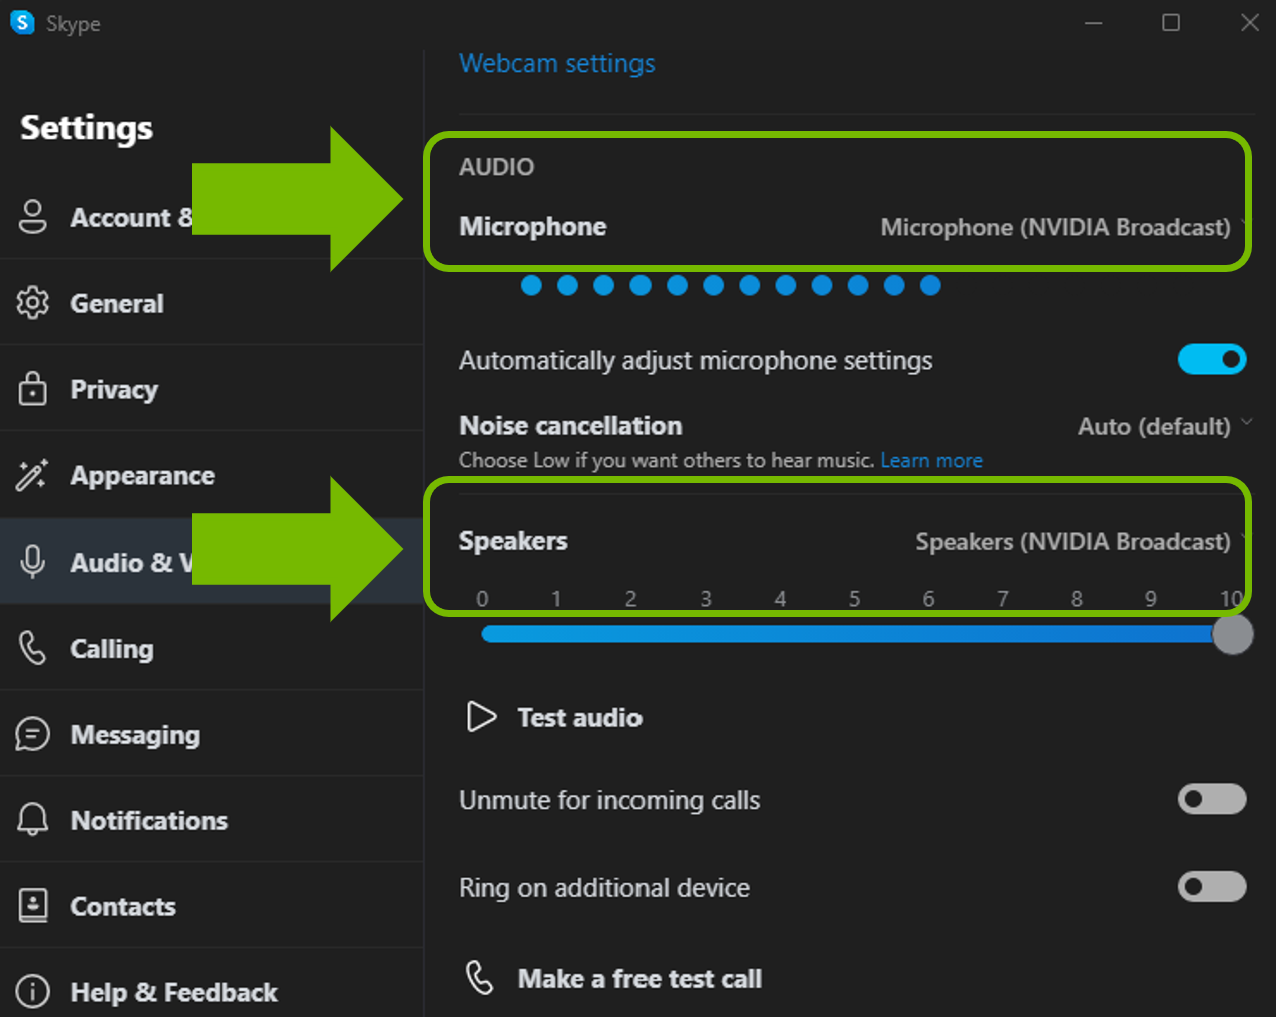
Skype
1. Click on Settings and go to Audio & Video.
2. Scroll down and change the devices to the NVIDIA Broadcast ones.
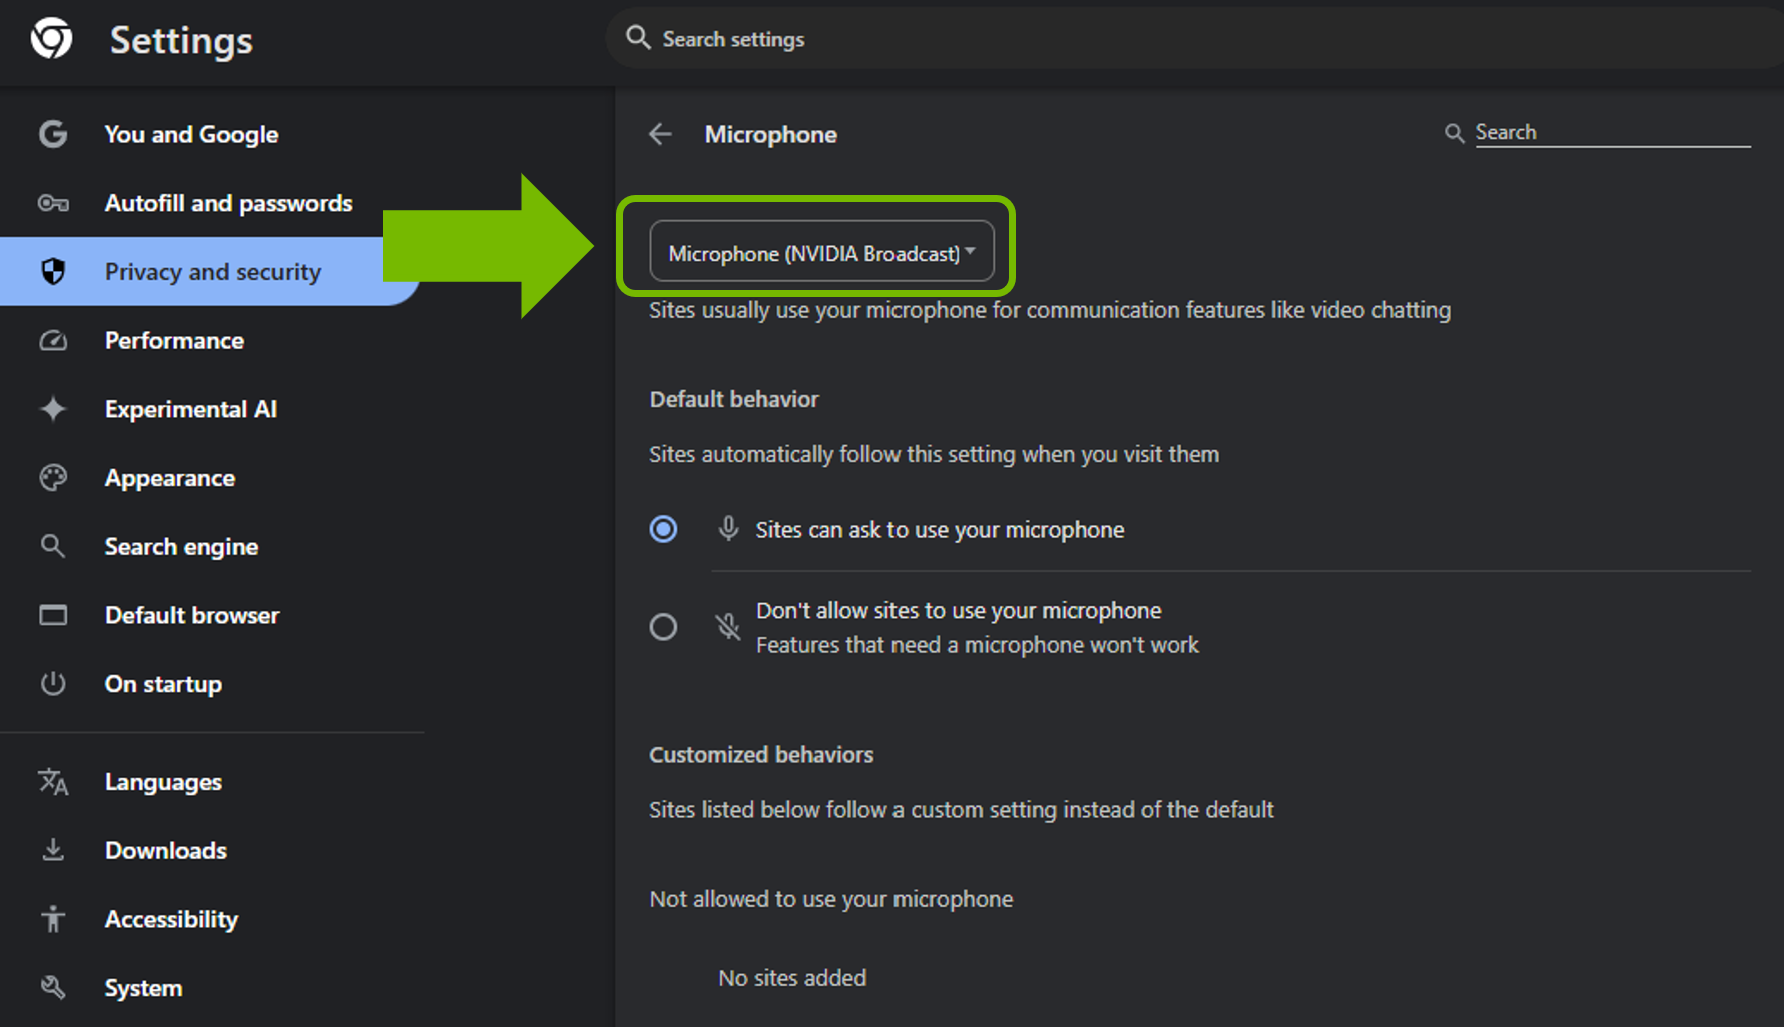
Google Chrome
- Go to Settings (3 dots on the top right, then Settings).
- Click on Site Settings > Microphone.
- Select Microphone (NVIDIA Broadcast).
- Go back to Site Settings, and then navigate to Site Settings > Site Settings > Camera.
- Select Camera (NVIDIA Broadcast).