Run OpenClaw For Free On NVIDIA RTX GPUs & DGX Spark
OpenClaw is a "local-first" AI Agent that runs on your computer. It is the fastest-growing project on Github, receiving praise for how it combines different capabilities to be a useful assistant. It remembers your conversations and adjusts itself accordingly, runs continuously on your local machine, uses context from your files and apps, and leverages new ‘skills’ to expand its capabilities.
Here are some popular use cases:
- Personal Secretary: With access to your inbox, calendar and files, OpenClaw helps you manage your schedule autonomously. It drafts replies to emails using context from your files and previous mails, sends reminders you have asked for, before time, arranges meetings and finds open slots on your calendar.
- Proactive Project Management: OpenClaw can check up regularly on the status of a project over the email or messaging channels you use, send you status checks, and follow up / send reminders as needed.
- Research Agent: With personalized context from your apps, OpenClaw can create reports combining search from the internet and your files.
OpenClaw is powered by Large Language Models (LLMs) that can be run locally or on cloud. Cloud LLMs can incur significant costs due to the always-on nature of OpenClaw. And they require you to upload your personal data.
In this guide, we’ll show you how you can run OpenClaw and the LLM locally on NVIDIA RTX GPUs and DGX Spark to save money and ensure your data stays private.
NVIDIA GPUs provide the best performance for agent workflows thanks to the Tensor Cores in the GPU, which accelerate AI operations, and the CUDA accelerations for all the tools required to run OpenClaw - including Ollama and Llama.cpp. DGX Spark is a particularly good option as it’s built to be always on, and has 128GB of memory, allowing you to run larger local models which will provide the best accuracy.

Important Notice Before You Begin
You should be aware of the risks of AI Agents and exercise caution to minimize them. Check out OpenClaw’s website for more information.
These are the 2 main risks in this kind of agent:
- Your personal information or files could be leaked or stolen.
- The agent on its own, or the tools you connect to the bot, may expose your PC to malicious code or cyber attacks.
There’s no way to completely protect against all risk, so proceed at your own risk. These are some of the measures we took when testing OpenClaw:
- Run OpenClaw on a separate, clean PC with no personal data, or a virtual machine. Then copy over only the data you want the agent to have access to.
- Don’t give it access to your primary accounts. Instead, create dedicated accounts for the agent and share specific information or access with it.
- OpenClaw can be enhanced further with third-party ‘skills’. Be careful with the skills you enable, ideally limiting testing to those that have been vetted by the community.
- Ensure any channels you use to access your OpenClaw assistant, like the web UI or messaging channels, are not accessible without authorization.
- If possible for your use case, limit internet access.
Getting Started Guide
In this guide, you will download a local LLM, set up a local inference server, install OpenClaw and finally configure OpenClaw to use it.
First, If you’re using Windows, you can either install OpenClaw in Native Windows, or Windows Subsystem for Linux (or WSL for short). WSL provides a Linux-style environment if your skills need it. On the other hand, using Windows is easier to set up and allows for OpenClaw to more easily connect with Windows apps. If you’re using WSL, follow section 1. Otherwise, skip to section 2.
If you choose to use WSL with your RTX GPU, follow section 1. Otherwise, you can skip to section 2.
1. Windows Subsystem for Linux Installation
If you have WSL installed, you can skip to the next OpenClaw Installation section. To install WSL (Link for reference):
1.1. Press the Windows Key, type PowerShell, right-click the result, and select Run as Administrator.
1.2. Paste the following command and press Enter:
wsl --install
1.3. Run the following command to check whether WSL is installed correctly. You should see output similar to the following screenshot:
wsl --version

1.4. Open WSL by searching Powershell from the Windows Search Bar, selecting “run as admin”, and typing in:
wsl
2. Local Model Configuration
You can power OpenClaw with an LLM running locally on your RTX GPU, or with a cloud LLM. In this section we’ll show you how to configure OpenClaw to run locally.
The quality of responses depends on the size and quality of the LLM. You’ll want to make sure that you free up as much VRAM and context as possible (e.g. don’t run other workloads on the GPU, only load the skills you need to minimize context, etc.).
2.1. Select the backend of your choice:
- LM Studio and Ollama are optimized, easy-to-use tools that use the llama.cpp backend and benefit from our latest optimizations. You can use either for a simple experience. We recommend Windows users should start with LM Studio as it also enables MTP by default on supported models, which can deliver up to +100% faster performance.
- For Linux users, vLLM offers the maximum configurability. We provide optimized recipes to help users get the best performance. We recommend DGX Spark users to use this, and we will cover an optimized path config for DGX Spark in this guide.
2.2. First install the backend of your choice. Open up a Powershell (or terminal if using Linux) and enter:
| LM Studio | Ollama | vLLM |
curl -fsSL https://lmstudio.ai/install.sh | bash
|
curl -fsSL https://ollama.com/install.sh | sh
|
Install uv (if not already installed)curl -LsSf https://astral.sh/uv/install.sh | sh
uv pip install vllm
|
2.3.Select the LLM of your choice: We recommend the following models depending on your GPU:
- 6-8GB RTX GPUs: Qwen3.5 4B
- 12-16GB RTX GPUs: Qwen 3.5 9B / Gemma 4 12B
- 24GB+ RTX GPUs: Qwen 3.6 27B
- DGX Spark: Qwen 3.6 35B
2.4. If you are using a DGX Spark, follow the instructions here to get an optimized Qwen 3.6 35B checkpoint and set up an optimized inference server with vLLM. Then skip to section 3.
2.5. Download the model:
| LM Studio | Ollama |
|---|---|
lms get qwen/qwen3.6-27b
|
ollama pull qwen3.6:27b
|
2.6. Run the model, and set the context window to 32K tokens or more so it can run well with OpenClaw. If your system has additional VRAM, we recommend using 64k or more
| LM Studio | Ollama |
|---|---|
lms load qwen/qwen3.6-27b --context-length 65536
|
ollama run qwen3.6:27b /set parameter num_ctx 65536
|
3. OpenClaw Installation
- 3.1 You can install OpenClaw following the commands here - either with Linux, WSL or native Windows.
- 3.2 Proceed through installation, read and accept the security warnings to continue
- 3.3 When you get to model/auth provider, select your inference backend from the list (Ollama, LM Studio or vLLM)
- 3.4 For your selected provider - fill in the configuration:
- API Key: Leave blank or use a dummy value.
- Base URL: Use the default value
- 3.4.1 If you are running OpenClaw in WSL and encounter an error, replace 127.0.01 with the Windows host IP as seen from WSL.
- Model ID: Use the exact model name you set up in the inference backend.
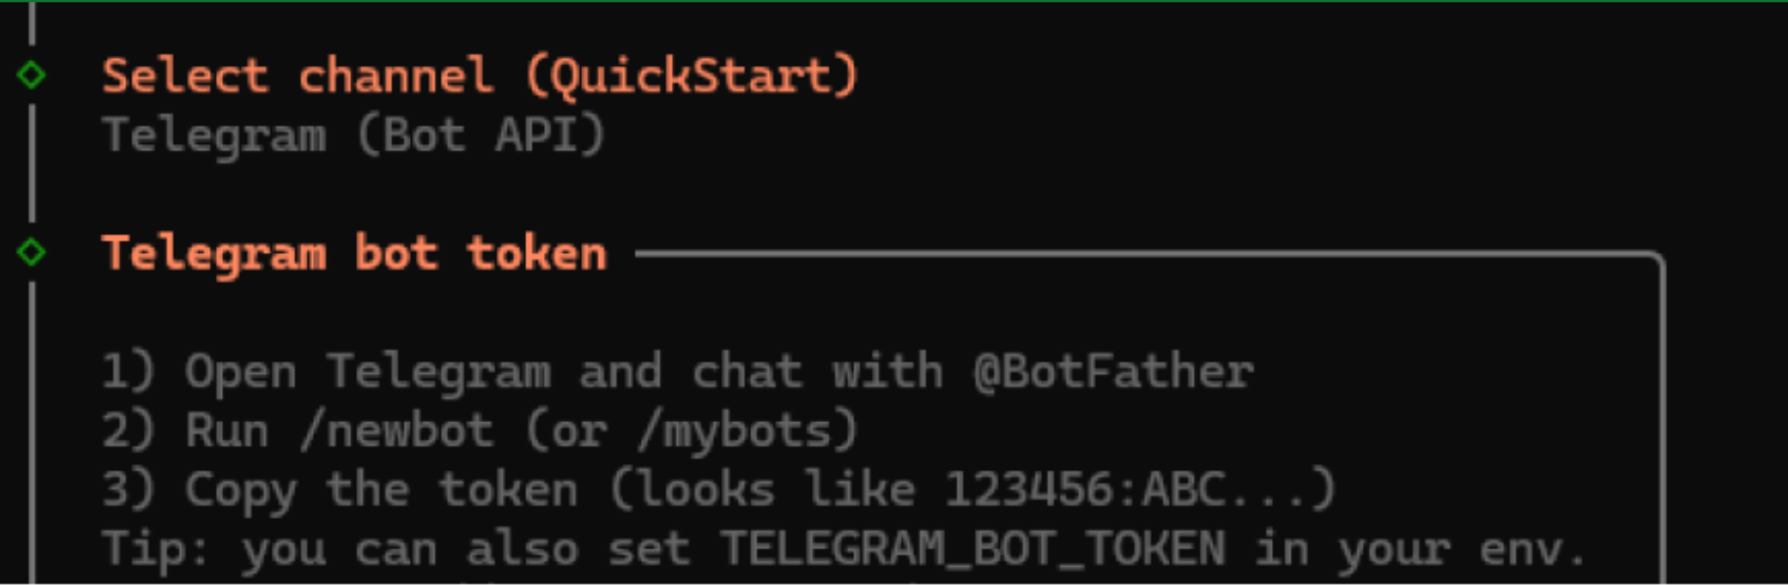
- 3.5 Proceed with the remaining installation. We recommend setting up at least one channel (like Telegram) so you can access your Claw easily from your phone, and web search.
- 3.6
- For Telegram you will need to create a Telegram bot, give OpenClaw an access token, and finally, give OpenClaw a pairing code from your Telegram chat
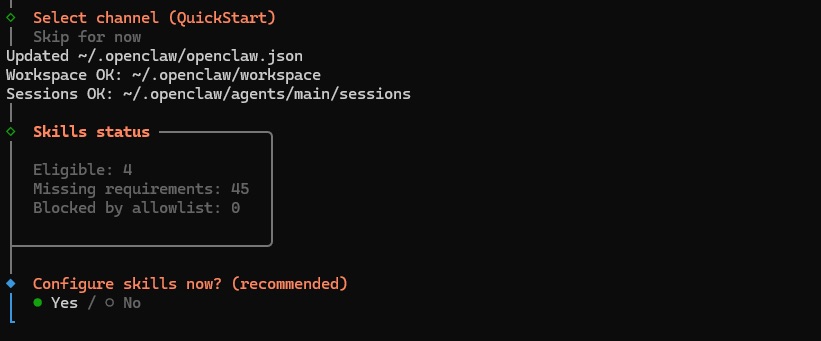
- 3.7 Next you’ll be prompted with the skills configuration - these are the abilities that the bot will have. We recommend selecting “No” for now to proceed with the setup. You can always add skills later once you experiment with it and identify the skills you need for your use-case.
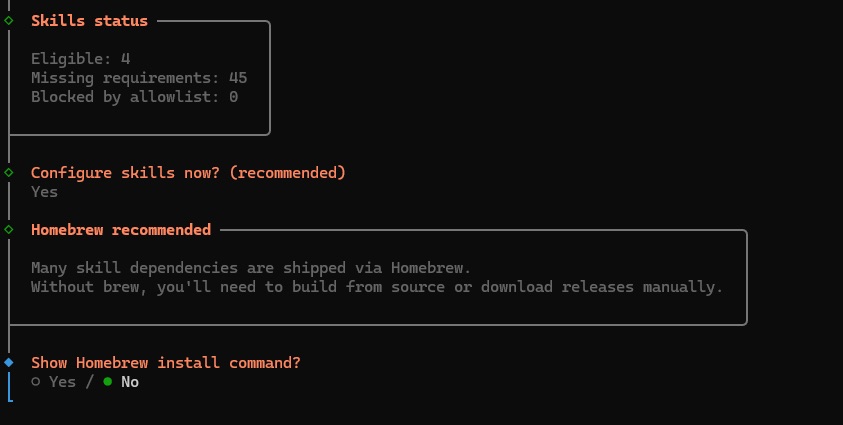
- 3.8 Next, OpenClaw will prompt you to install the homebrew package - select “No”, this is needed for Mac setups but not for Windows.
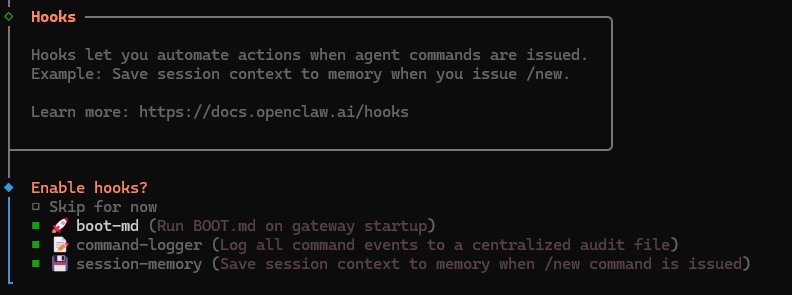
- 3.9 The next prompt will be to install Hooks. We recommend selecting all 3 for a better experience. But consider if you are comfortable with having your data logged locally.
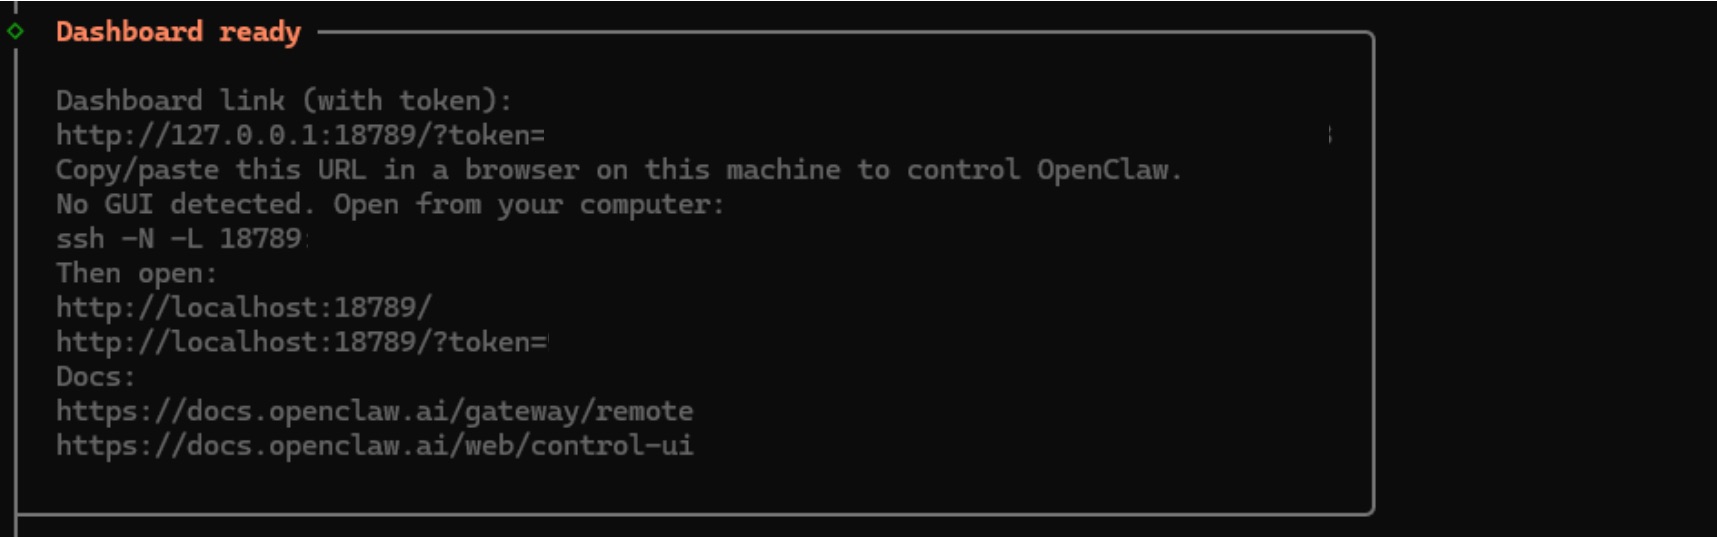
- 3.10 The resulting terminal output will present a URL for accessing your OpenClaw dashboard. Save this address as you’ll need it to load the UI.
- 3.11 Finally, select “Yes” on the last prompt to complete the OpenClaw installation.

- 3.12 You can now access OpenClaw via the dashboard link provided with the access token.
And you are good to go! To check if everything is set up correctly, open a browser window and paste the OpenClaw URL with the access token. Click on new, and try typing in something. If you get a response back, you’re all set up! You can also ask OpenClaw what model it’s using and can even switch between models by typing /model MODEL_NAME in the gateway chat UI.
To learn more about how to use OpenClaw, visit the OpenClaw website.
One thing you may want to look into is adding new skills, to expand your agent’s capabilities and connect it with more of your apps / tools. Remember that these introduce additional risk, so be careful with which ones you add. To add a new skill:
- Ask OpenClaw to configure itself with a skill
- Use the sidebar in the webUI to enable skills
- Find community-built skills on Clawhub
Enjoy the lobster!